How to Apply Purchase Invoices and Credit Memos in Dynamics NAV 2016

Need to apply a Purchase Invoice to a Credit Memo? Let’s walk through how Microsoft Dynamics NAV 2016 handles this process.
First, you will need to open the Vendor Master Record.
Go to Departments > Financial Management > Payables > Vendors
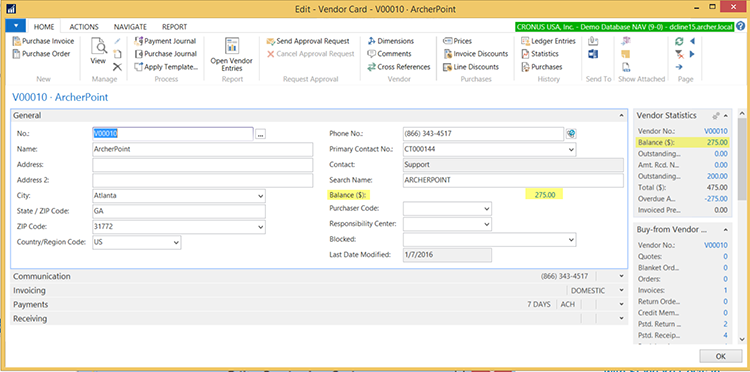
- Select Vendor – Select the Vendor you are wanting to apply one or more entries together. You can open the Vendor Card or highlight the Vendor in the list and then select the Balance under Vendor Statistics.
Figure 1. Vendor List
- Balance – Select the Vendor Balance
Figure 2. Vendor Detail Balance
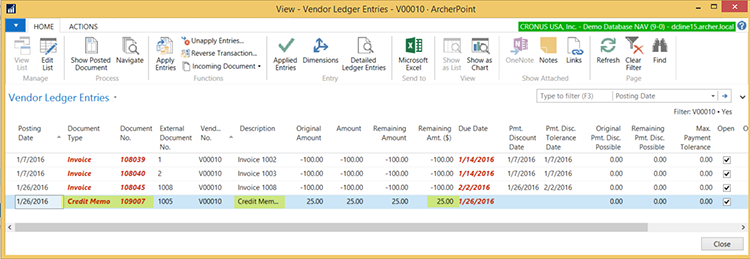
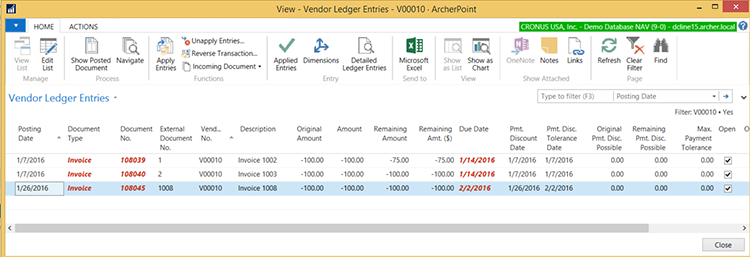
View – Vendor Ledger Entries – Select the Vendor Ledger Entry you would like to apply entries to.
Figure 3. Vendor Ledger Entries
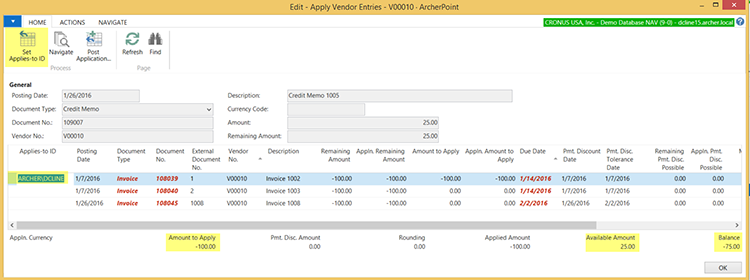
- Applied Vendor Entries – Select ‘Applied Entries’ in the Tool Bar above. Select the line that you want to Apply and then select the ‘Set Applies-to ID’ in the tool bar at the top. NAV will populate the Login Users ID. Repeat process until all items are applied.
- Review Entries – After selecting all lines that are being applied, notice that the ‘Amount to Apply’ should equal to the amount you are applying.
Figure 4. NAV enters the User ID that is applying the entry.
- Post – Select the Post Application in the Tool Bar above to apply entries.
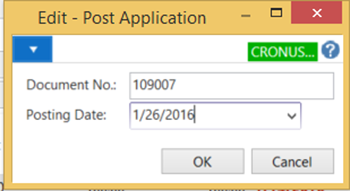
- Edit – Post Application – NAV will prompt you with a ‘Document No.’ and ‘Posting Date’. The Document No. is the Purchase Invoice you are applying the entry to and the Posting Date of the entry. Select OK to proceed.
Figure 5. Post Application
- After you select OK, A window will pop up a window with the message ‘The application was successfully posted’. Select OK to proceed.
NOTE: Notice that the Credit Memo is no longer in the list.
Figure 6. Balance after posting
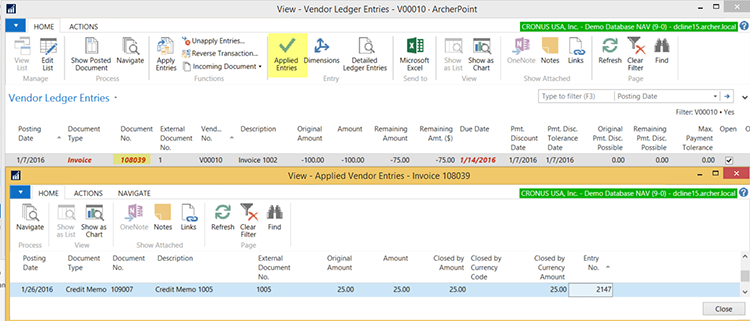
- View Applied Entries – Select the Vendor Ledger Entire and then select the ‘Applied Entries’ in the Tool Bar above for review.
Figure 7. Review detailed entries that have been applied.
If you have any questions on this or other features in NAV 2016, contact ArcherPoint.
For more step-by-step instructions on how to perform specific tasks in Microsoft Dynamics NAV, see our collection of How-To blogs.


