
Managing Permissions and Security Groups in Dynamics 365 Business Central – Part IV: Permission Recording, Auditing, and Troubleshooting

In our previous blogs in this series, we discussed managing user permissions with permission sets, security groups, and effective permissions. We also looked at viewing permissions by user and by security group.
You can catch up on these blogs here:
- Managing Permissions and Security Groups in Dynamics 365 Business Central – Part I: Permission Sets
- Managing Permissions and Security Groups in Dynamics 365 Business Central – Part II: Security Groups
- Managing Permissions and Security Groups in Dynamics 365 Business Central – Part III: Managing Licensing and Effective Permissions
The takeaway from these blogs is that, whenever possible, it’s better to control user access by adjusting security groups and permission sets rather than defining permissions directly on the user card. This makes it much easier to determine who in the organization can access specific tasks: Whoever is in that security group has access to whatever that security group is allowed to access.
The goal is to tighten permissions when it makes sense to protect business data while still giving everyone enough freedom to do their job.
In this blog, we continue the discussion by covering recording permissions, auditing, and troubleshooting tips.
How Permission Recording works in Business Central
Recording permissions is best used only occasionally for troubleshooting because it captures a wide range of items, including non-sensitive table data like buffer and setup tables, making it hard to determine the specific access the user needs.
The best use of permission recording is to capture when a user tries to perform a task and can’t because of a permission issue. The user might or might not receive a helpful error message when the problem occurs. If they don’t receive a useful error message, Permission Recording can help identify where the error occurs and allow the administrator to identify and give the user the permissions they need to do their job.
A word of caution: If you record permissions for each task a user performs and create a permission set for each task, you might end up granting permissions in a cross-functional way you didn’t intend. Be sure to follow the principle of least privilege.
How to Record Permissions in Business Central
The steps to record permissions are:
- Identify the business role/process
- Create a new Permission Set
- Name the Permission Set
- Open the Permissions page
- Start recording the permissions: Select Actions > Record Permissions > Start
- Perform the business process as the user would normally perform it
- Stop the Recording
- Review the recorded permissions. Look for permissions that grant the user Read, Insert, Modify, Delete, and Execute
Step 1: Identify the business role/process
This comes from the user’s business needs. Typically, the user will say they are prevented from performing an essential task, like setting up a new customer, creating an invoice, or creating a purchase order. They may or may not receive an error message. Recording permissions is a good way to identify missing permissions and grant the user the appropriate access, especially when the error message provides little to no information.
In this example, we will be creating a sales order. This task is typically straightforward: Create the sales order, populate it with the customer information and the item(s) they want to purchase, then release the sales order.
Step 2: Create a new Permission Set
From Permission Sets, select New to create a new Permission Set (Figure 1).

Step 3 – Name the Permission Set
Give the new Permission Set a descriptive name. Notice that its Type is set to User-Defined rather than System (Figure 2).

Step 4 – Open the Permissions page
When you open the new Permissions page (Figure 3)…

…it will be blank (Figure 4) because you have not added permissions yet.
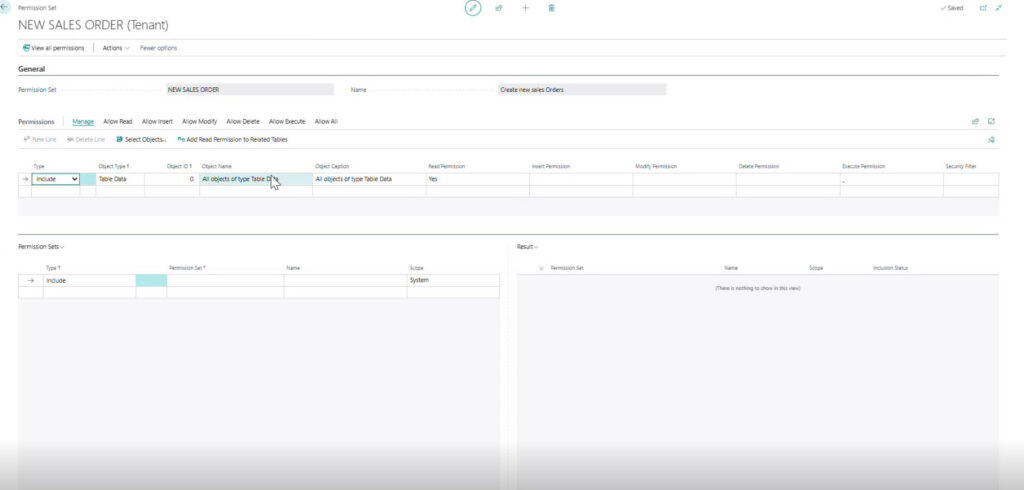
Step 5 – Start recording the permissions
Start recording the permissions: Select Actions > Record Permissions > Start (Figure 5). Once the recording starts, leave the screen open.
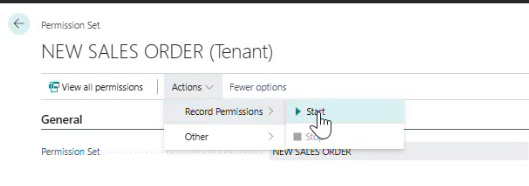 Figure 5 – Start the recording by selecting: Actions > Record Permissions > Start
Step 6 – Perform the business process as the user would normally perform it
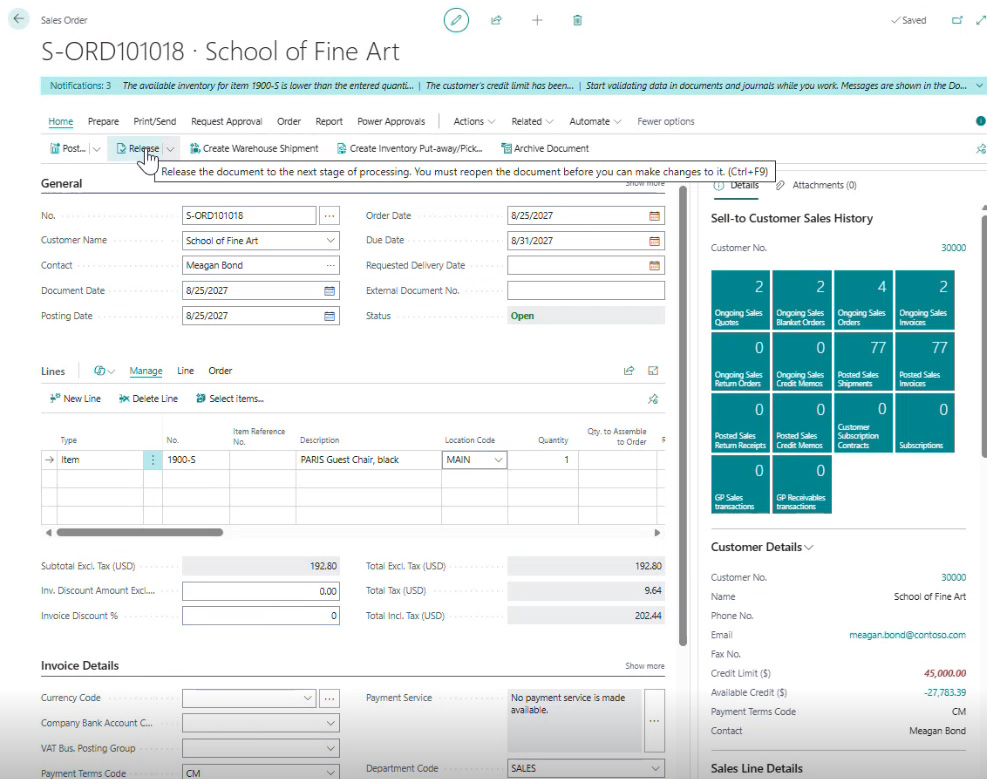
In this example, we are creating a new sales order. So, in a separate window, navigate to Sales Orders and create a new sales order (Figure 6).
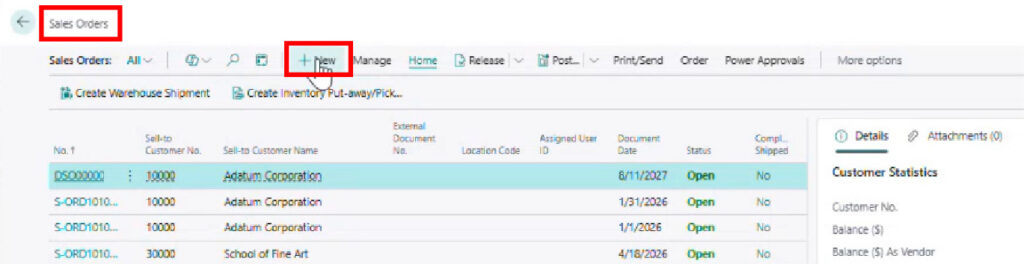
Once created, populate the new sales order with data, then release it (Figure 7).
Step 7 – Stop the Recording
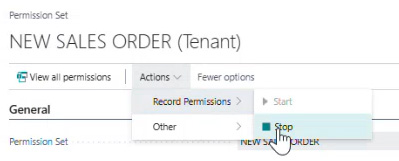
Stop Recording Permissions. Go to Permission Set > Actions > Record Permissions > Stop (Figure 8).
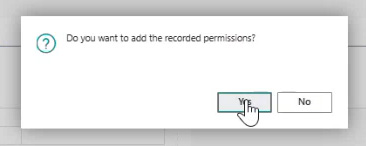
You will be asked if you want to add the recorded permissions. Select “Yes” to add the recorded permissions and view them (Figure 9).
Step 8 – Review the recorded permissions
Review the recorded permissions (Figure 10). Look for permissions that grant the user Read, Insert, Modify, Delete, and Execute.
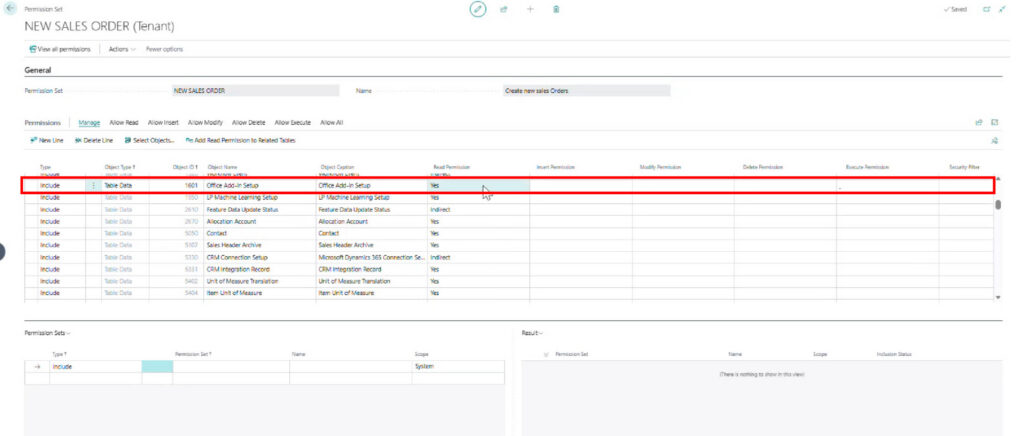
Review the permissions from the recording.
You will notice there is a column showing various Object Types: Codeunit, Page, Query, Table, and Table Data. There are also columns for different permission types: Read, Insert, Modify, Delete, and Execute.
Pay close attention to the Table Data rows. The goal is to limit the user’s access to Table Data as much as possible, especially the ability to Insert, Modify, and Delete data. You are primarily concerned about the user’s access to Table Data because even if a user can open a Table, they can’t view the Table Data. Instead, they will see a blank table.
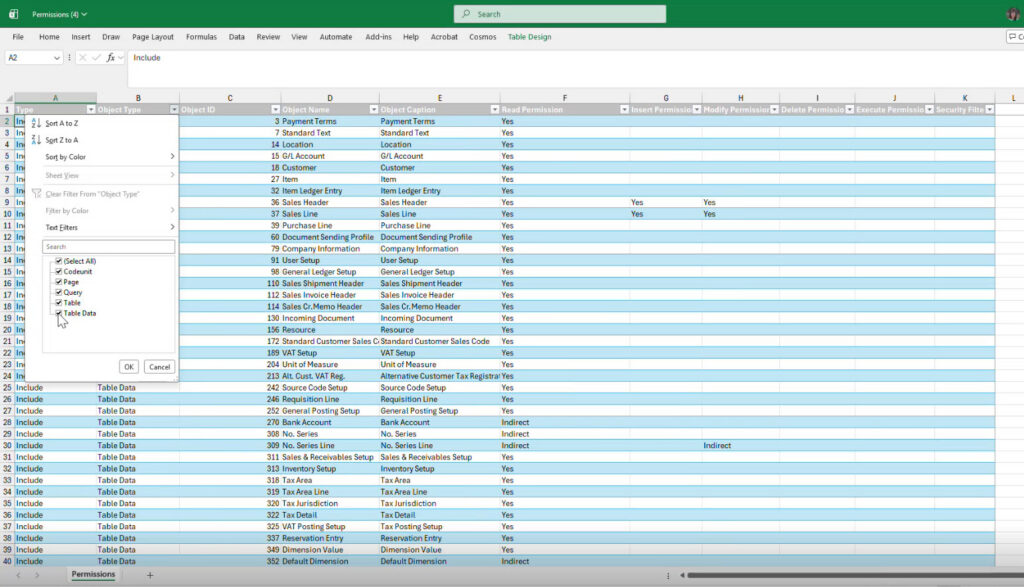
Many users find it more convenient to export the data to Excel for analysis (Figure 11).
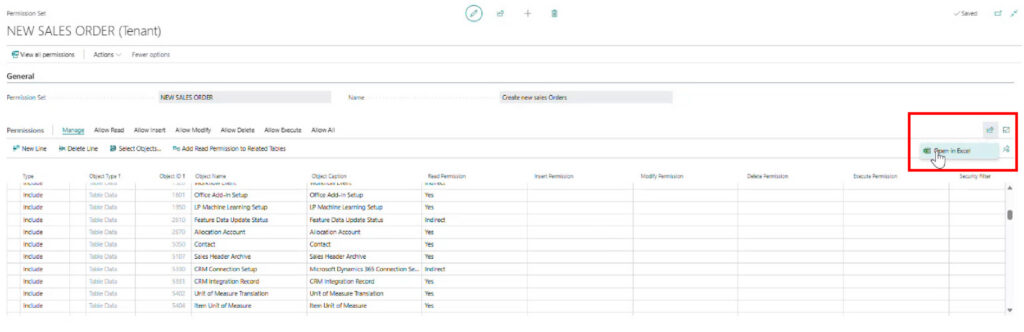
Excel makes it easier to sort permissions by Object Type (Figure 12). Often, the problem stems from the user not having sufficient permissions to access Table Data. Sort by Table Data to find any missing permissions.
You can use AI to help you locate missing permissions by comparing your recording to the user’s permission set (Read, Modify, etc.).
A word of caution: Always use AI wisely! Many AI platforms require you to specifically request that your data not be shared for public AI model training. To limit public access to your data, configure your profile settings to control who can see it.
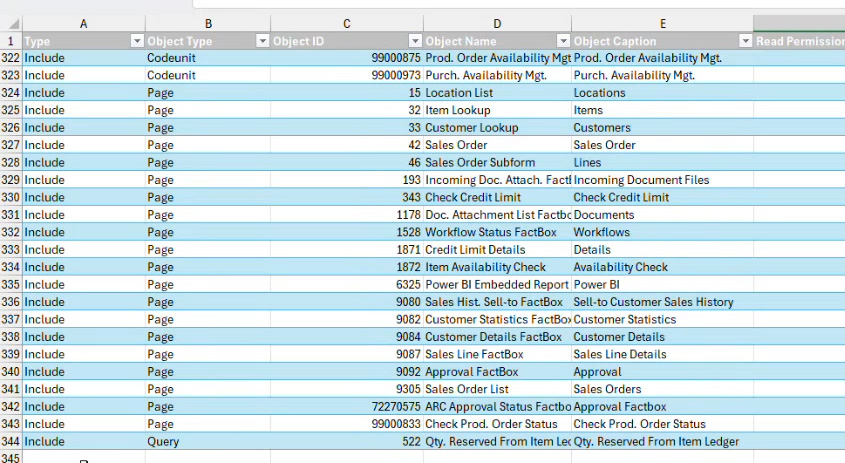
Use permission recording sparingly, mostly for troubleshooting. To illustrate the point, simply creating a new sales order in this example generated over 340 different items the user needs permission to access – most of which are not important (Figure 13).
TIP: You can review the BI report and find out where permissions were granted. If you need to adjust, adjust the appropriate security group based on what you find. But don’t just mindlessly use this permission set and give it to the user. The goal is not to give permissions to a user, but to give permissions to a security group.
Troubleshooting Business Central user permissions with Effective Permissions
Recording permissions is just one way to troubleshoot permission issues. Another technique is to investigate the user’s effective permissions for greater insights. To review effective permissions, see Effective Permissions in Managing Permissions and Security Groups in Dynamics 365 Business Central – Part III: Managing Licensing and Effective Permissions.
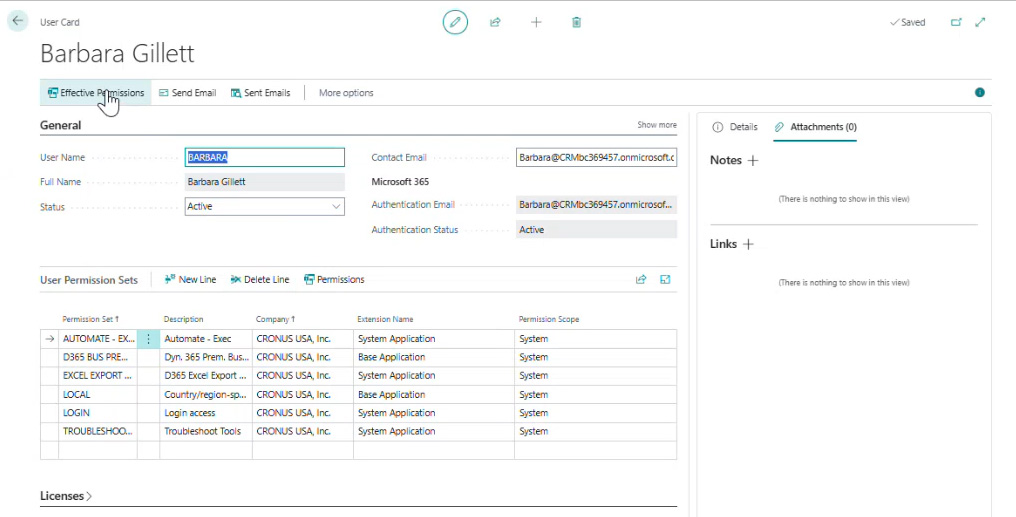
Run the Effective Permissions request from the User Card (Figure 14). It might take a while to complete, but it provides a comprehensive list of a user’s effective permissions. Since it’s not easy to see what’s going on in that list, use it as a troubleshooting tool. You can also export the list to Excel or create a Power BI report to make it easier to search the information.
Suppose a user made a change they shouldn’t have permission to make. This tool can trace the issue to a specific user and the problematic permission. Take the permission from the Power BI report, determine which permission sets and/or security groups grant access to the table in question, and isolate the problem.
The Effective Permissions tool can help you determine where the permission is and where it’s assigned from. From there, you can review where those permissions should be assigned and whether they are in the correct place. You can now check and decide where you want that permission to reside.
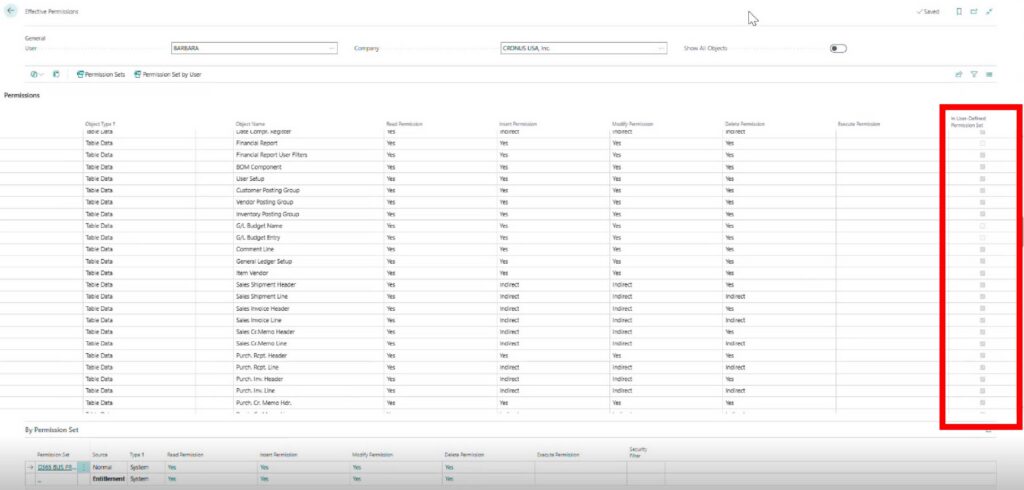
The Effective Permissions results (see Figure 15) show a column labeled User-Defined Permission Set. User-Defined Permissions have a checked checkbox. Those without a checked box come from a standard permission set from Microsoft. As stated in earlier blogs, standard permission sets can be too lenient when it comes to reducing user access. Since Microsoft can update these permission sets at any time, use User-Defined permission sets whenever possible.
Auditing Business Central permissions and changes
Business Central includes a comprehensive set of native auditing capabilities.
For example, the Change Log records what changed, who changed it, and when. Once you specify the tables and fields you want to log, activating the Change Log will track all direct modifications made to the database. You can also use the Data Analysis feature to analyze Change Log data.
NOTE: Using the Change Log can affect system performance.
In addition, the Financial Report Audit Log lets you track user activities related to financials for auditing purposes.
Using Power BI to analyze permissions and Change Log data
You can also use Power BI to build additional reports to help audit user permissions and permission sets. For instance, you can build a Power BI report (Figure 16) showing which permission sets allow access to various areas of Business Central, such as table data, tables, pages, etc.
Ultimately, your focus is mainly on table data because that is what we are trying to lock down for limited access.
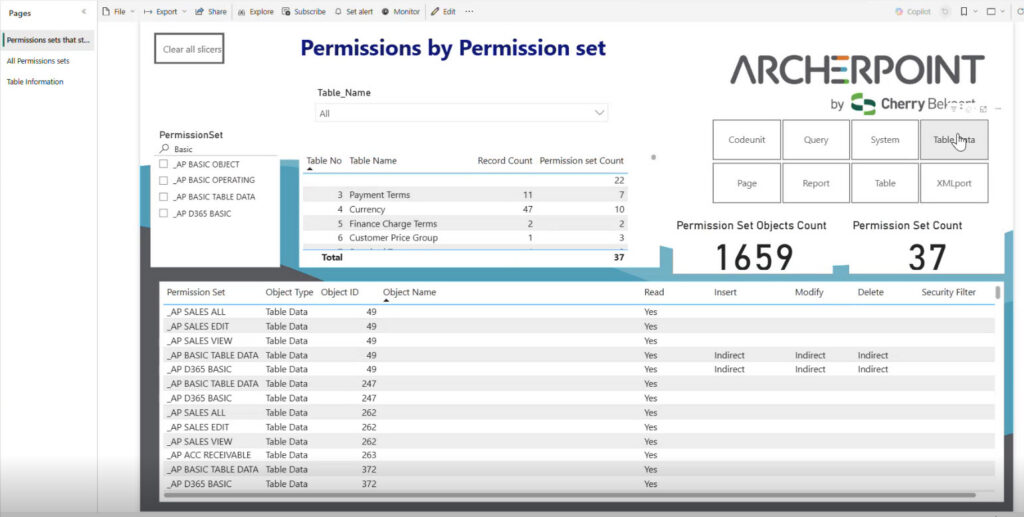
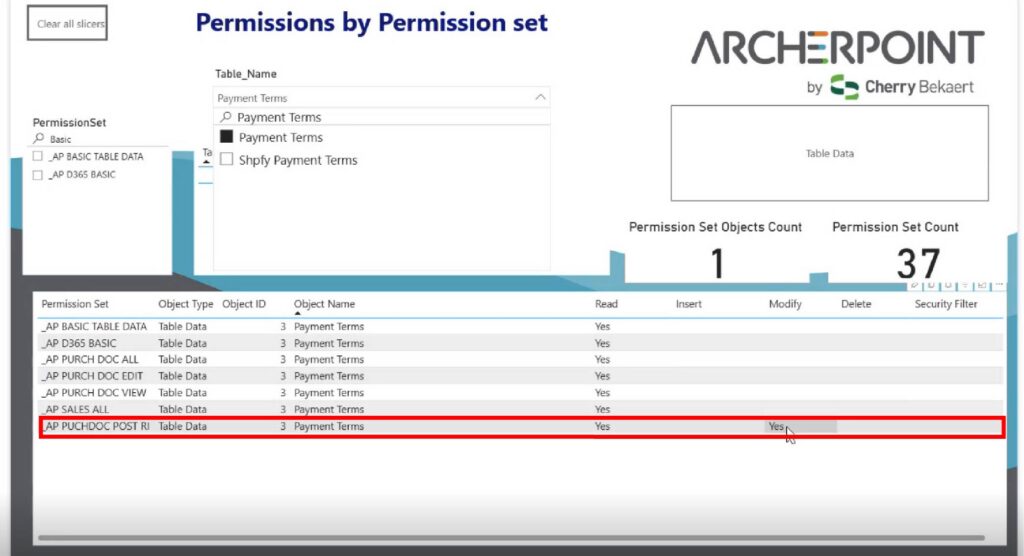
A Power BI report showing permissions by permission set can help determine who can change sensitive company data. For instance, Figure 17 shows an example where the Purchase Doc permission set allows the user to modify payment terms. Since typically only the account manager should have this access, not the daily user, the administrator should remove it from the permission set.
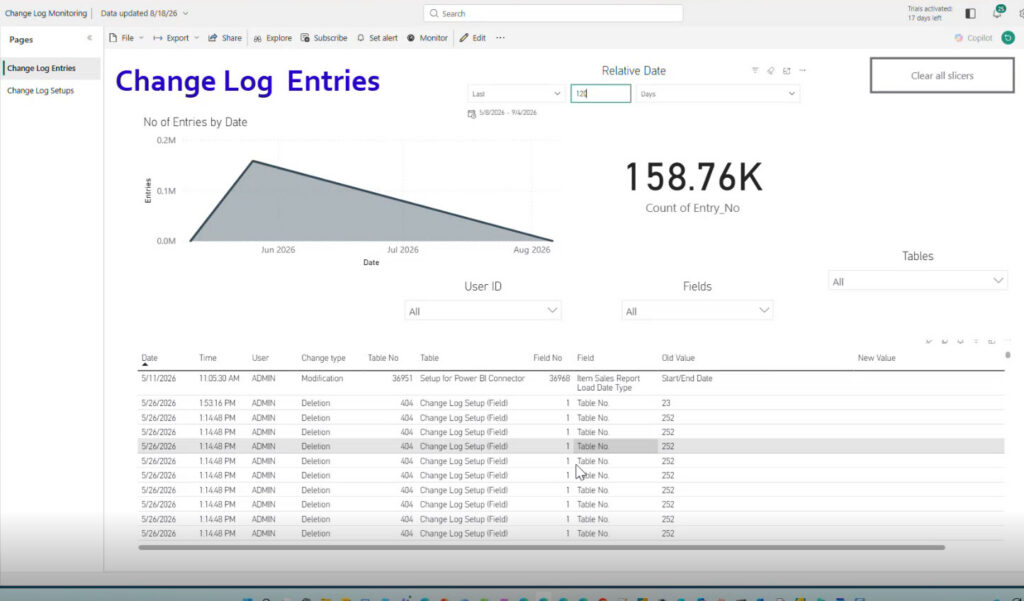
Power BI reports can also be linked to the Change Log to show when changes are made to critical data. For example, Figure 18 shows that Admin deleted table data. The report includes not just the user name, but also the time, date, type of change, table number, and field number.
As another example, Figure 19 shows that Admin changed a customer’s credit limit from $5,000 to $2,000.
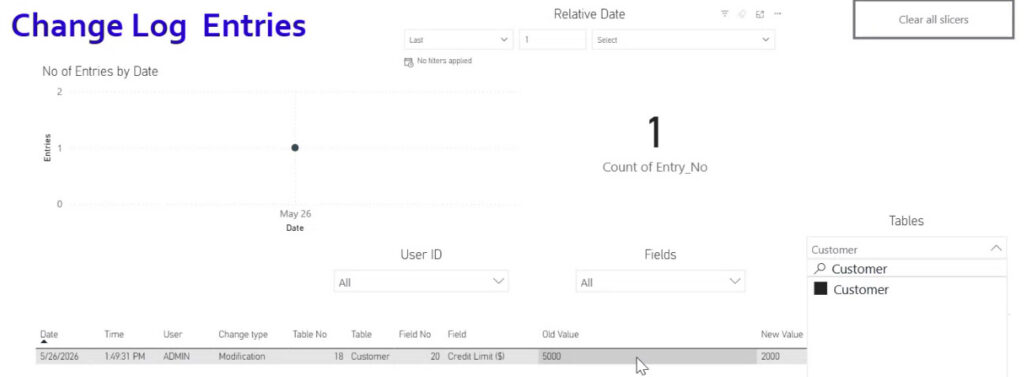
As these Power BI reports show, the Change Log can be used to find database changes by specific tables, specific users, or other criteria, and it can be a powerful tool for internal and external auditors.
NOTE: Run the Change Log only on a limited number of fields to minimize clutter and reduce system performance impact.
How to set up the Change Log in Business Central
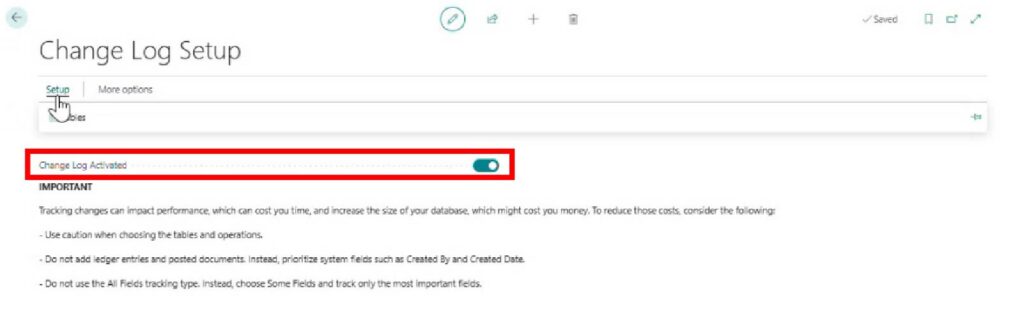
To use the Change Log, you must first activate it (Figure 20).
After you activate the Change Log, select the tables and fields you want to monitor. Selecting All Fields (Figure 21) logs every action on the table, which makes the log data difficult to read.
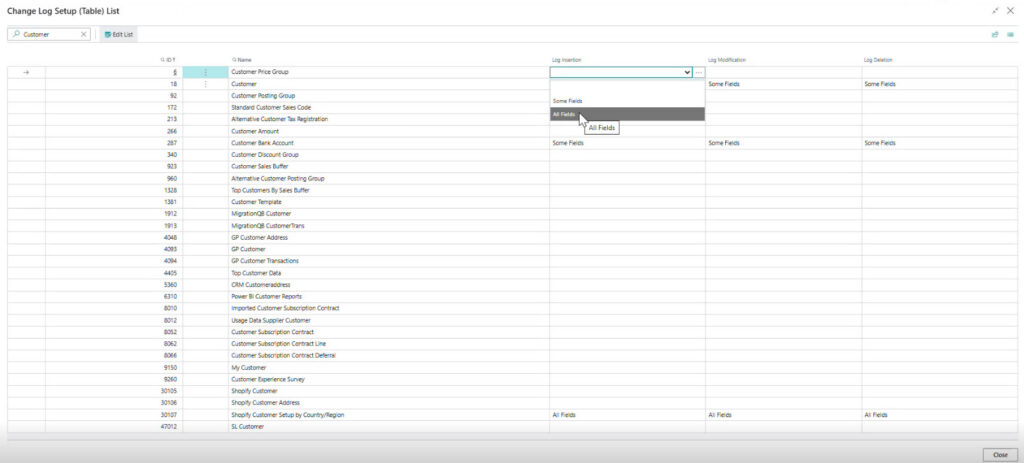
Instead, choose Some Fields (Figure 22)…

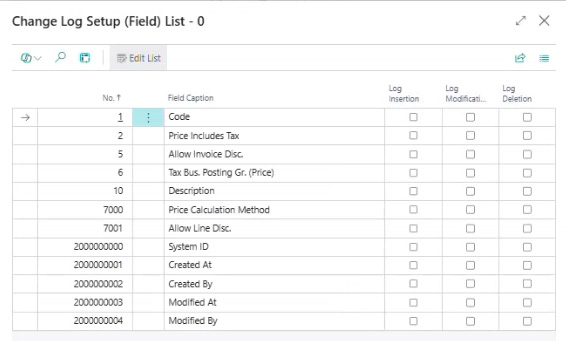
…which lets you select the specific fields you want to track in each table (Figure 23).
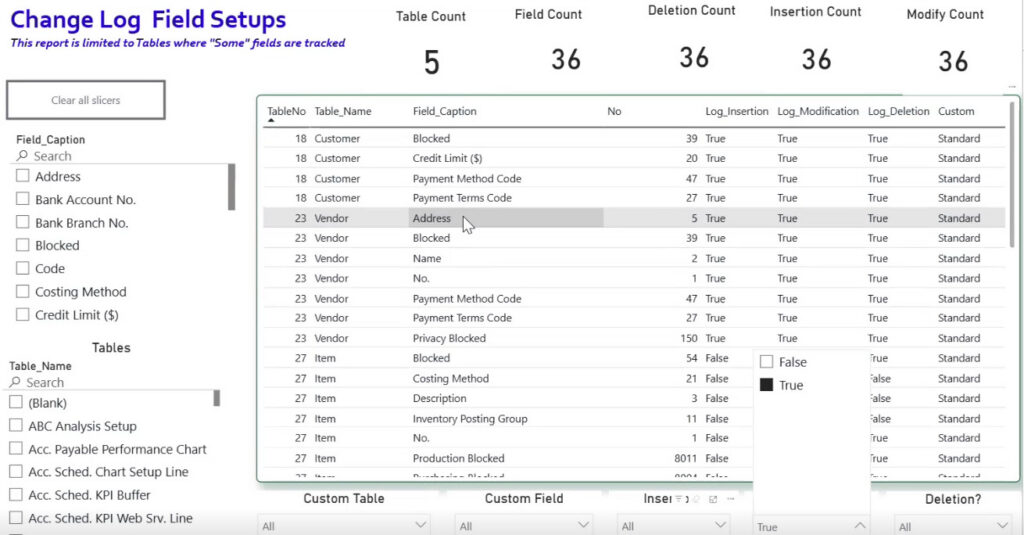
Each company must determine which tables, fields, and actions to track, particularly when required by government regulations, accounting audits, or other oversight groups.
Figure 24 shows an example of a Change Log set up to track specific tables, fields, and actions for auditing purposes.
Do the right people have the right access?
Business Central permissions can become increasingly complex as users, roles, security groups, and business requirements change. Too much access can put sensitive data at risk, while overly restrictive permissions can prevent employees from doing their jobs.
You don’t have to do this alone!
Contact ArcherPoint by Cherry Bekaert and let us help you evaluate your Business Central security model, identify permission gaps and unnecessary access, and establish a more manageable approach to user roles, security groups, auditing, and ongoing permission management.
Trending Posts
- Login Error: Communication protocol mismatch between client and server
- How to Make Measures Total Correctly in Power BI Tables
- The Microsoft Technology Stack – What Is It & Why Should You Care?
- MRP vs. MPS: Choosing the Right Planning Approach for Your Manufacturing Business
- Designing a Connected Student Engagement Technology Stack
Stay Informed
Subscribe to Communications
"*required" indicates required fields