
Installing the AL Language Extension in Visual Studio Code

Follow these instructions to install an AL extension in Visual Studio Code.
1. Open Visual Studio
Figure 1 – Open Visual Studio
2. Navigate to View-> Extensions
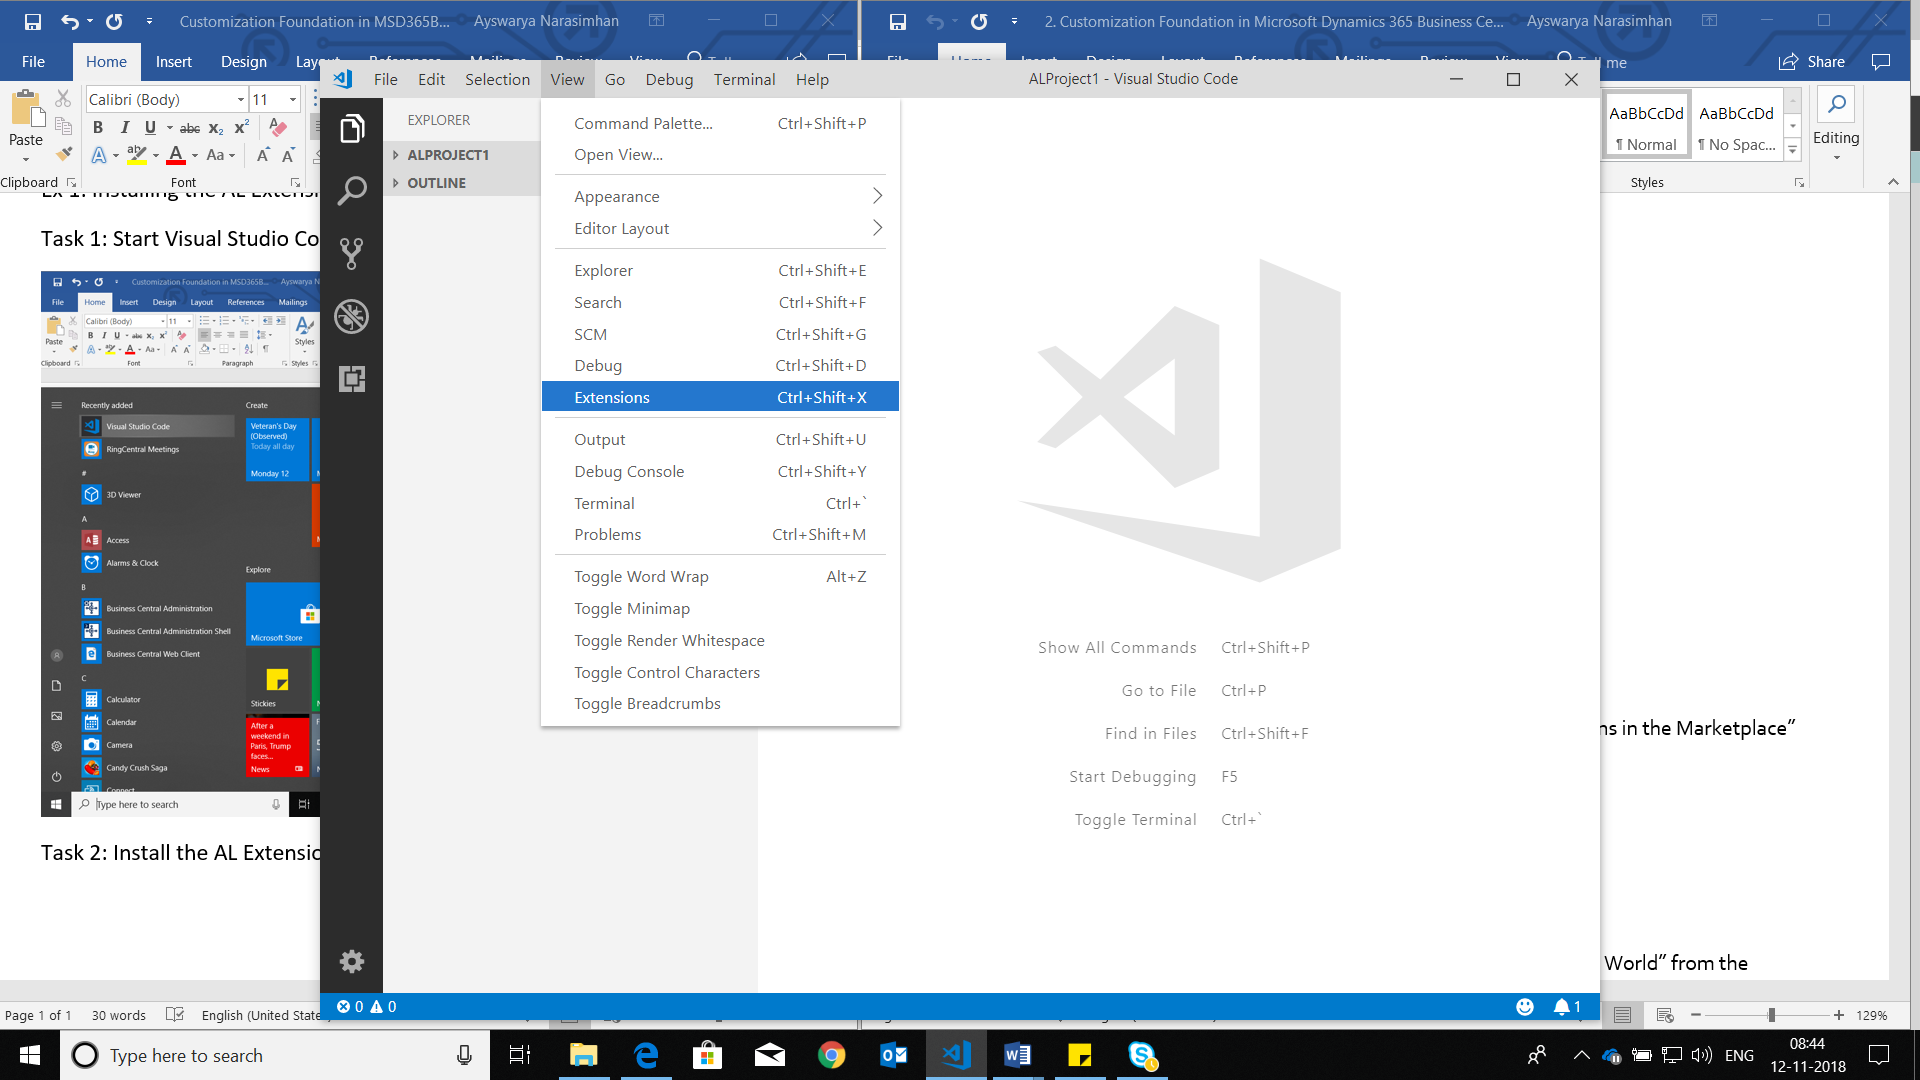
Figure 2 – Navigate to Extensions through the View menu bar
3. Type AL in the search bar and install AL Language
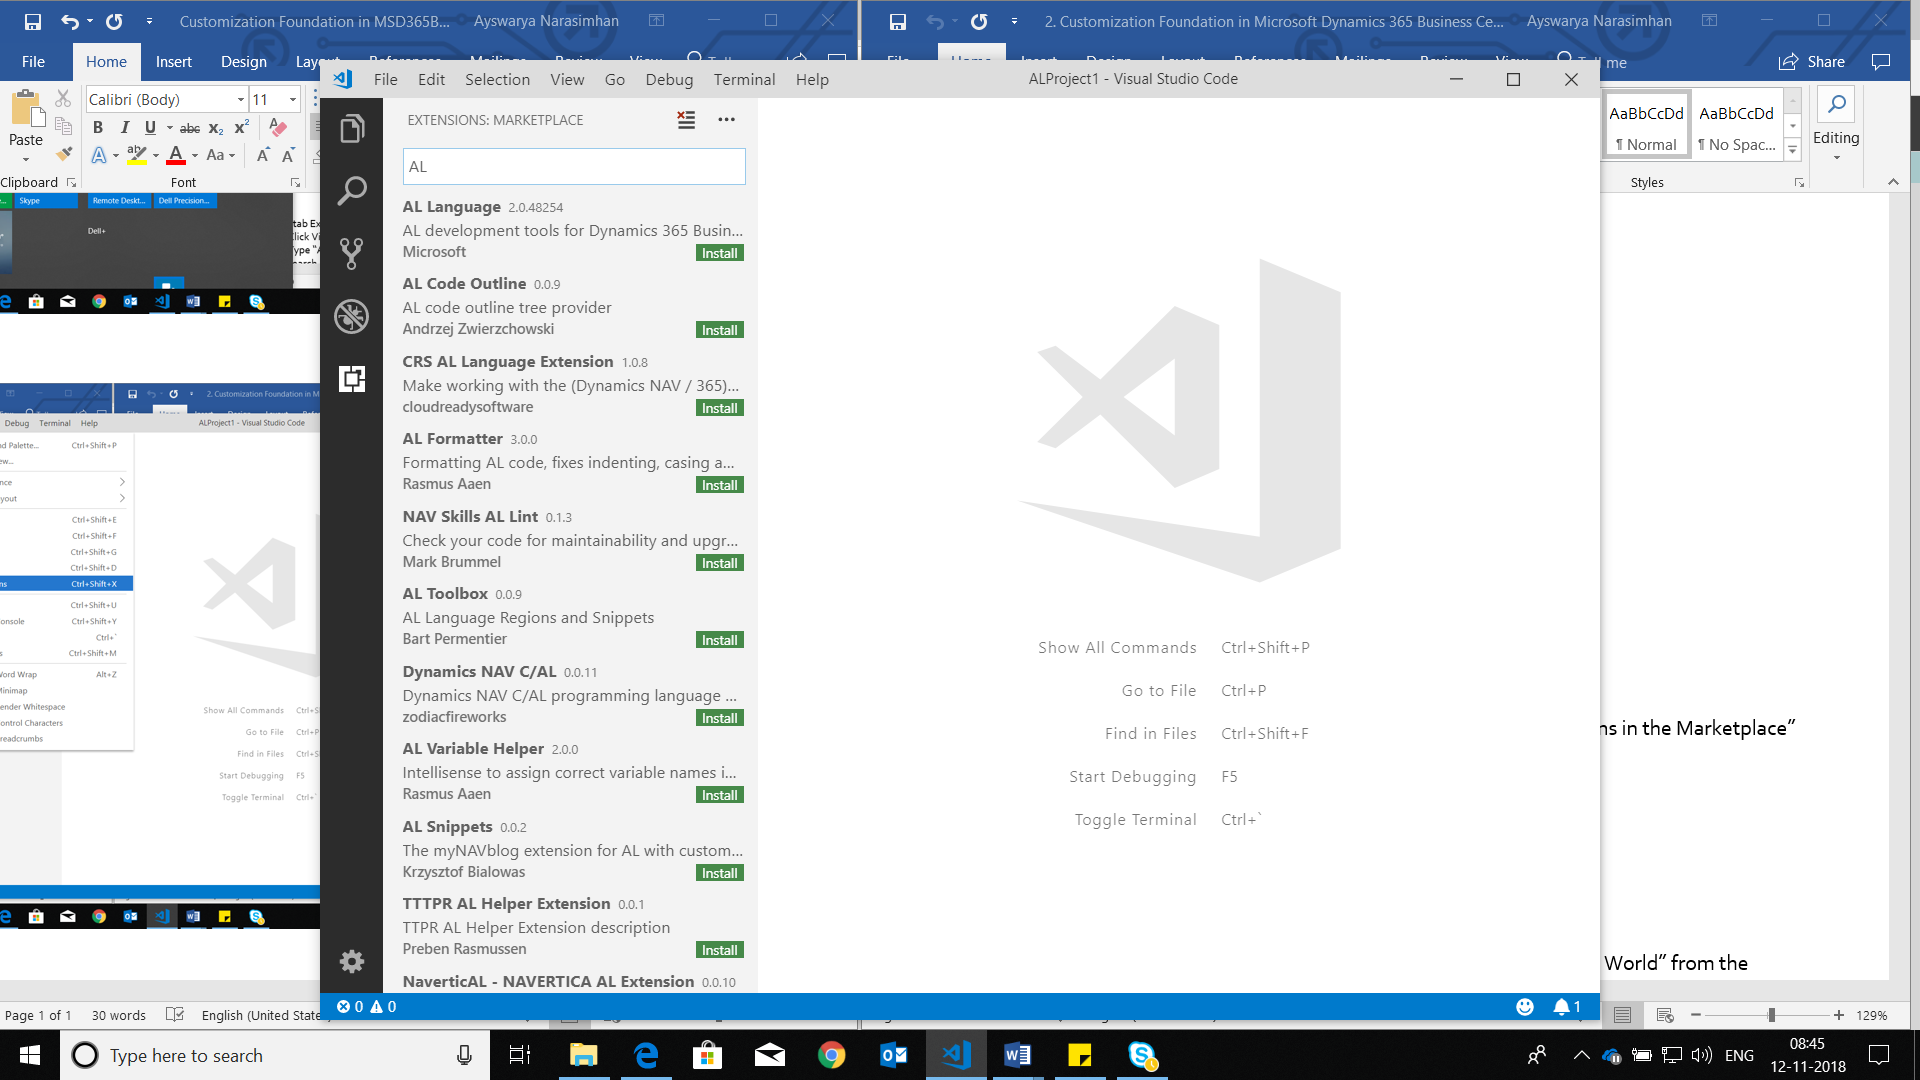
Figure 3 – Search for the AL Language Extension
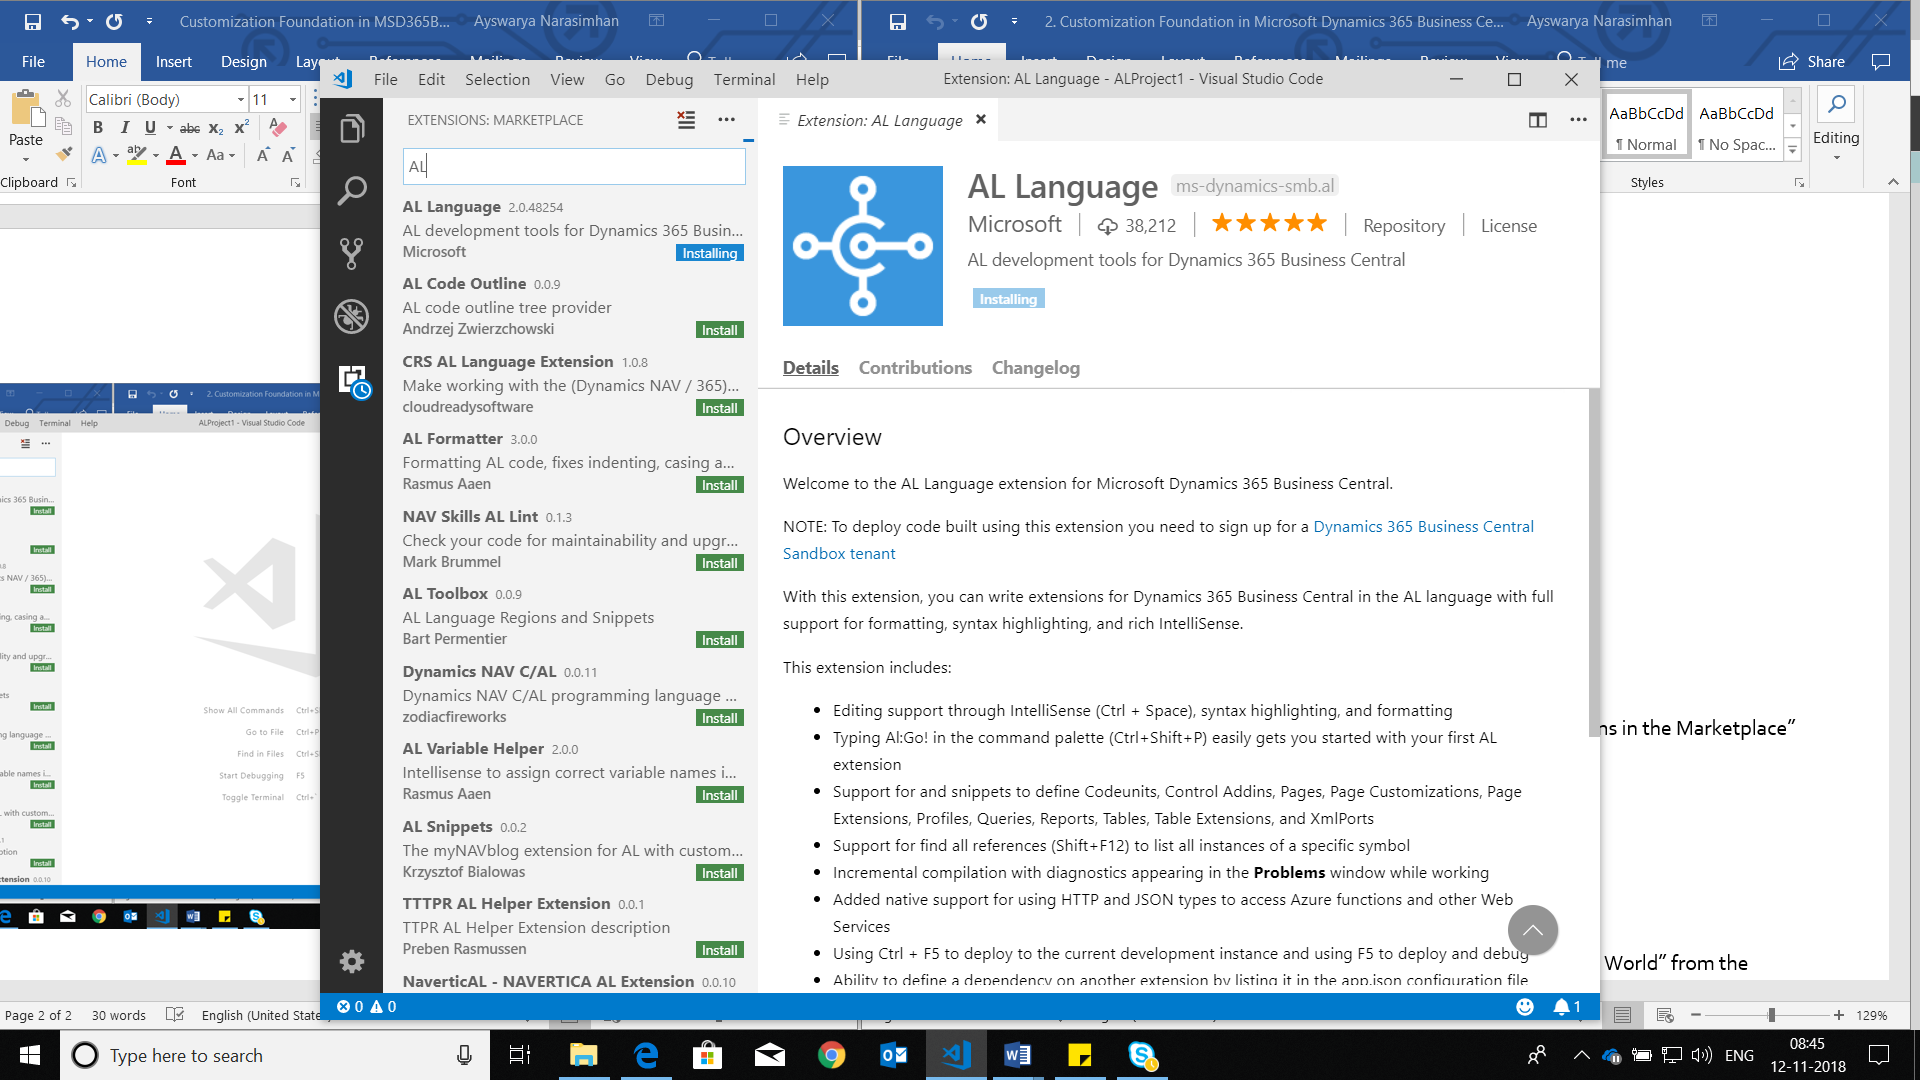
Figure 4 – Install the AL Language Extension
4. After Installing, Click Reload to complete the AL Extension Installation
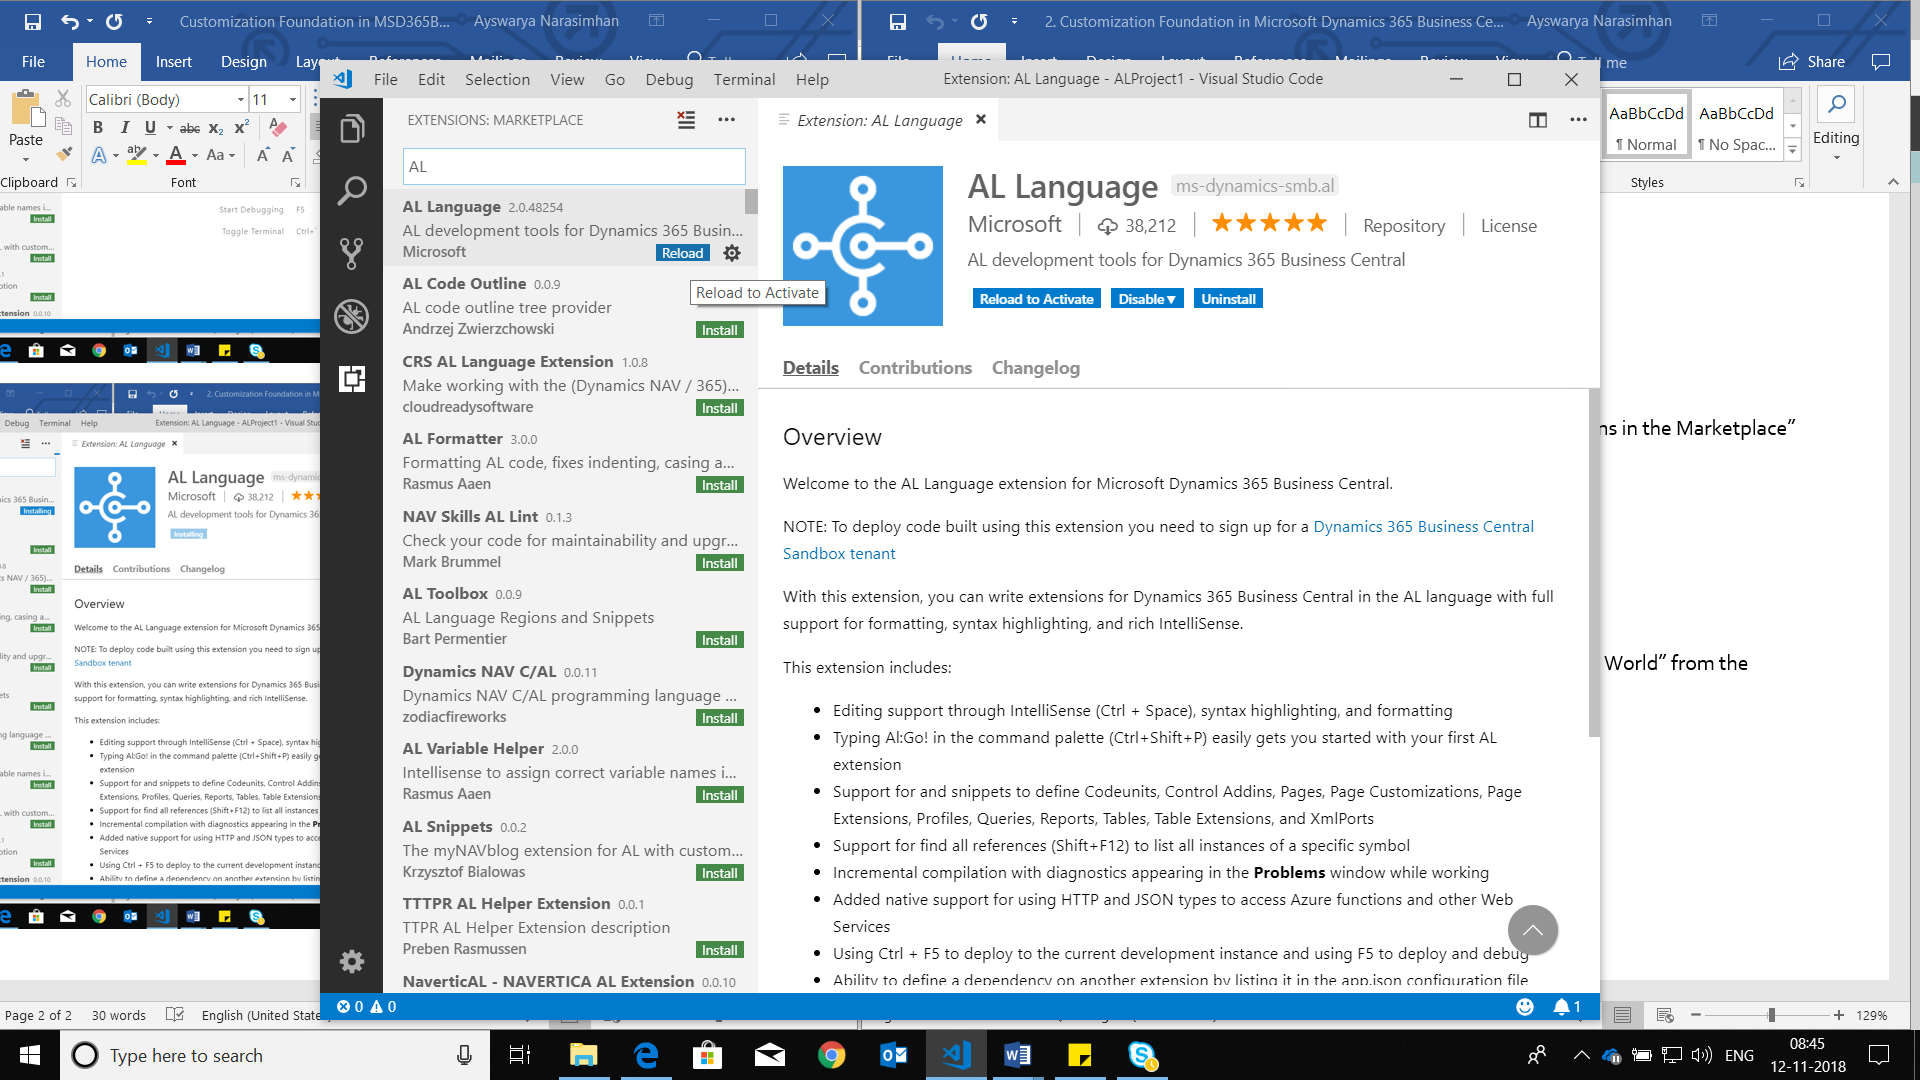
Image 5 – Reload the AL Language Extension
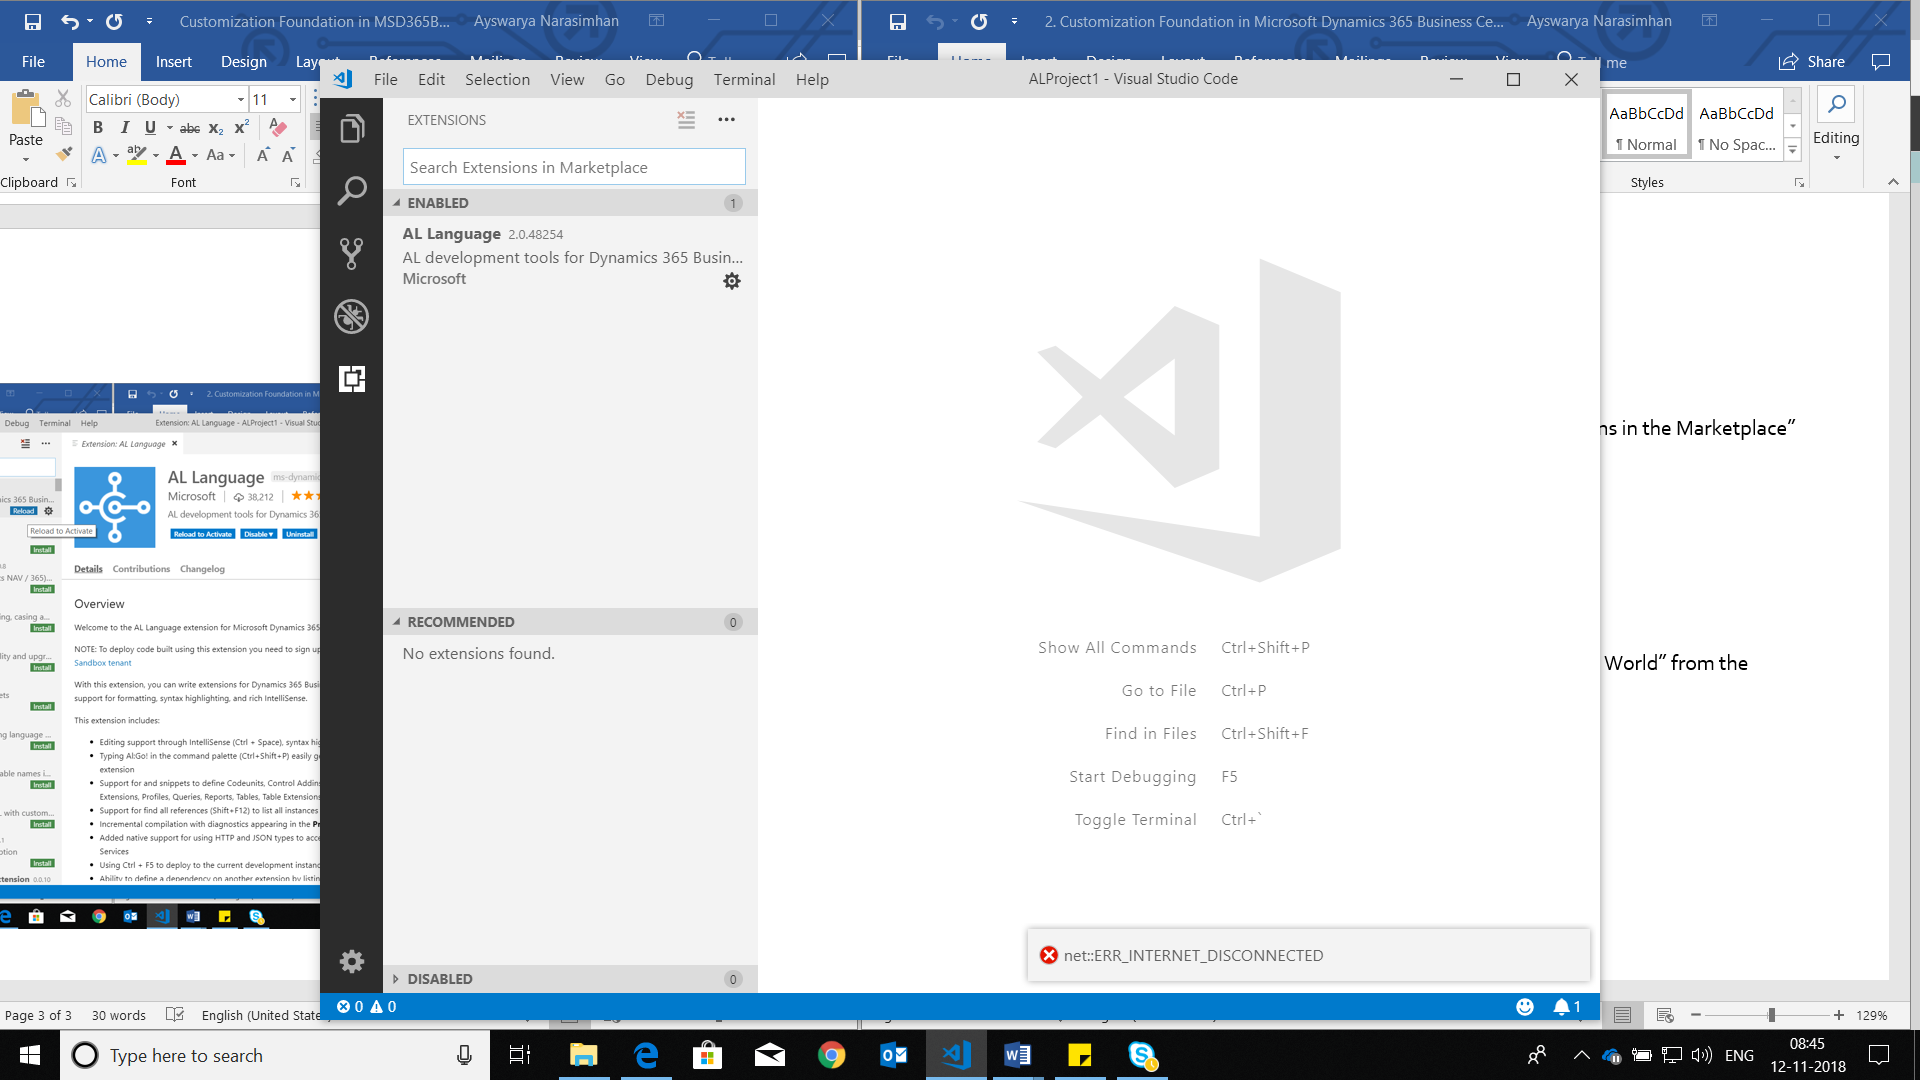
Figure 6 – Installed AL Language Extension in the Explorer pane
You now have the AL language extension installed in Visual Studio Code.
If you have any questions about this function or other Microsoft Dynamics 365 Business Central or Dynamics NAV questions for any version, contact Archerpoint.
Read more “How To” blogs from Archerpoint for practical advice on using Microsoft Dynamics NAV.
If you are interested in NAV development, check out our collection of NAV Development Blogs.
Trending Posts
- Login Error: Communication protocol mismatch between client and server
- How to Make Measures Total Correctly in Power BI Tables
- The Microsoft Technology Stack – What Is It & Why Should You Care?
- MRP vs. MPS: Choosing the Right Planning Approach for Your Manufacturing Business
- Guide to How Manufacturers Can Implement Quality Control Systems Using Business Central
Stay Informed
Subscribe to Communications
"*required" indicates required fields