
Customizing Drop-Down Lists for Tables in the NAV Role-Tailored Client

Back in the days of the legacy client, doing lookups into another table for a foreign key field in Microsoft Dynamics NAV (Navision) always involved running a list form.
Nowadays, if you try to do a lookup into a table for a foreign key, you get something like this (Customize DropDown List for a table found in View – Field Groups – DropDown group):
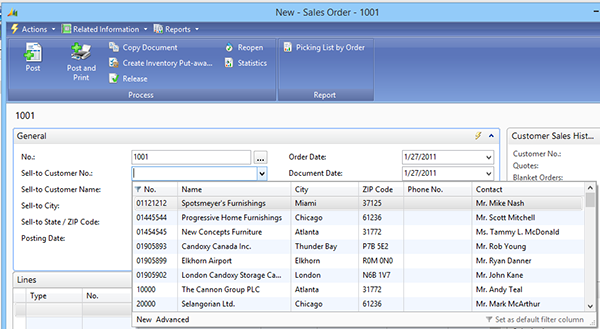
Figure 1 – Lookup into the Sell-to Customer No. on a New Sales Order with a drop down list displayed.
On a semi-regular basis, I have customers look at this drop down list and decide that they need some extra fields added. Back in the day when everything was done with a list form, this involved adding a new field to the list. But if you get into the code for the Sales Header table and look at the OnLookup trigger for Sell-to Customer No., you won’t see any code that’s running a list form.
You might go look at the Customer table and notice that it has a LookupFormID property assigned to the Customer List page. But take a look at those fields on the drop down list above—those are not the fields from the Customer List, are they? And if you try editing the Customer List page, the changes you make are not reflected in the drop down list at all.
The actual way you edit this is hidden in the FieldGroups for the table. You can access it in the development environment by going to the View menu and choosing Field Groups. (It’s right under the “Keys” option.)
Field Groups with code for adding “Address” to customer lookup.” src=”https://archerpoint.com/wp-content/uploads/2021/06/blog-customizing-a-nav-drop-down-list-03.png” style=”width: 600px; height: 210px;”>
Figure 3 – Customer Table -> Field Groups with code for adding “Address” to customer lookup.
And then my drop down list looks like this:
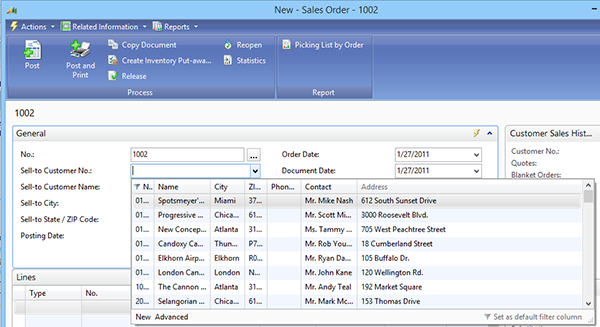
Figure 4 – Sell-To Customer No. drop down with address added.
That’s all you have to do. Note that if you want to filter on the field in the drop down list, you also need to add it as a key to the table.
It’s not the most intuitive thing in the NAV development world, but it’s easy once you know how—sort of like doing 360 motions in Street Fighter for those big command throws with Zangief. (The secret there is to buffer them with something that takes enough time that you can finish the up parts of the motion without jumping inadvertently, so you can jump in and do the top part of the circle while you’re jumping, or you can start a dash and use the time while you’re moving forward to put the top part of the circle in, or you can even do a move and put the motion in while the animation for the move is completing.)
Be sure to read more ArcherPoint developer blogs. If you have any further questions about customizing in NAV, please feel free to contact any of the NAV experts at ArcherPoint. (Please direct all Street Fighter questions directly to Tom Hunt.)
Trending Posts
- Login Error: Communication protocol mismatch between client and server
- How to Make Measures Total Correctly in Power BI Tables
- The Microsoft Technology Stack – What Is It & Why Should You Care?
- MRP vs. MPS: Choosing the Right Planning Approach for Your Manufacturing Business
- Guide to How Manufacturers Can Implement Quality Control Systems Using Business Central
Stay Informed
Subscribe to Communications
"*required" indicates required fields