
Microsoft Business Central File Handling Part 2

At the Microsoft Directions Asia Conference, a team from ArcherPoint attended many sessions and shared their experiences. On a large scale, the conference unveiled the April ’19 Release of Dynamics 365 Business Central as well as announcing the end of Windows Client beginning with the October ’19 release. They also shared best practices for continuing on with Visual Studio Code and AL.
In addition, we left the conference with some practical applications. This blog series discusses handling files in Microsoft Dynamics Business Central online, including:
- Exporting to Excel and downloading the file
- Uploading a file and storing it in a table
- Updating an existing Excel file
- Emailing an exported file
Part 1 explained how to export a file to Excel and then download it. This blog explains how to upload a file and store it in a table.
Uploading a File and Storing It in a Table
A common scenario is to allow users to upload a file to the application. Uploaded files can serve different purposes, like importing data or linking a file to a record. In this example, we are going to upload an Excel file and store it in a table. In the following example, we will use this file as a template to fill with data and then download it to the user.
Prerequisites:
- Dynamics 365 Business Central Sandbox Environment.
- Dynamics 365 Business Central should run from Azure Cloud
This task includes the following steps:
- Create a table to store the file
- Create a list page
- Create a function to select and upload an Excel file
- Call the function from the list page
Here are the steps:
- Create a new table that looks like the table in Figure 1 to store the file. The table will have a BLOB field in which to store the file content.Figure 1 – Creating a table in Microsoft Dynamics Business Central online
- Create a list page, which will contain the fields and a checkbox to indicate if the BLOB contains a file.
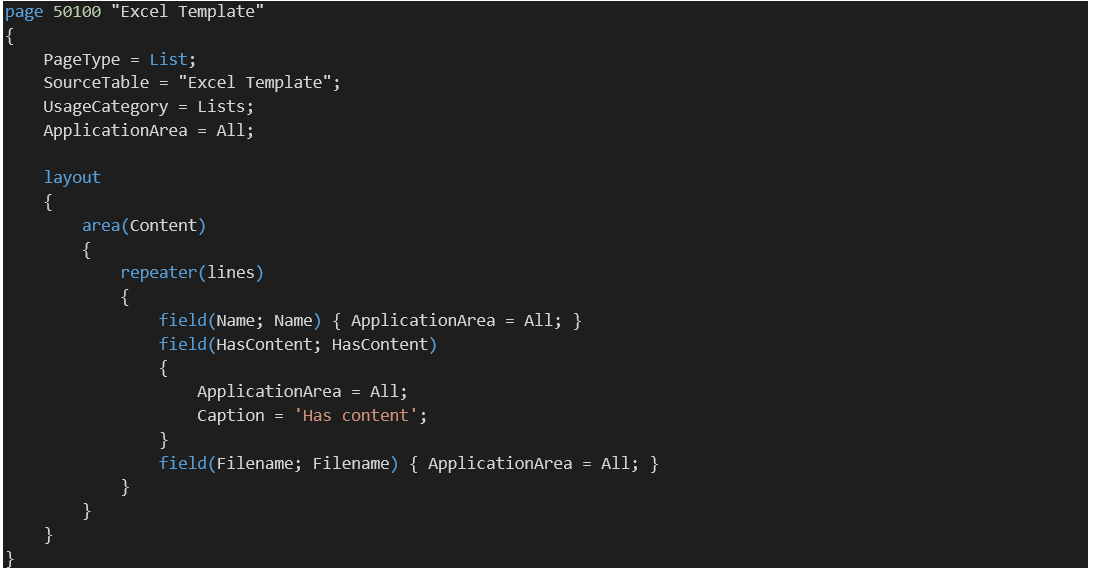
Figure 2 – Creating a list page in Microsoft Dynamics Business Central online - Add a function to the table to select and upload an Excel file. In this example, we are using the File Management Codeunit, which provides functions that are safe for both online and on-premesis.
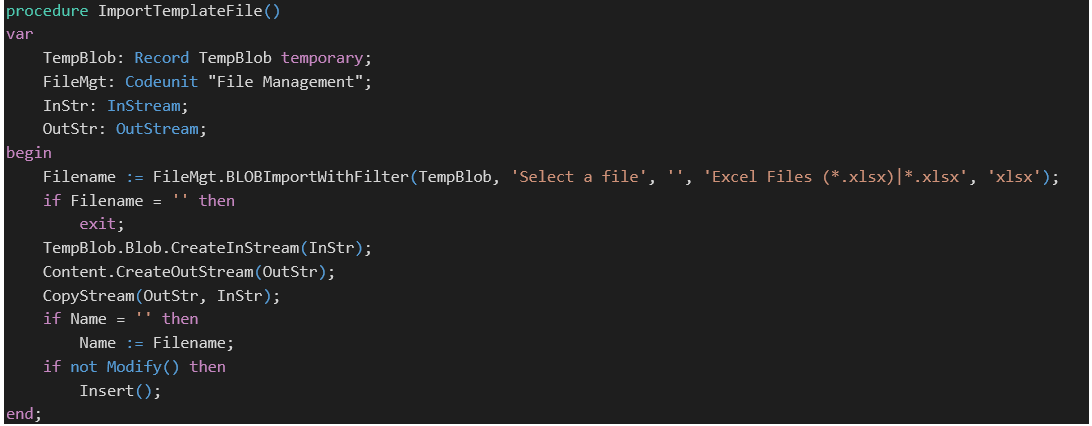
Figure 3 – Adding a function in Microsoft Dynamics Business Central online - Call the function from the list page by adding an action to the page that calls the ImportTemplateFile function in the table.

Figure 4 – Calling a function from the list page in Microsoft Dynamics Business Central online - Publish the app again, open the Excel Template page, and test the upload function. Use the Order Template.xlsx file from the materials; this file will be used in the next blog in the series, Updating an Existing Excel File.
Stay tuned for the next blog in this series. If you have any Dynamics NAV or Business Central questions for any version, contact ArcherPoint.
Read more “How To” blogs from ArcherPoint for practical advice on using Microsoft Dynamics Business Central or NAV.
If you are interested in NAV/Business Central development, check out our collection of NAV/BC Development Blogs.
Trending Posts
- Login Error: Communication protocol mismatch between client and server
- How to Make Measures Total Correctly in Power BI Tables
- The Microsoft Technology Stack – What Is It & Why Should You Care?
- MRP vs. MPS: Choosing the Right Planning Approach for Your Manufacturing Business
- Guide to How Manufacturers Can Implement Quality Control Systems Using Business Central
Stay Informed
Subscribe to Communications
"*required" indicates required fields