Microsoft Dynamics NAV 2016 - User Group and Group Permissions
With a new project implementation, after mapping customer gaps in the standard database, importing opening balances, and importing master data, we all have had issues in previous versions of Microsoft Dynamics NAV assigning permissions to users. For every user, we need to map the Permission Set they require to access the system.
In this blog post, we will discuss a few features in Microsoft Dynamics NAV 2016 that will make that task easy.
Consider this scenario, where I have three types of Warehouse Users Groups:
- Warehouse Administrator – Takes care of set-ups related to the warehouse
- Warehouse Operator – Creates receipts and shipments
- Warehouse Viewer – Can check the status of shipments and receipts
With previous versions of NAV up through 2015, we would have needed to map permissions created for all these users, one by one, to everyone’s Windows accounts. With Microsoft Dynamics NAV 2016, however, we can actually group users who share the same permission sets and assign permissions to the Group instead having to assign it to each user. Following is how to do this:
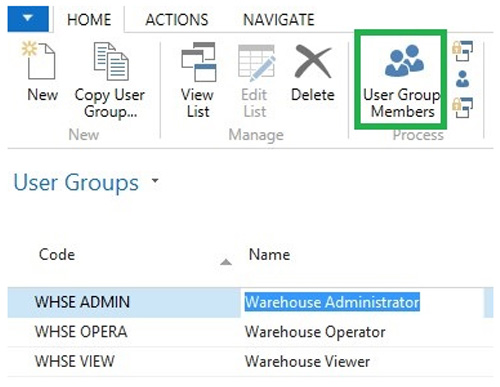
Navigate to user Menu from Department > Administration > IT Administration > General > Users as shown below. Select User Group as highlighted in Figure 1.
Figure 1 – User Menu with User Groups highlighted.
Add Groups as per your business requirements as shown in Figure 2. I have added WHSE ADMIN, WHSE OPERA, and WHSE VIEW.
Select the User Group Membership as Shown Below.
Figure 2 – User Group with groups added.
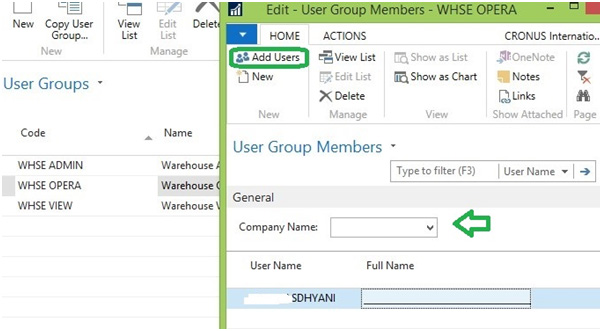
In the Window, you can add an existing user in the group or add a new user in the database. You can also filter the company, as shown in Figure 3.
Figure 3 – User Group Members.
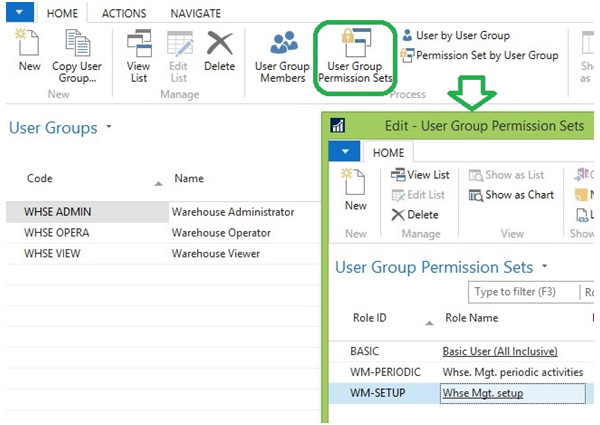
Once you have completed this, go back to the User Group Menu and select User Group Permission Sets, as shown in Figure 4. Select the permissions you want to assign to all members of the Group.
Figure 4 – User Group Permission Sets.
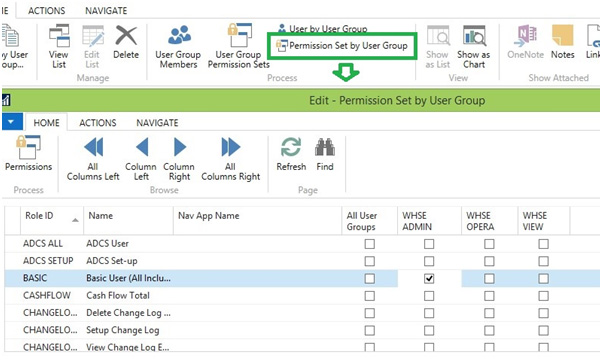
With Microsoft Dynamics NAV 2016, there is an easy way to assign or remove permissions. There is also a matrix of User Group vs Role ID where we can select or remove permission to the User Group as shown in Figure 5.
Figure 5 – Permission Set by User Group.
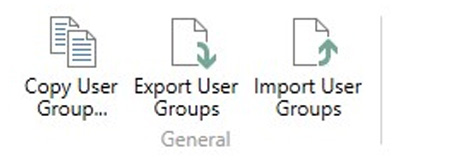
One of the best features of this new functionality is that you can set permissions up in a test environment. Once all setup and testing is complete, you can move them to the production environment using Export User Group and Import User Group, shown in Figure 6.
If you are planning to create a new user Group that will be a subset or superset of any existing group, you can use Copy User Group, also shown in Figure 6.
Figure 6 – Export Import User Group Menu
How cool is that!
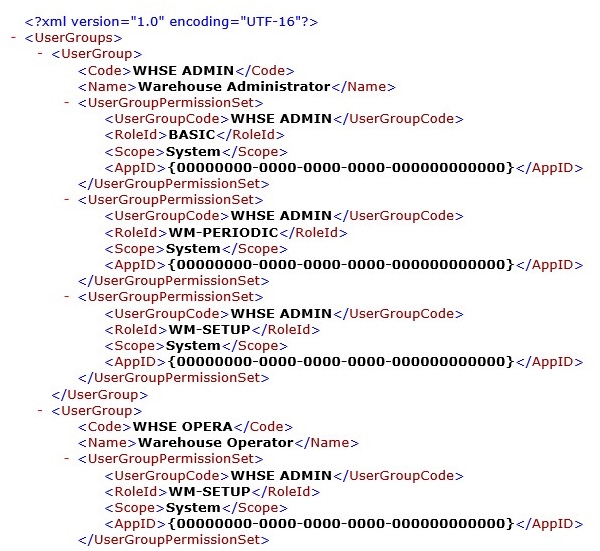
Figure 7 shows what it looks like when we export the user group. NAV takes the user group and the permissions assigned to that group.
Figure 7 – Exported User Group.
From there, you can simply import it into your production and assign users in the group.
I hope you found this blog helpful and will like the feature… I love it!
If you have any questions on this or other new features in Microsoft Dynamics NAV 2016, contact the NAV experts at ArcherPoint.
If you would like to learn more about NAV 2016, visit our website or contact us for a demonstration.
Trending Posts
Stay Informed
Choose Your Preferences
"*required" indicates required fields


