Creating a List Report in Microsoft Dynamics NAV or Business Central On Premises

This blog explains how to create a simple list report (non-processing only) in Microsoft Dynamics NAV or Business Central On Premises, based on the Customer table. This example will include the following requirements:
- Add the Report columns: No., Name, City, Balance
- Provide request fields on the report: No., Sales Person Code
- Exclude the customers with Balance = 0 from the report output. You will use report data item property to do that
- Create a Boolean option (check box) on request page called. “Show Customers with Balance”
- Find the Total of Balance and display that value at the end of report by adding a field for Total and displaying it there.
- Show Balance Customer option always set to TRUE; by default, the value should be TRUE anytime the report is run.
- Set up the report to display a simple message, ‘Report Completed’ at the end of the report, using the appropriate Report Trigger.
Reports are used to print information from a database. A report can be used to structure and summarize information, and reports can be used to print documents such as invoices. Reports can also be used to process data without printing anything.
The data set used for the report is a collection of data items. These data items correspond to fields in a table. When the report is run, each data item is iterated for all records in the underlying table with an appropriate filter defined.
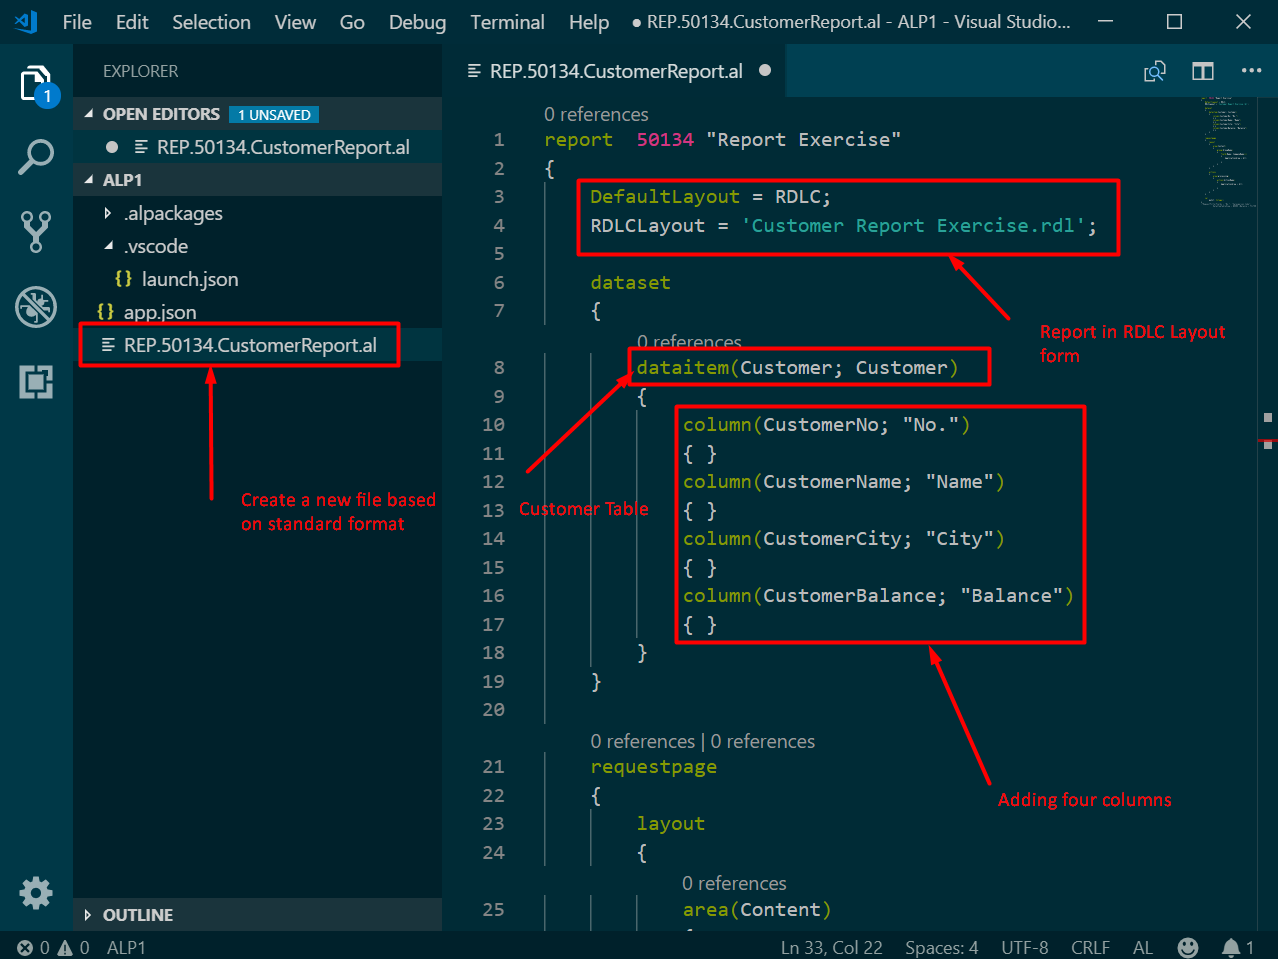
- Create a report in Visual Studio, similar to that shown in Figures 1 and 2, based on the standard file format and then defining the RDLC layout syntax and adding four columns in customer table.
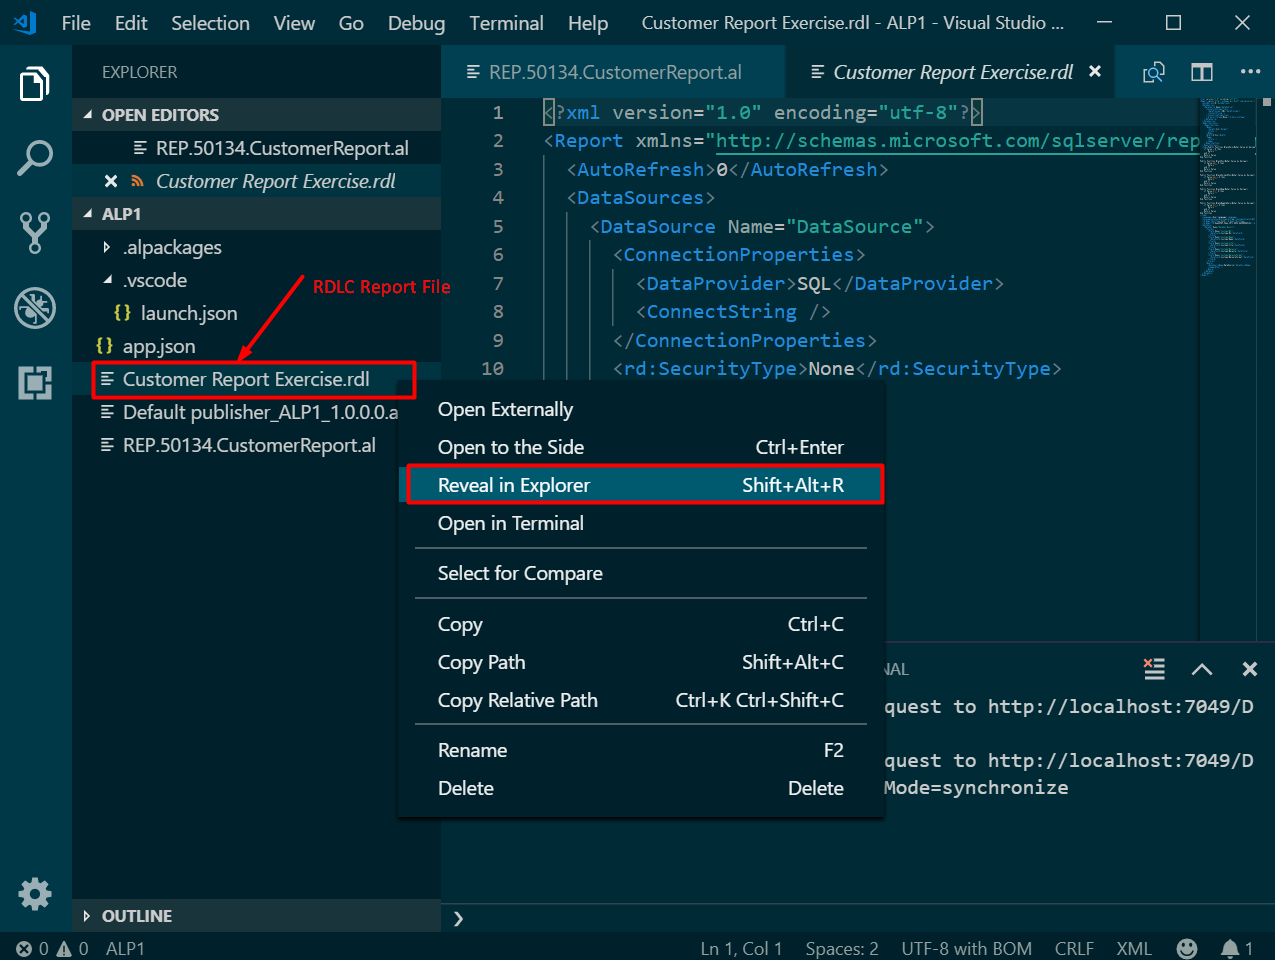
Figure 1 – Adding four columns in RDLC layout report in Microsoft Dynamics Business Central on premises or NAV - Use the keyboard shortcut -> F5 to publish. You will get a new file with the extension .rdl. Right-click and open it using Reveal in Explorer.
Fig 2 – Opening the .rdl file using the Reveal in Explorer option in Microsoft Dynamics Business Central on premises or NAV - Double-click on the .rdl path to open the file in SQL Report Builder.
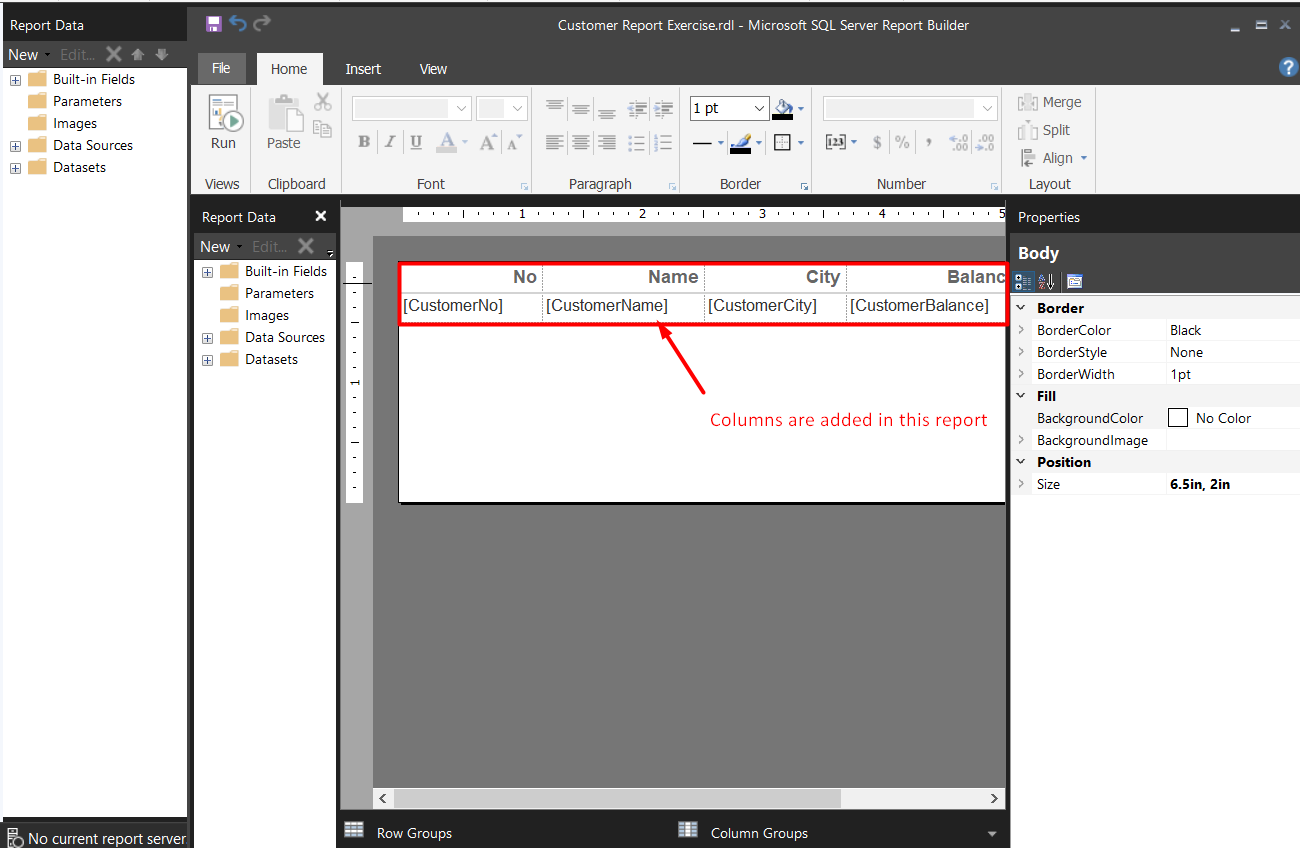
- Create four columns using the Table wizard, which will create the report structure, as shown in Figure 3.
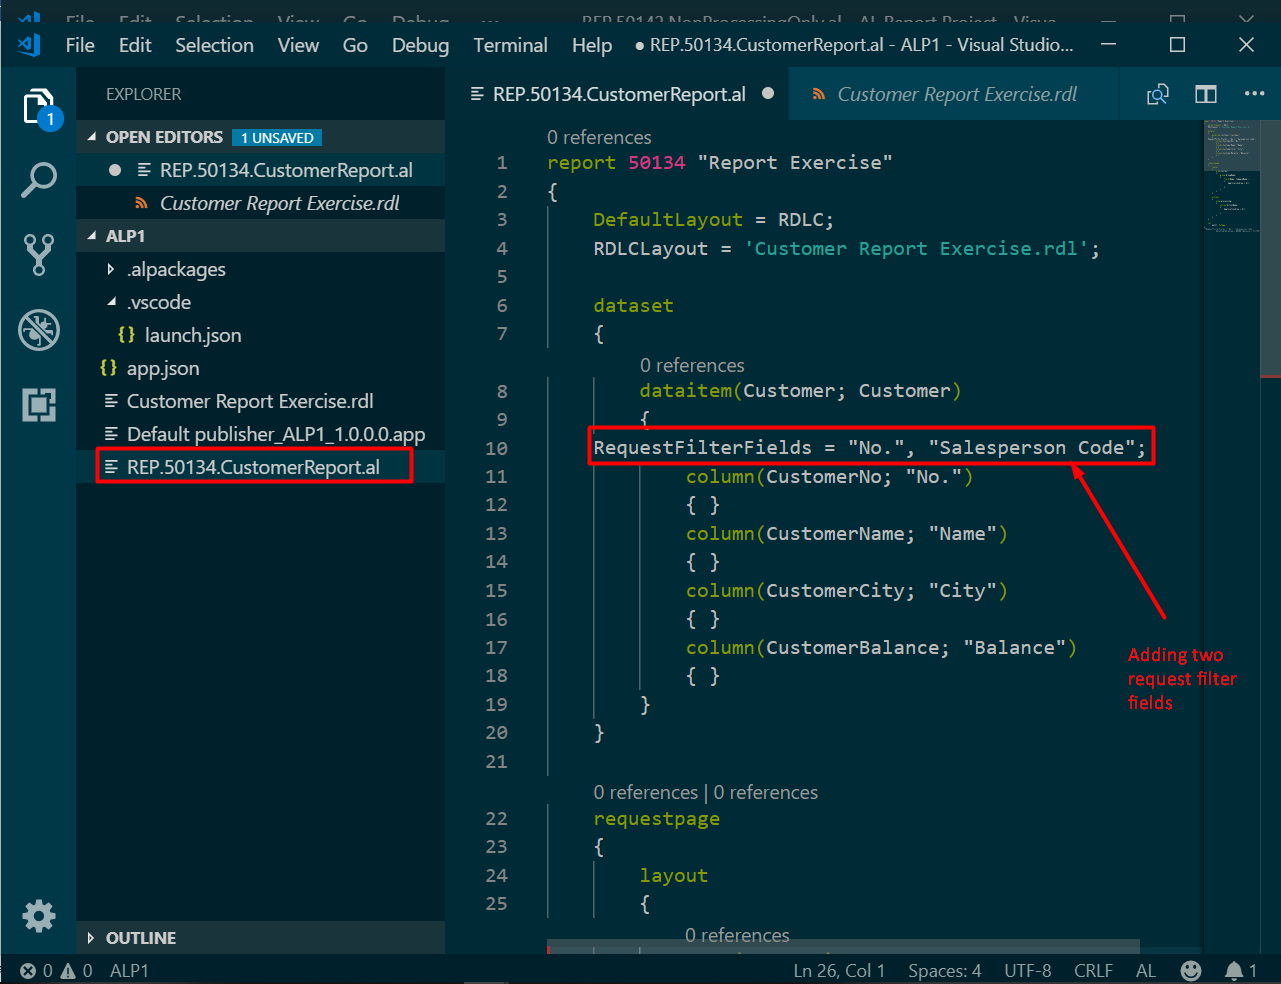
Figure 3 – Adding columns to a report in Microsoft Dynamics Business Central on premises or NAV - Provide request fields on the report: No., Sales Person Code. The Request field is simply the name of the fields that will be included in the request filter form.
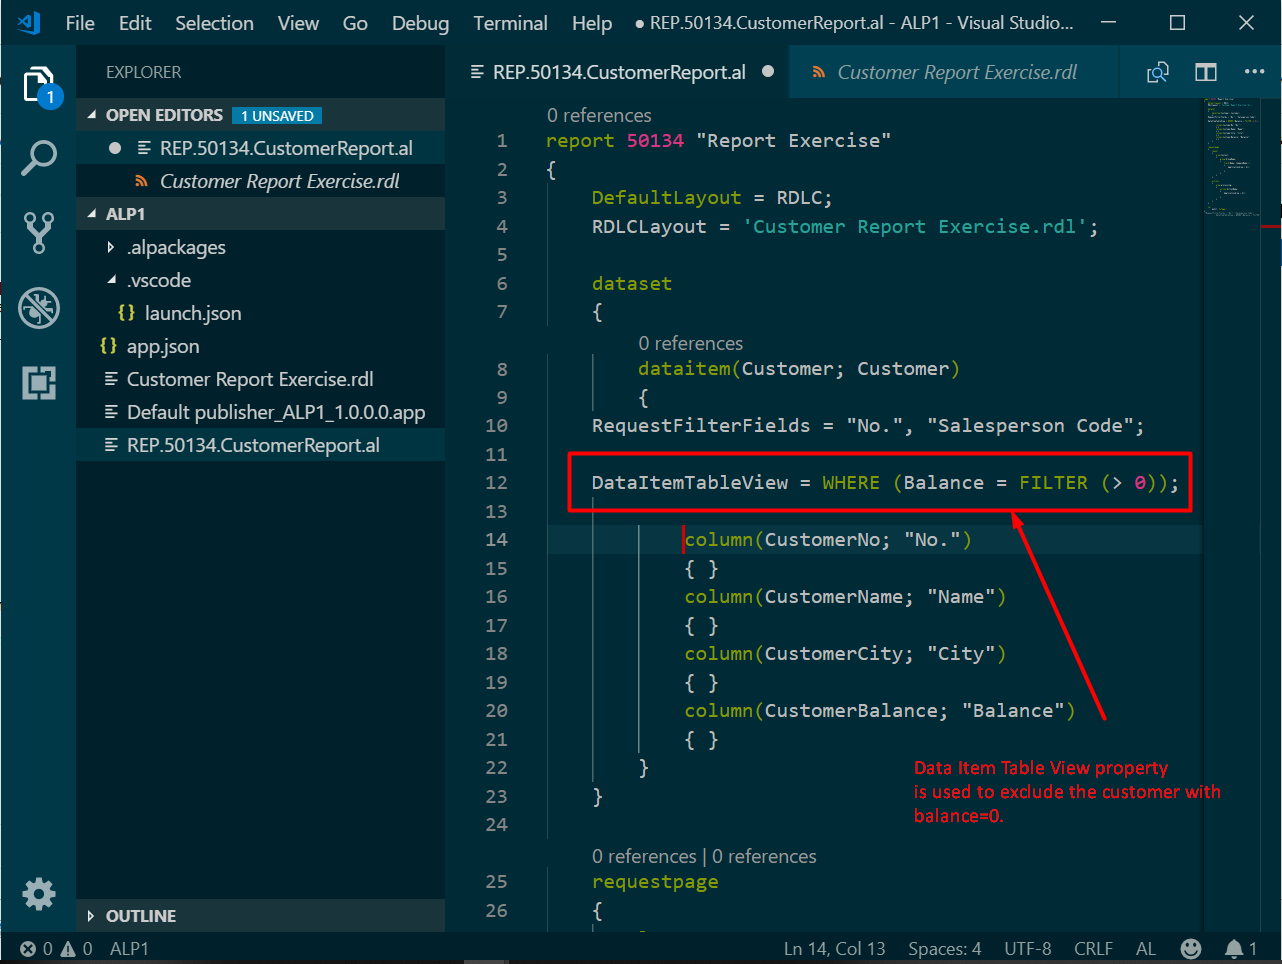
Figure 4 – Request filter fields added in customer report in Microsoft Dynamics Business Central on premises or NAV - Exclude the customers with Balance = 0 from the report output. Use report data item property to do this.
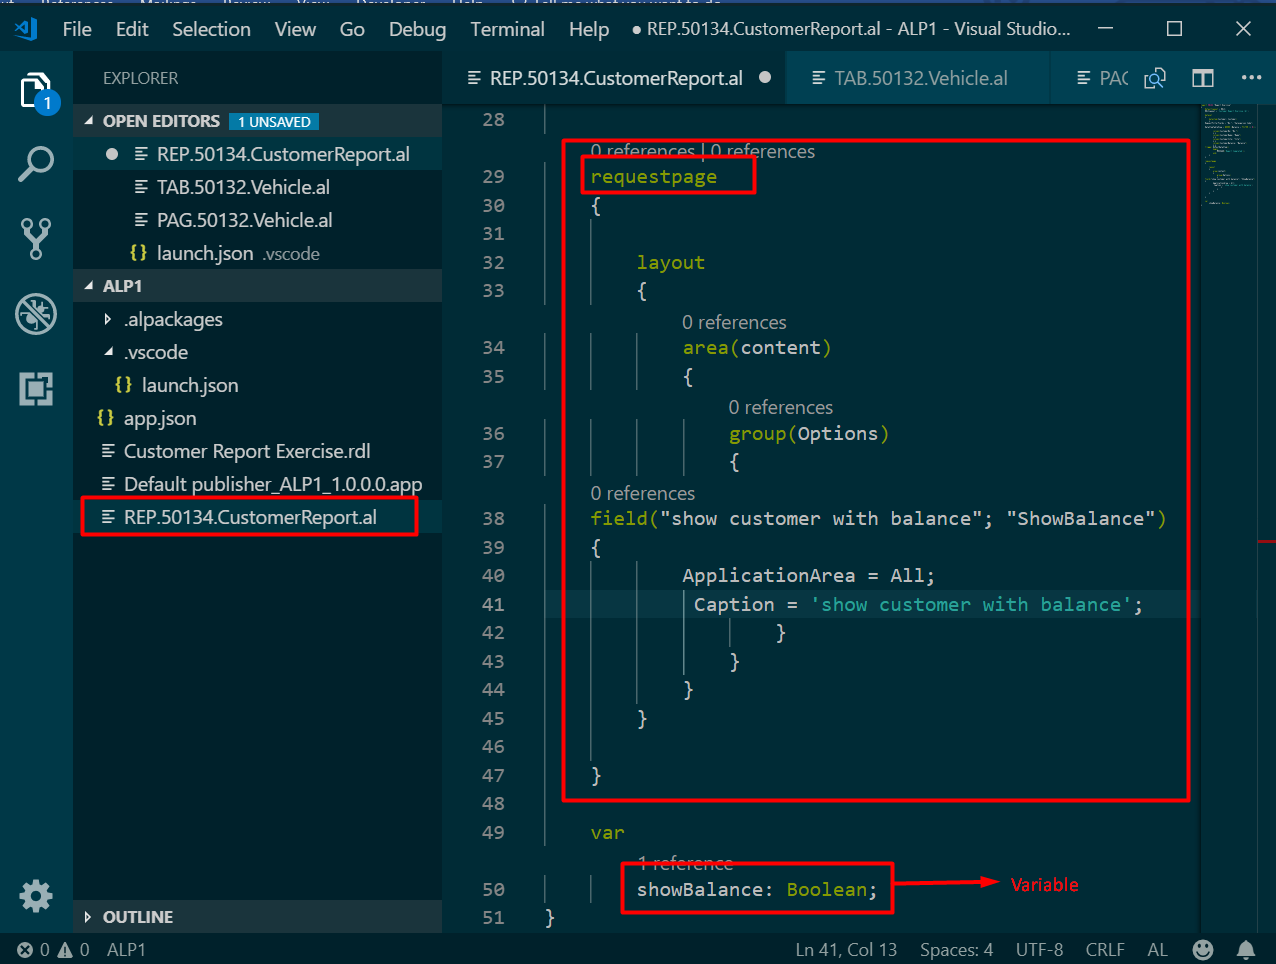
Figure 5 – Using the data item table view property for Exclude the Customers with Balance = 0 in Microsoft Dynamics Business Central on premises or NAV - Create a Boolean option (check box) on the request page called; “Show Customers with Balance” and declare a Boolean variable for that request page.
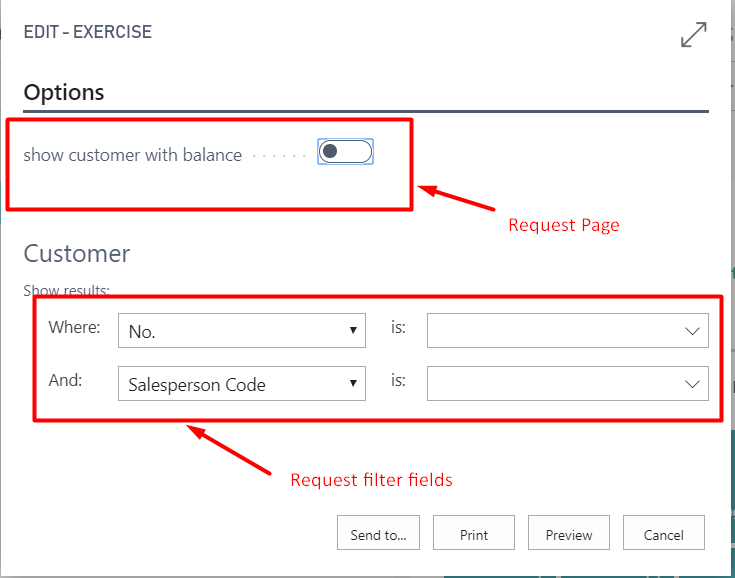
Figure 6 – Defining the request page in Microsoft Dynamics Business Central on premises or NAV - Run the report. You should see a result similar to that shown in Figure 7.
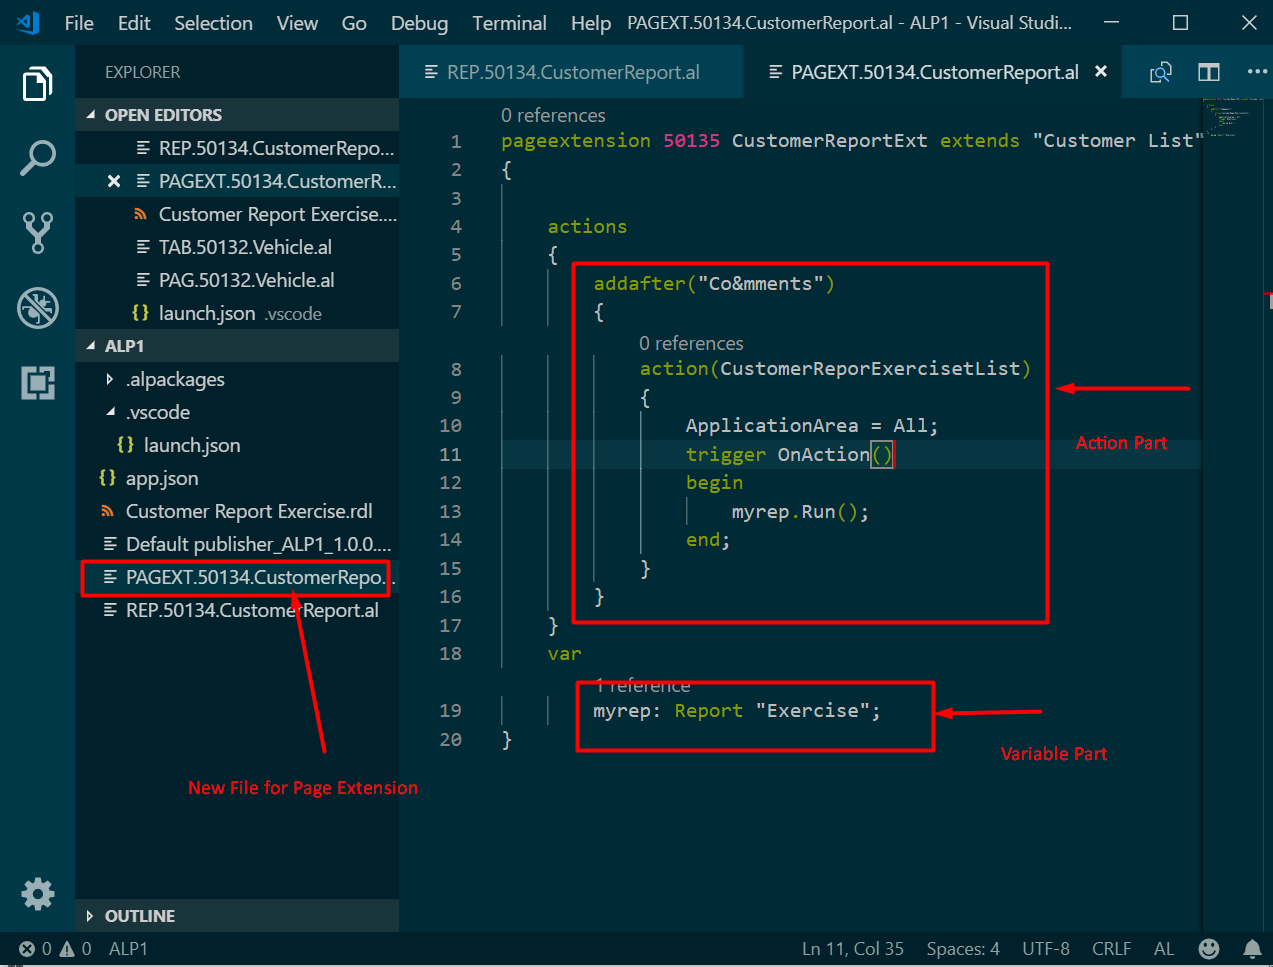
Figure 7 – Request page and request filter fields in Microsoft Dynamics Business Central on premises or NAV - Manage the report output based on this Boolean option while running the report. If this option is checked to TRUE, it should include only those customers with Balance <> 0.
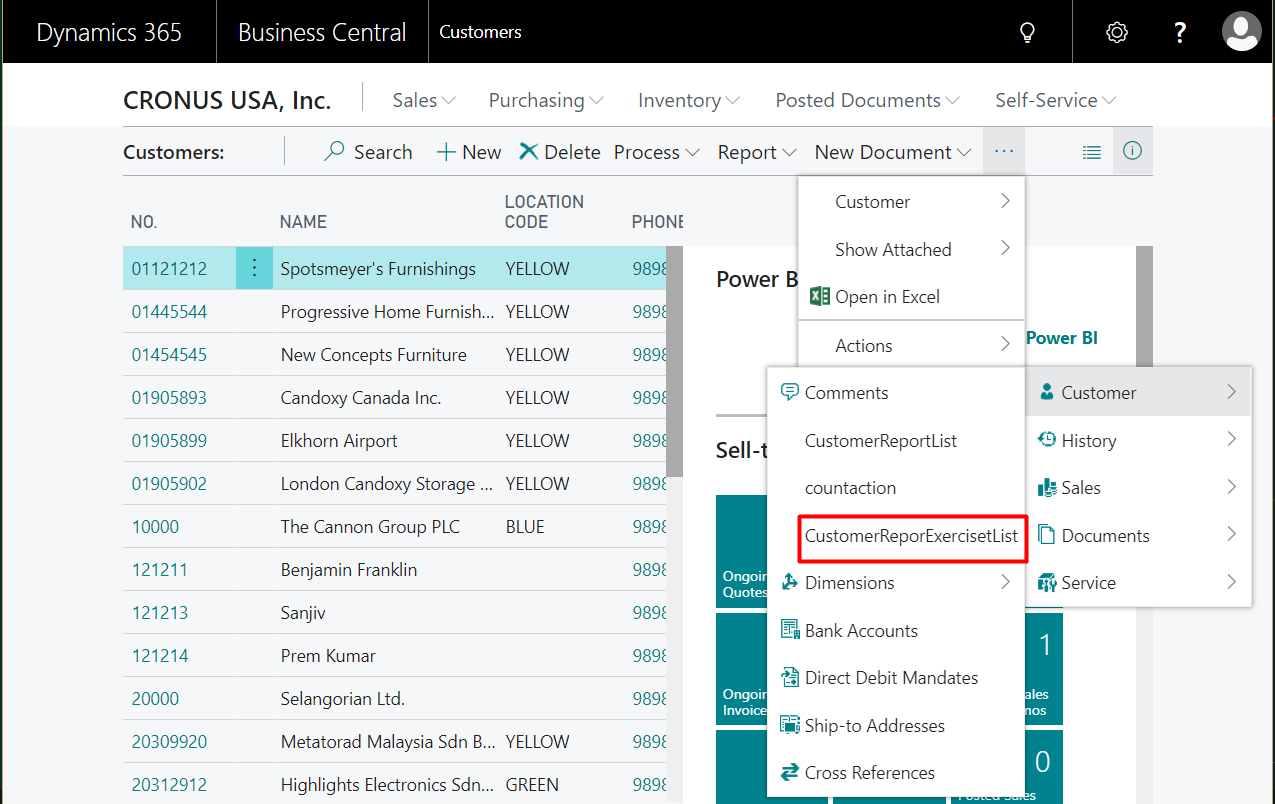
Figure 9 – Creating a page extension (assigning the variable to report and report name) in Microsoft Dynamics Business Central on premises or NAV - Use F5 or the shortcut Ctrl + G and select > AL: Publish. The customer page will open; go to Navigate -> Customer -> comments ->Customer report exercise list (Action name).
Figure 10 – The action is added after comments, and the name of the action is CustomerReportExerciesList in Dynamics Business Central on premises or NAV
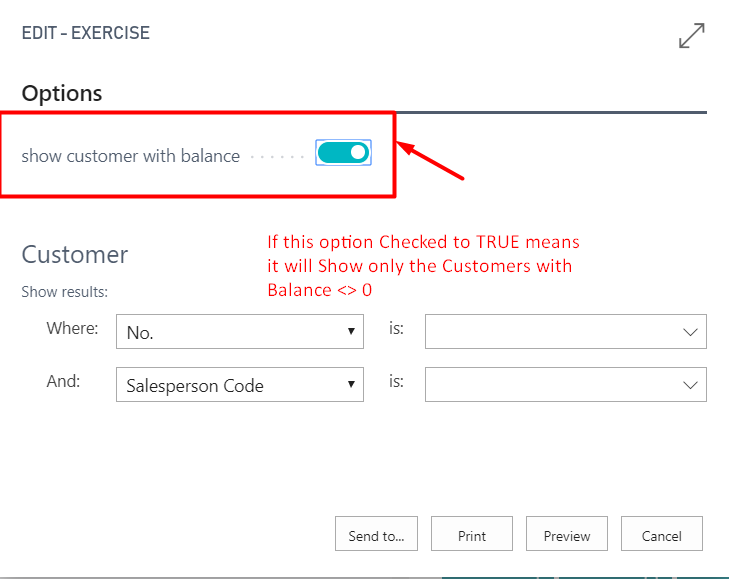
The dialog box will show if the “show customer with balance” option set to TRUE, as shown in Figure 11.
Figure 11 – Setting the “show customer with balance” option to TRUE in Microsoft Dynamics Business Central on premises or NAV
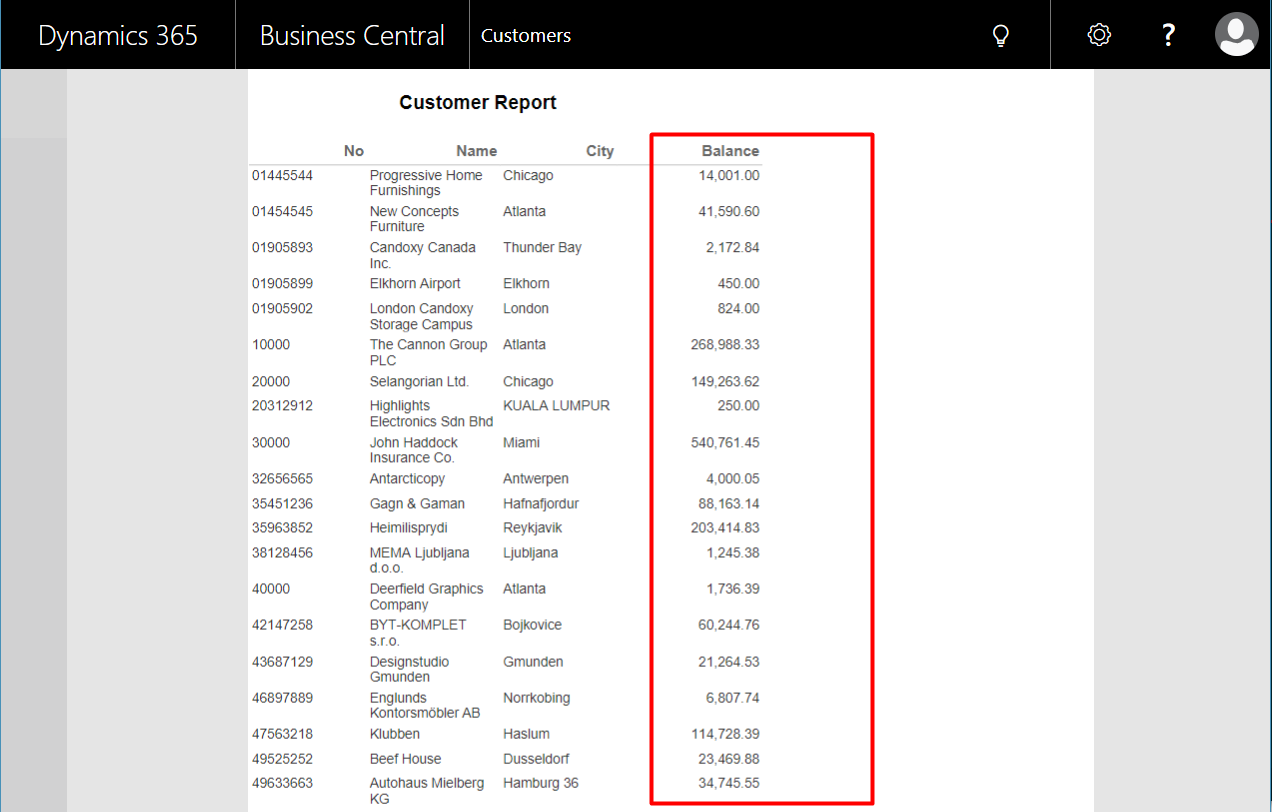
Figure 12 shows the output of the “show customer with balance” request page (set to TRUE).
Figure 12 – Output of the TRUE condition in Microsoft Dynamics Business Central on premises or NAV
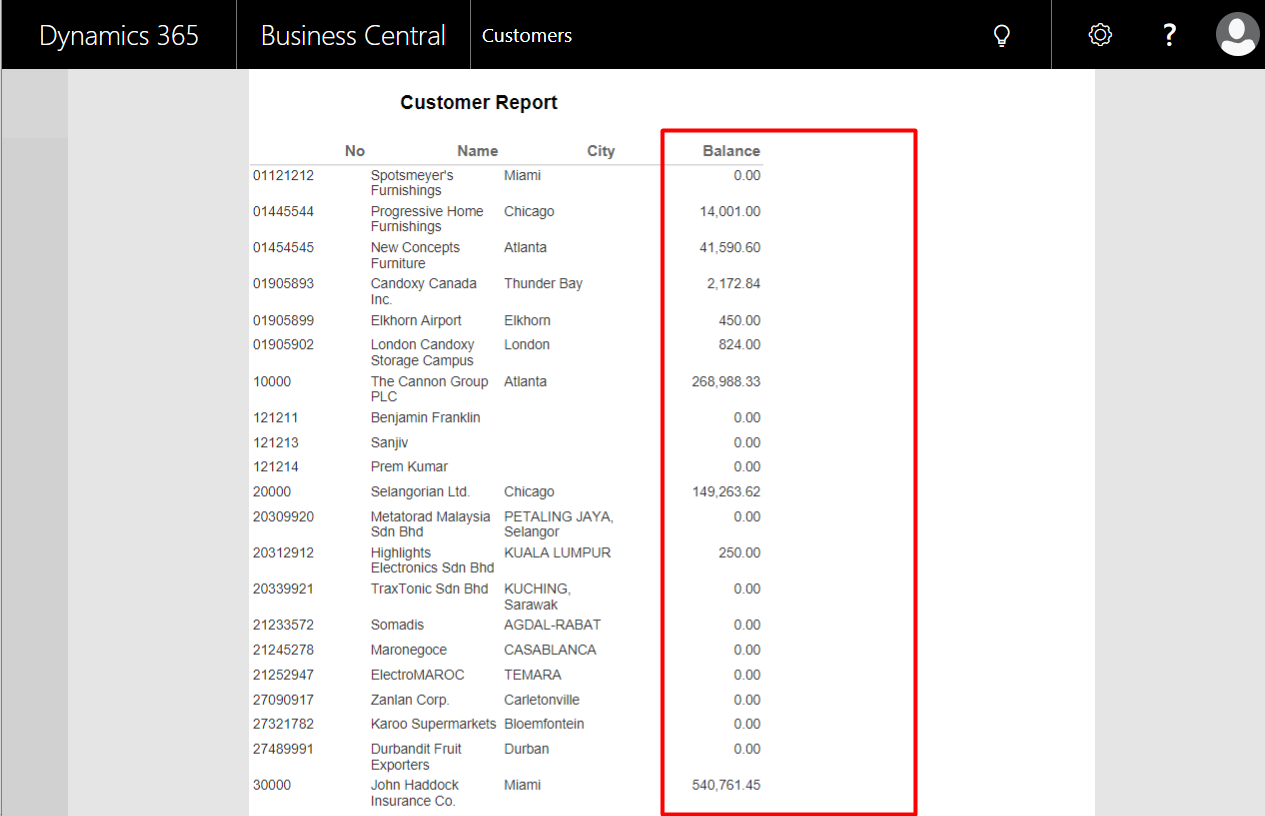
If the option is not checked or is set to FALSE, the report will show all customers (customers with Balance =0 and <> 0), as shown in Figure 13.
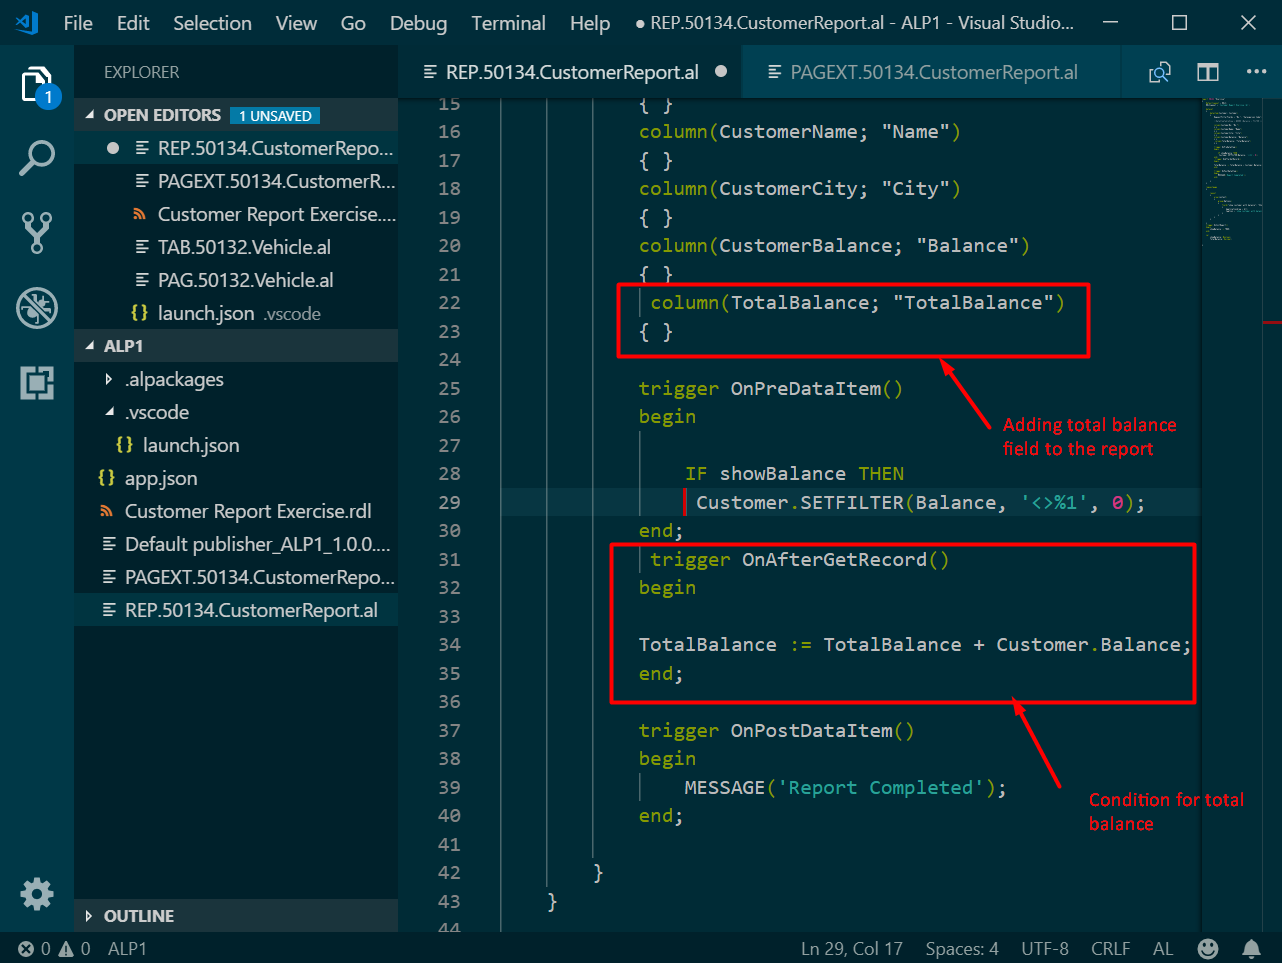
Figure 13 – Output of report with “Show customer with balance” option set to FALSE in Microsoft Dynamics Business Central on premises or NAV - Find the Total of Balance and display that value at the end of the report by adding a field for Total and displaying it. TIP: Use AL code report trigger to accumulate the Balance value for each customer and use that same trigger to display in the report output.
Figure 14 – Adding a Total Balance column in a report in Microsoft Dynamics Business Central on premises or NAV
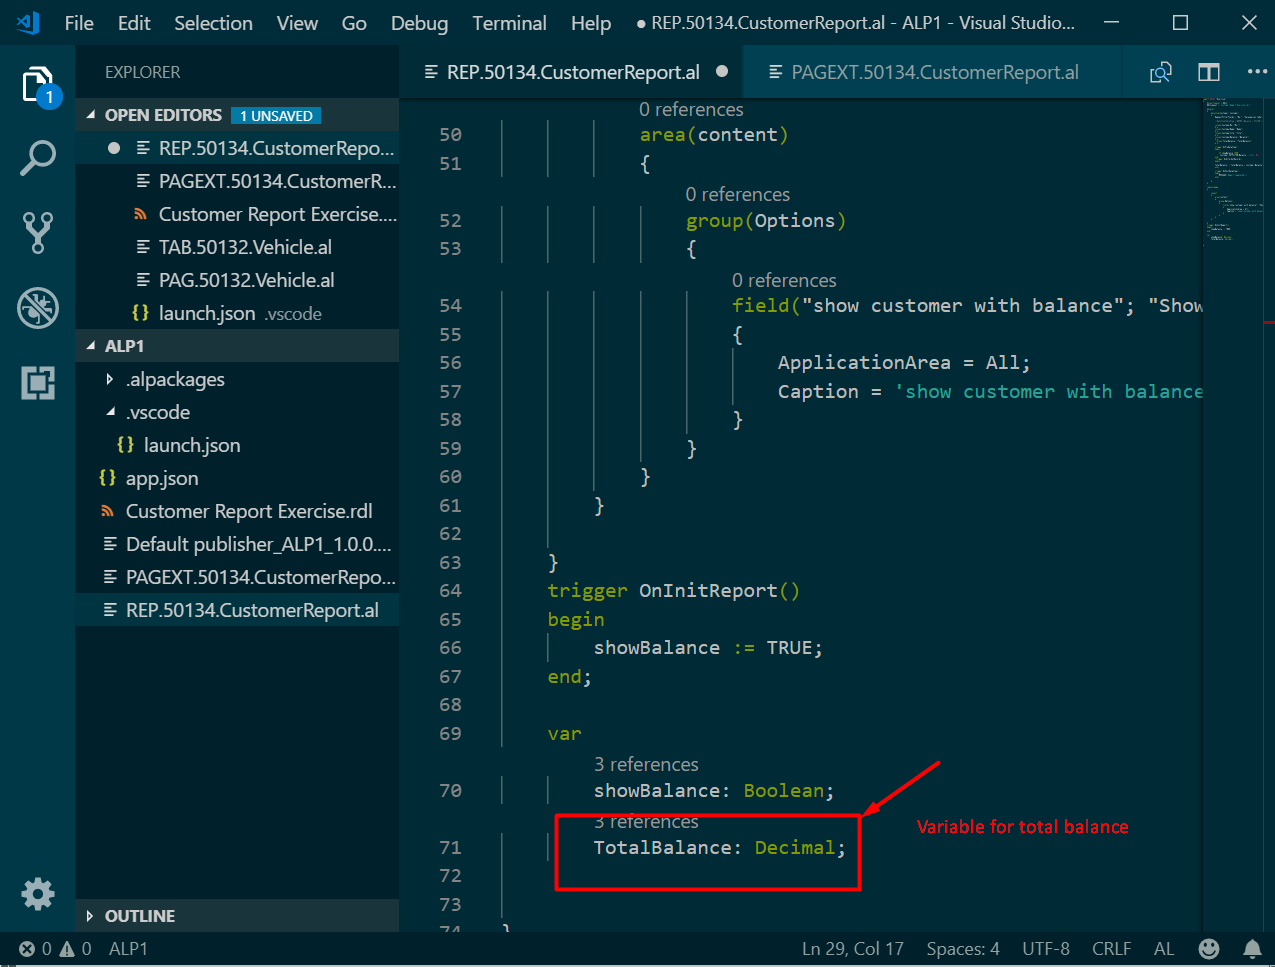
Some fields are added in Figure 15, and the variables syntax shows that the values are assigned to the decimal data type.
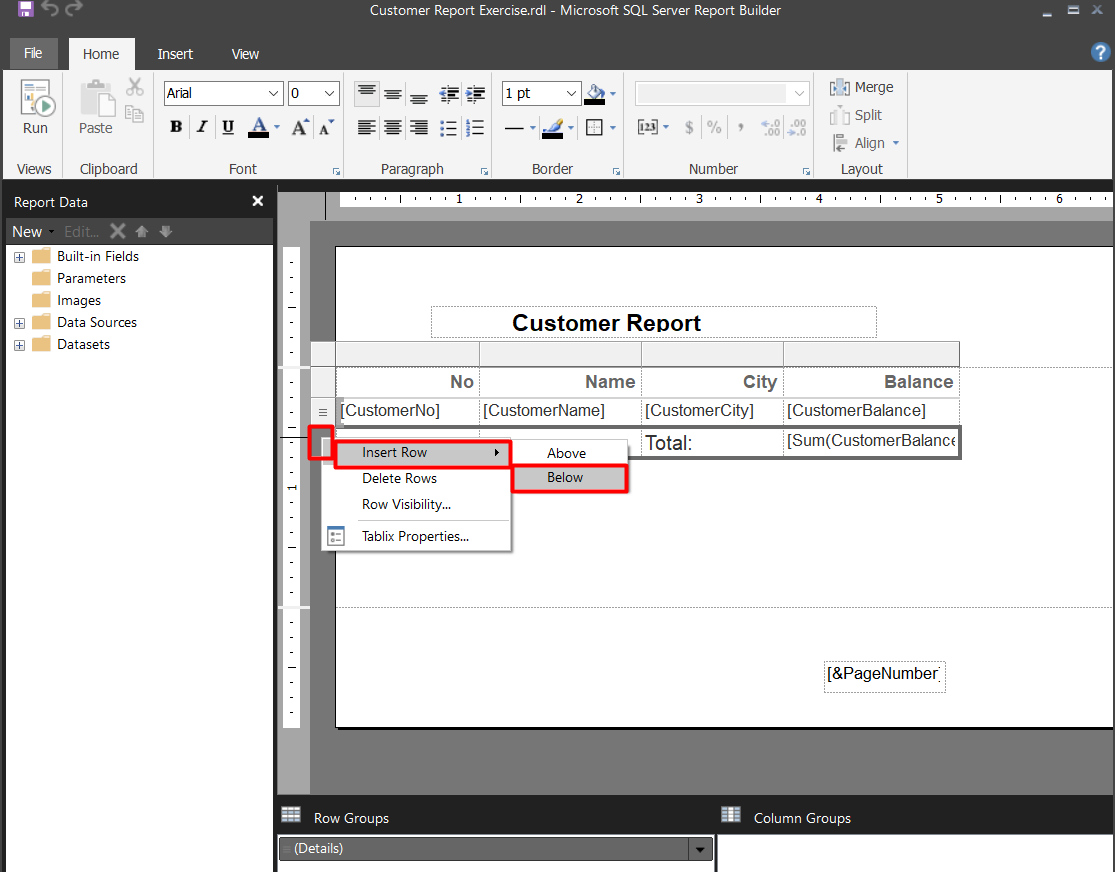
Figure 15 – Declaring a variable for total balance in Microsoft Dynamics Business Central on premises or NAV - Insert a new row in the table.
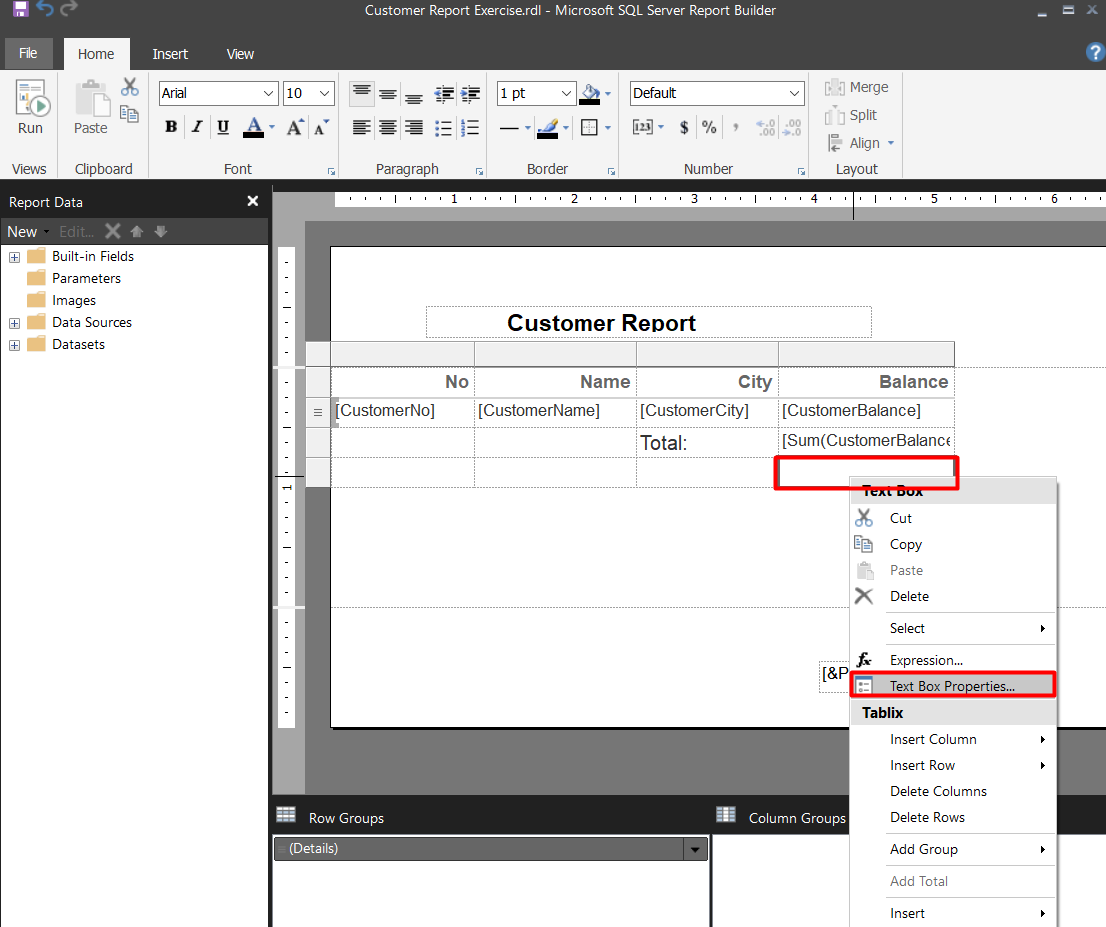
Figure 16 – Inserting new row for Total Balance field in Microsoft Dynamics Business Central on premises or NAV - Set the expression for the Total Balance field in the report builder.
Figure 17 – Defining the expression Microsoft Dynamics Business Central on premises or NAV
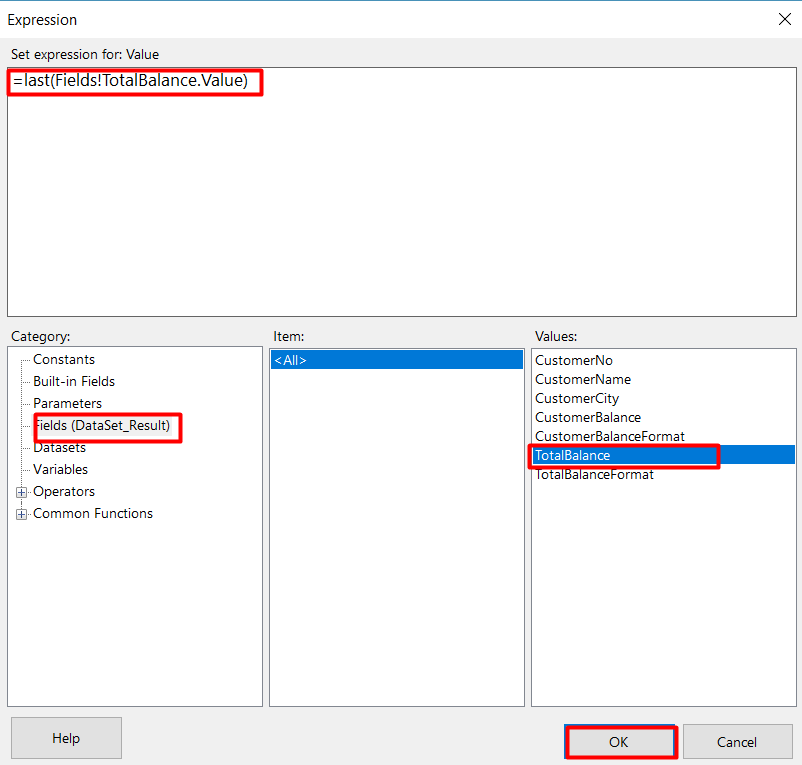
Figure 18 shows the condition for getting the Total Balance in this report. This example uses the last formula to calculate every customer balance and add to the previous customer balance.
Figure 18 – The condition for getting the Total Balance in Microsoft Dynamics Business Central on premises or NAV
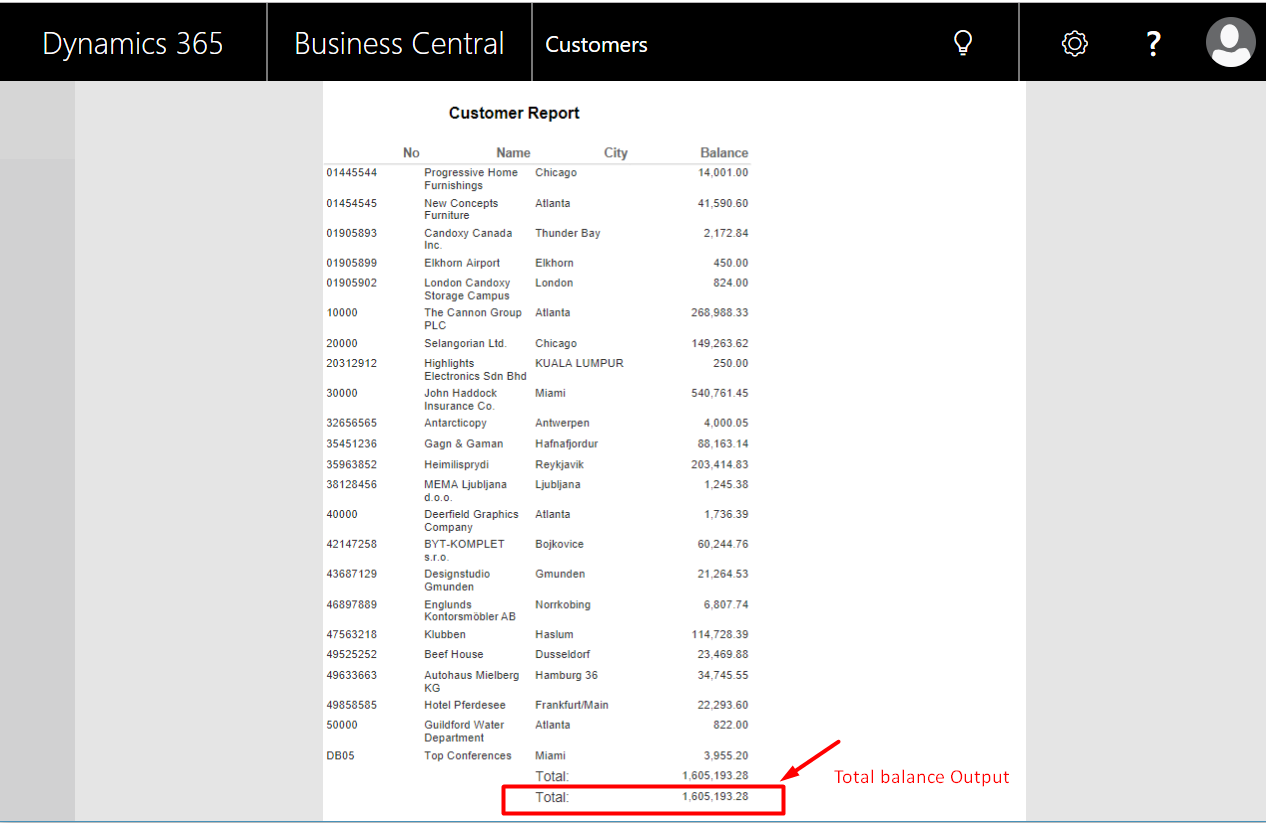
Figure 19 – The result for the Total Balance in Microsoft Dynamics Business Central on premises or NAV
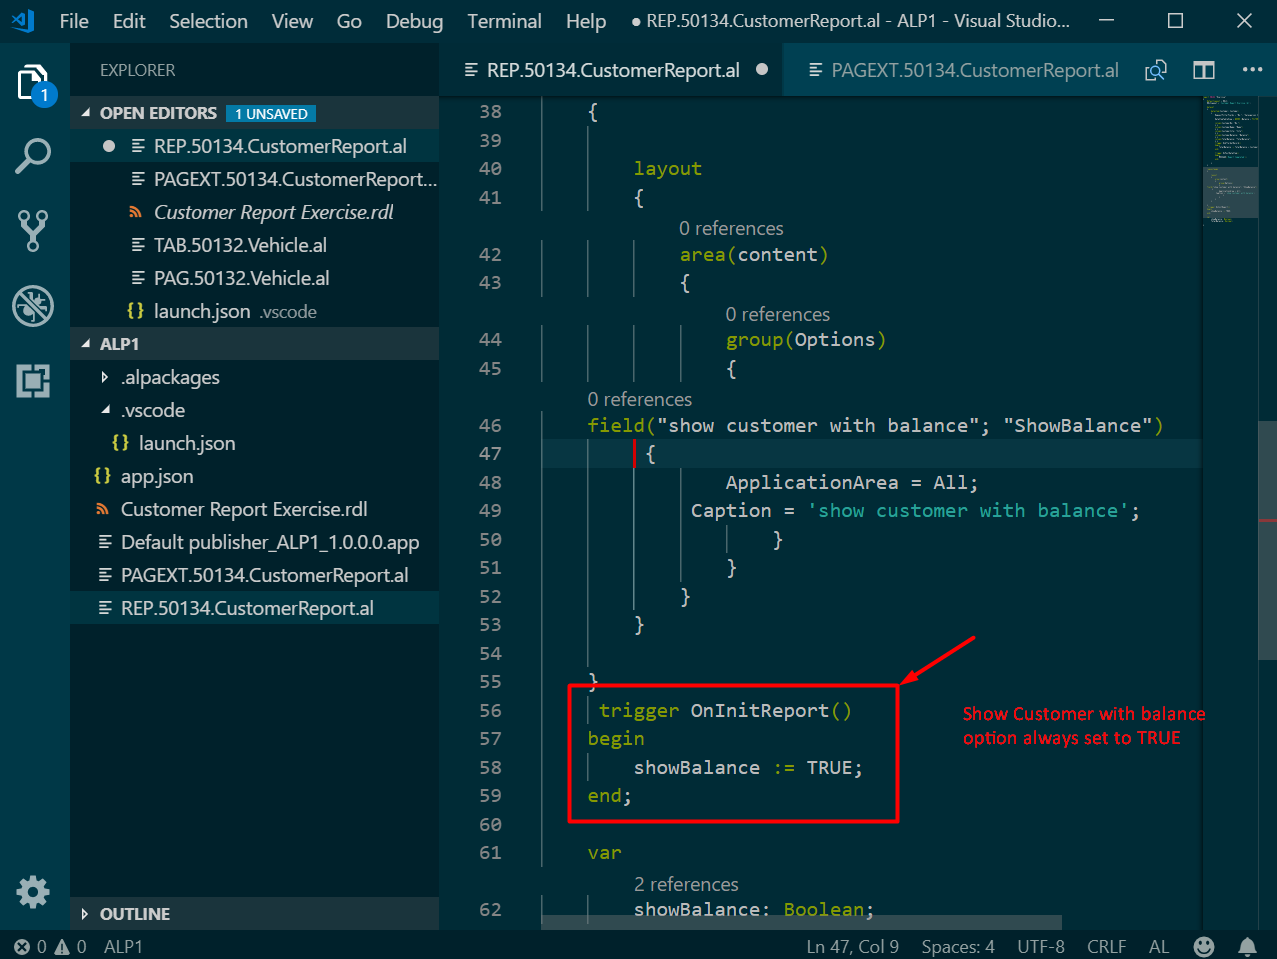
The Show Balance Customer option is always set to TRUE, so by default it should be TRUE anytime the report is run or the request page is opened.
Figure 20 – When the report is loaded, a trigger is fired in Microsoft Dynamics Business Central on premises or NAV
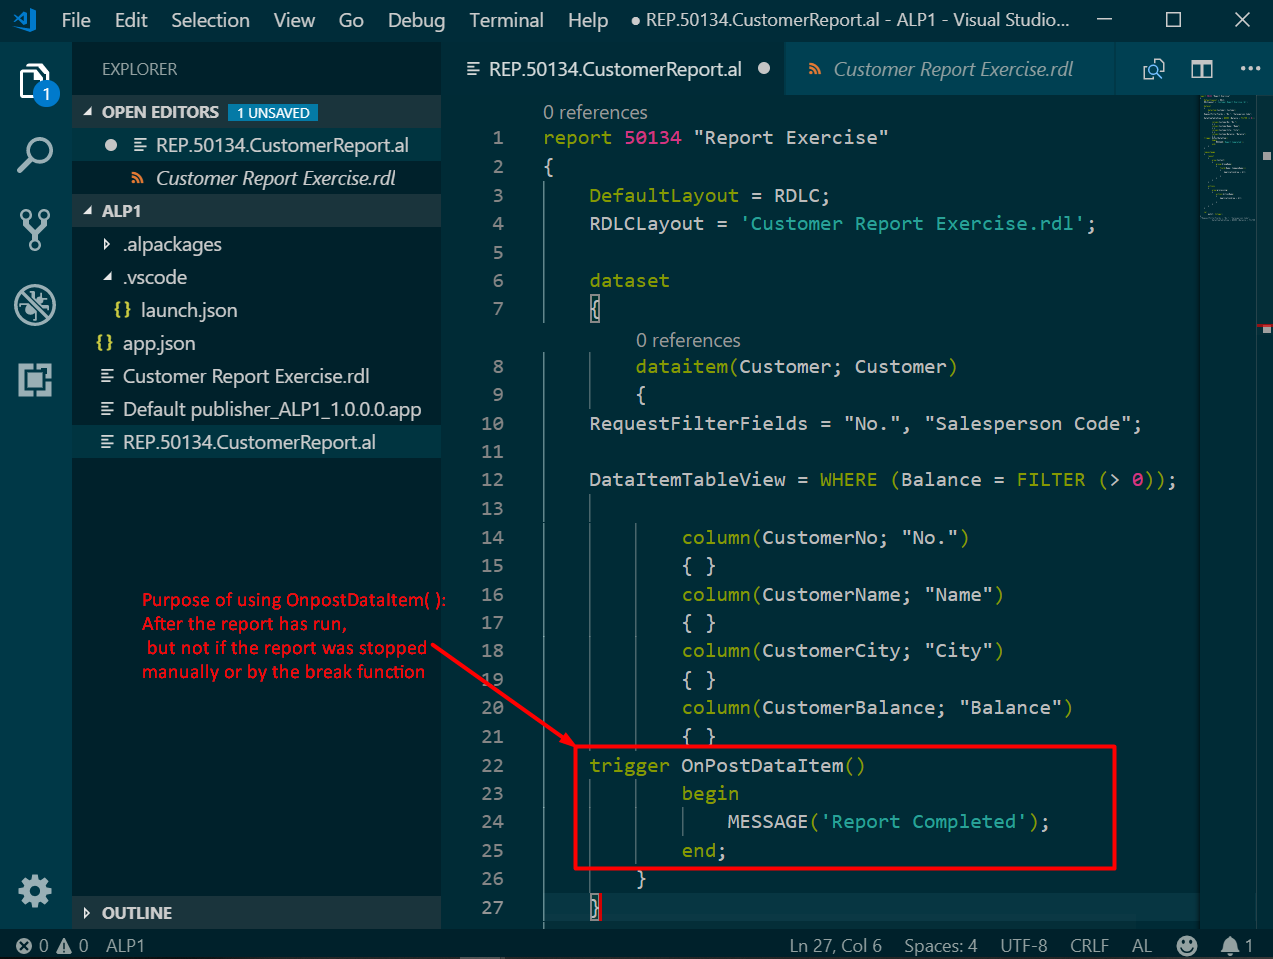
NOTE: When you publish the report, make sure the default request page is set to TRUE. - To set up a simple message, ‘Report Completed’, to be shown at the end of the report, use the appropriate Report Trigger to write a line of AL code for it, as shown in Figure 23.
Figure 21 – Setting up a simple message to include once the report is completed in Microsoft Dynamics Business Central on premises or NAV
If you have any questions about reporting or other Dynamics NAV or Business Central questions for any version, contact ArcherPoint.
Read more “How To” blogs from ArcherPoint for practical advice on using Microsoft Dynamics Business Central or NAV.
If you are interested in NAV/Business Central development, check out our collection of NAV and Business Central Development Blogs.
Trending Posts
Stay Informed
Choose Your Preferences
"*required" indicates required fields

