Creating a Report in Microsoft Dynamics 365 Business Central or NAV

This blog provides an overview of how a report is created in Microsoft Dynamics 365/NAV and how to publish it to the client. It also discusses how to build a report in the SQL Server Report Builder.
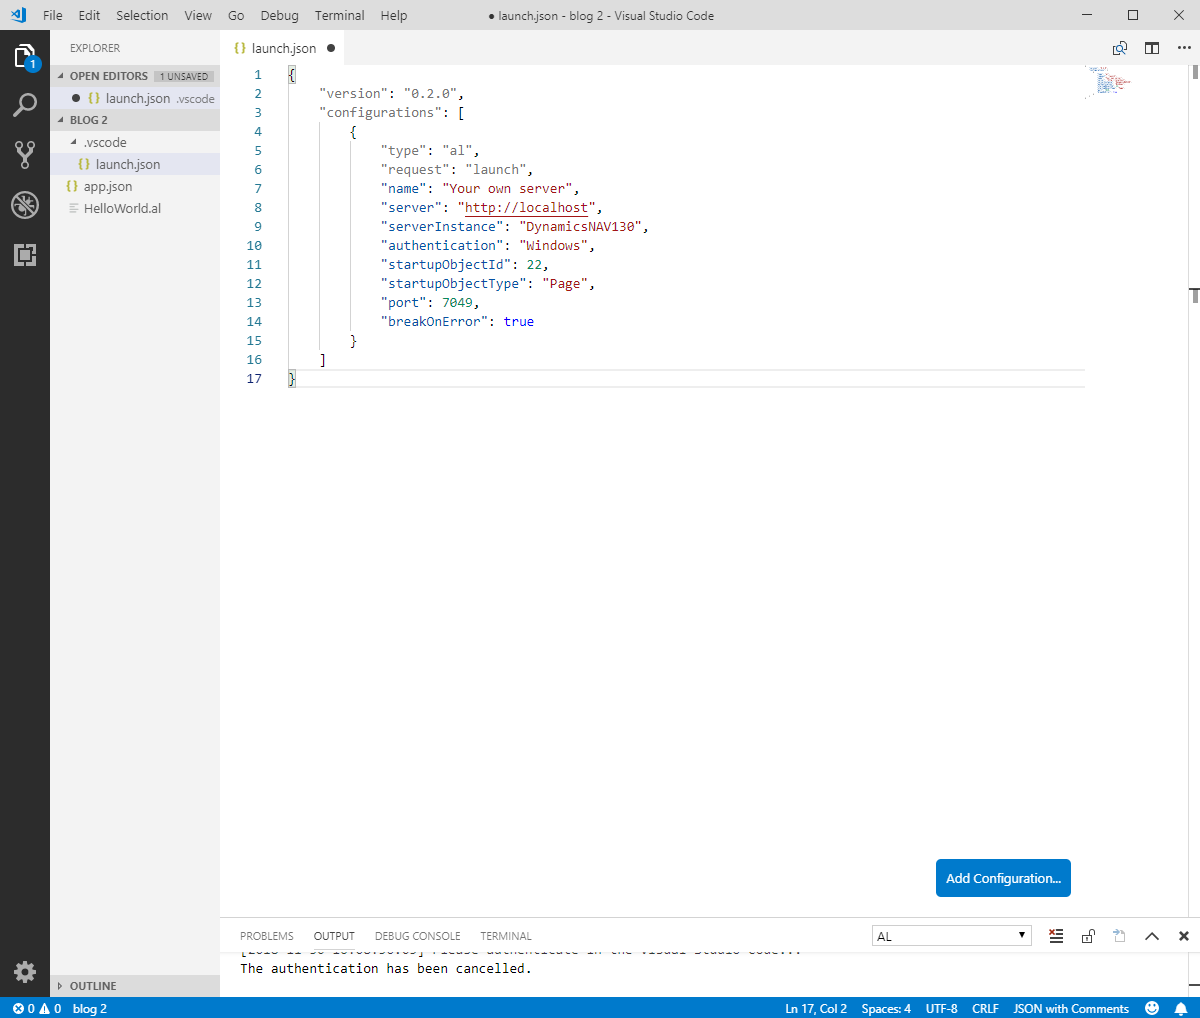
- Developers will know that you need to configure the app.json and launch.json. Set up all the basic settings that are required in launch.json.
Figure 1 – Basic settings in launch.json in Microsoft Dynamics 365 Business Central/NAV
Note: You always need to verify some basic configurations like name and the ServerInstance and the startupObjectId.
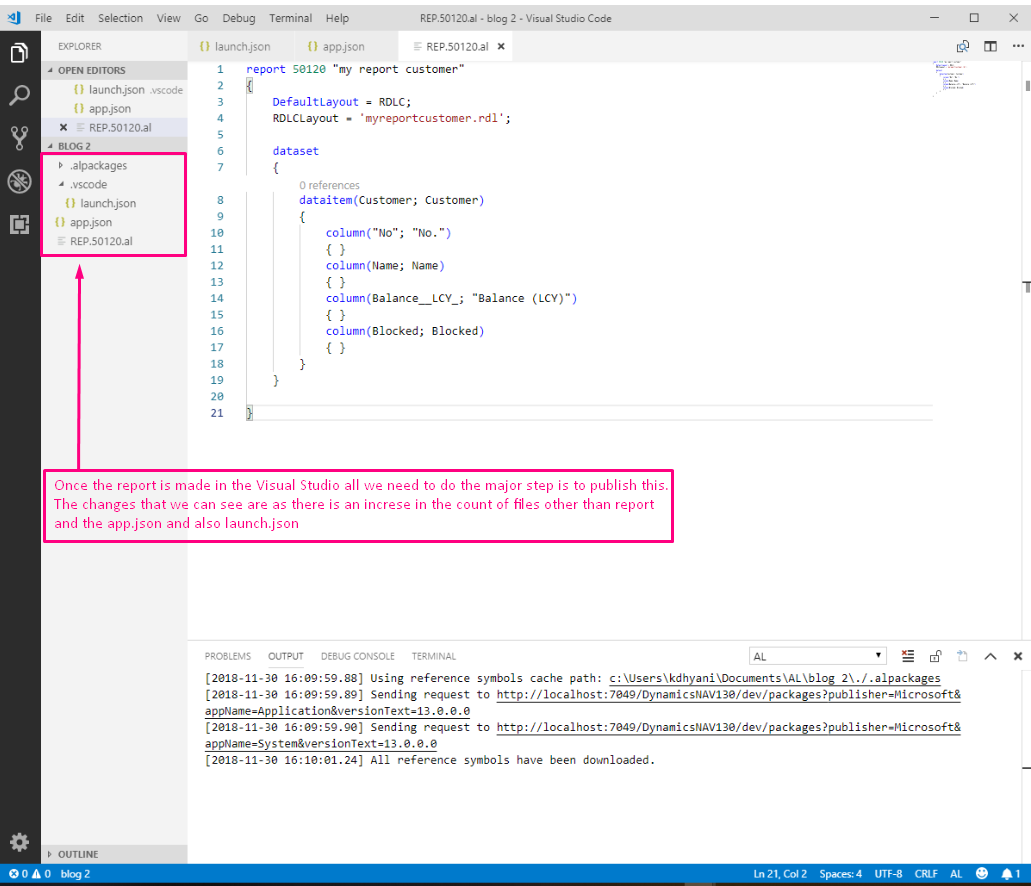
- Once the configuration is completed and the symbols are downloaded, remove the “HelloWorld.al” file and then create the Report file, as shown in the example in Figure 2.
Figure 2 – Creating a report file in Microsoft Dynamics 365 Business Central/NAV - Once the report coding is done, either go to the “View>>Command Pallet” or use the shortcut Ctrl+Shift+P.
- Once you publish the report programming file, you see a new file created. If you open that new file, you would see that it would be difficult to read the entire file.
- Reveal the file in the explorer by right-clicking over myreportcustomer.rdl and then selecting “Reveal” in explorer.
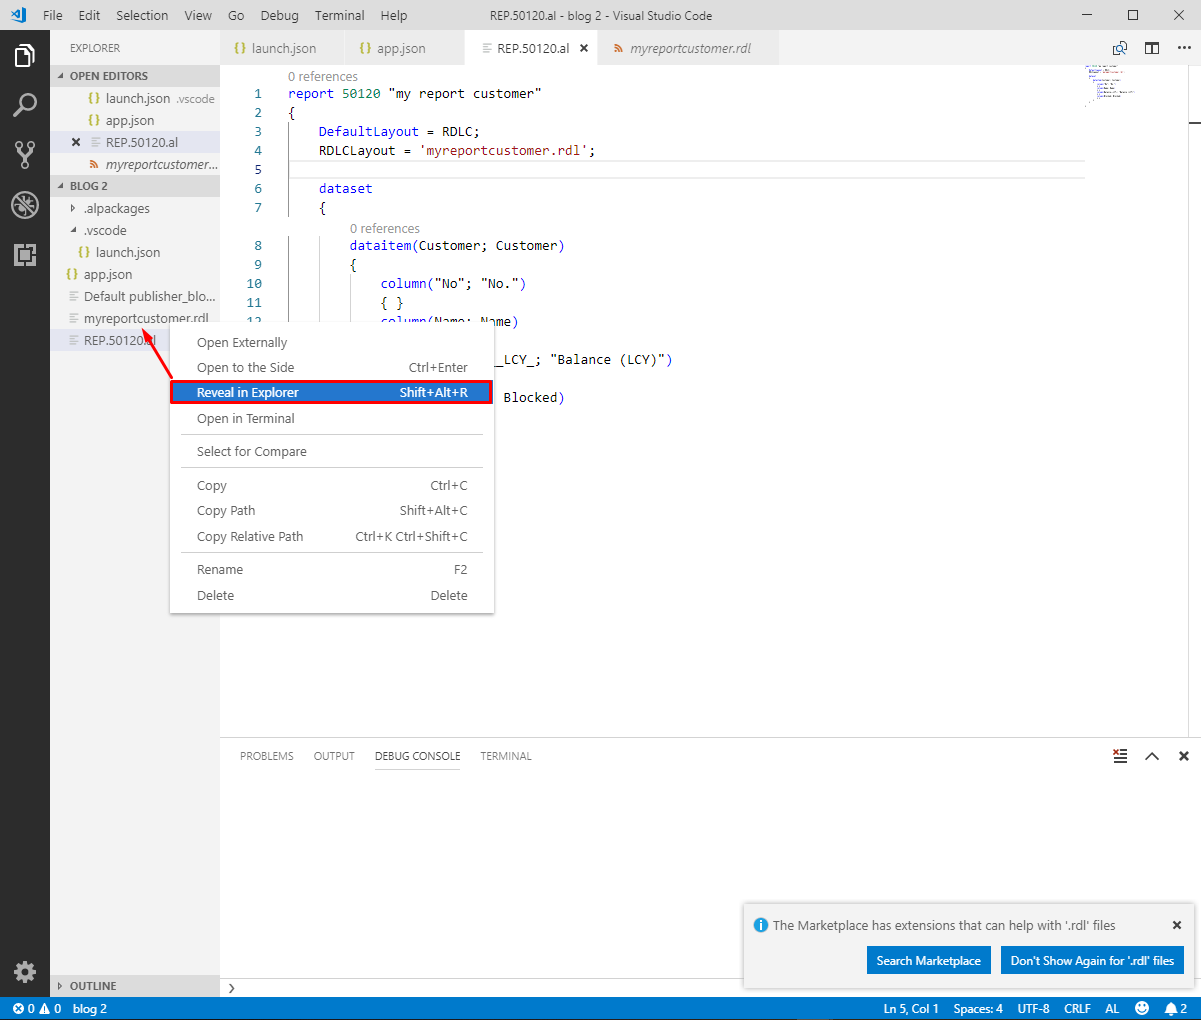
Figure 5 – A new file created in Microsoft Dynamics 365 Business Central/NAV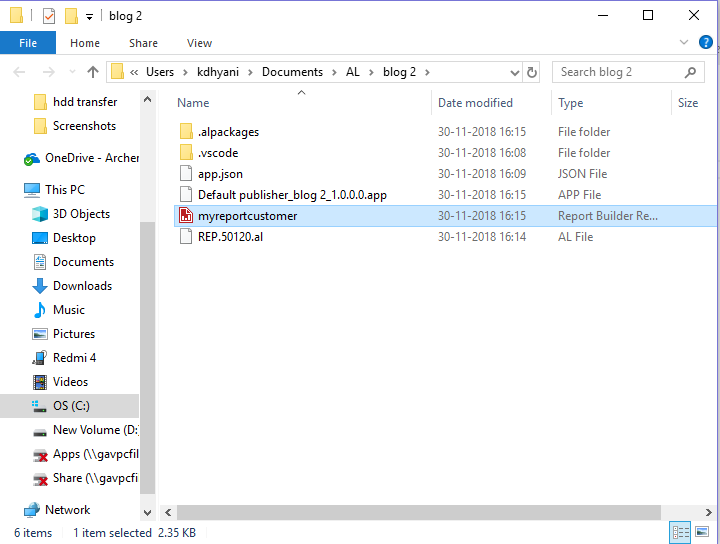
Figure 6 – File revealed in the explorer in Microsoft Dynamics 365 Business Central/NAV
Once you open the file, you are in the new window of the Microsoft SQL Server Report Builder. The next step goes into table designing and layout of the table. This is also where a personalization can be made for a customer.
Following are the components of the Report Builder that are involved in report design:
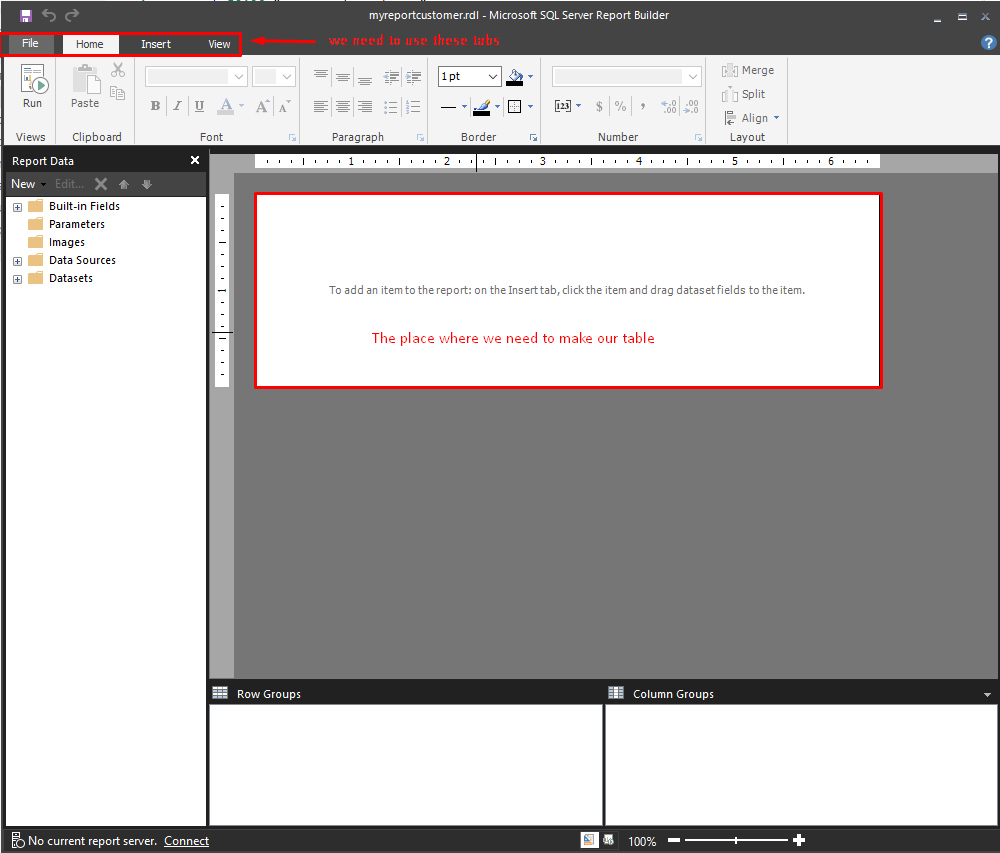
Figure 7 – The center of the Report Builder screen in Microsoft Dynamics 365 Business Central/NAV: table design and possible outcomes that can be applied to a report
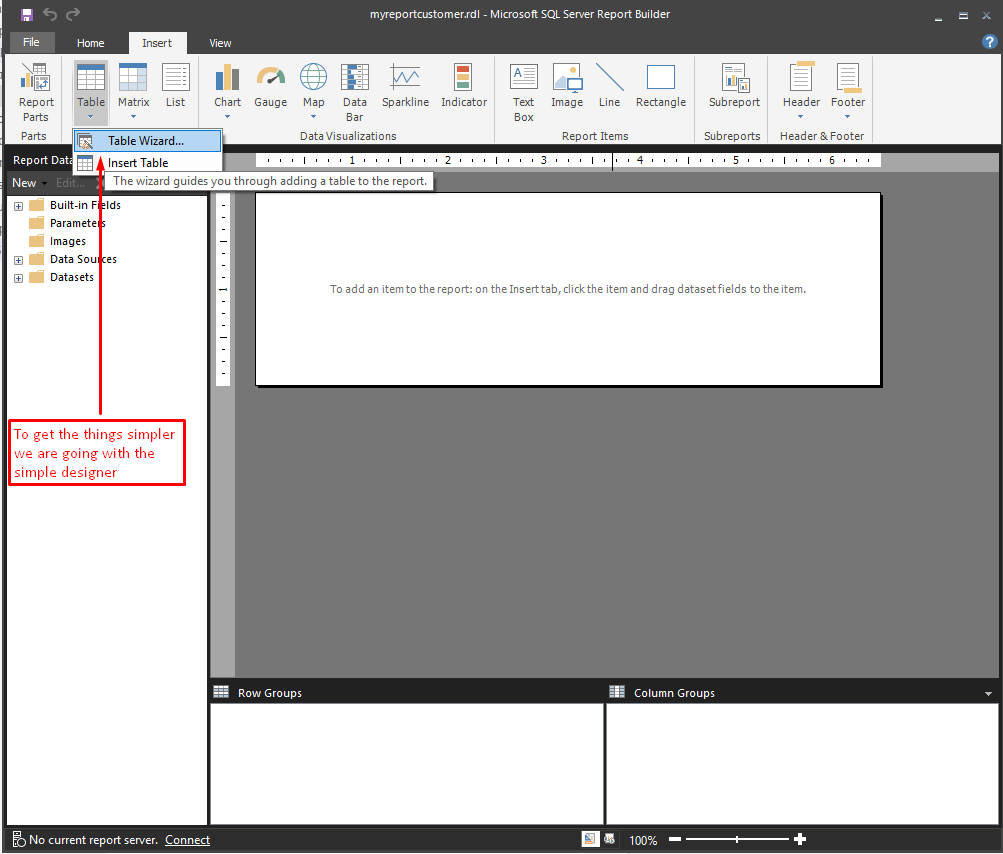
Figure 8 – The table wizard in the Report Builder in Microsoft Dynamics 365 Business Central/NAV
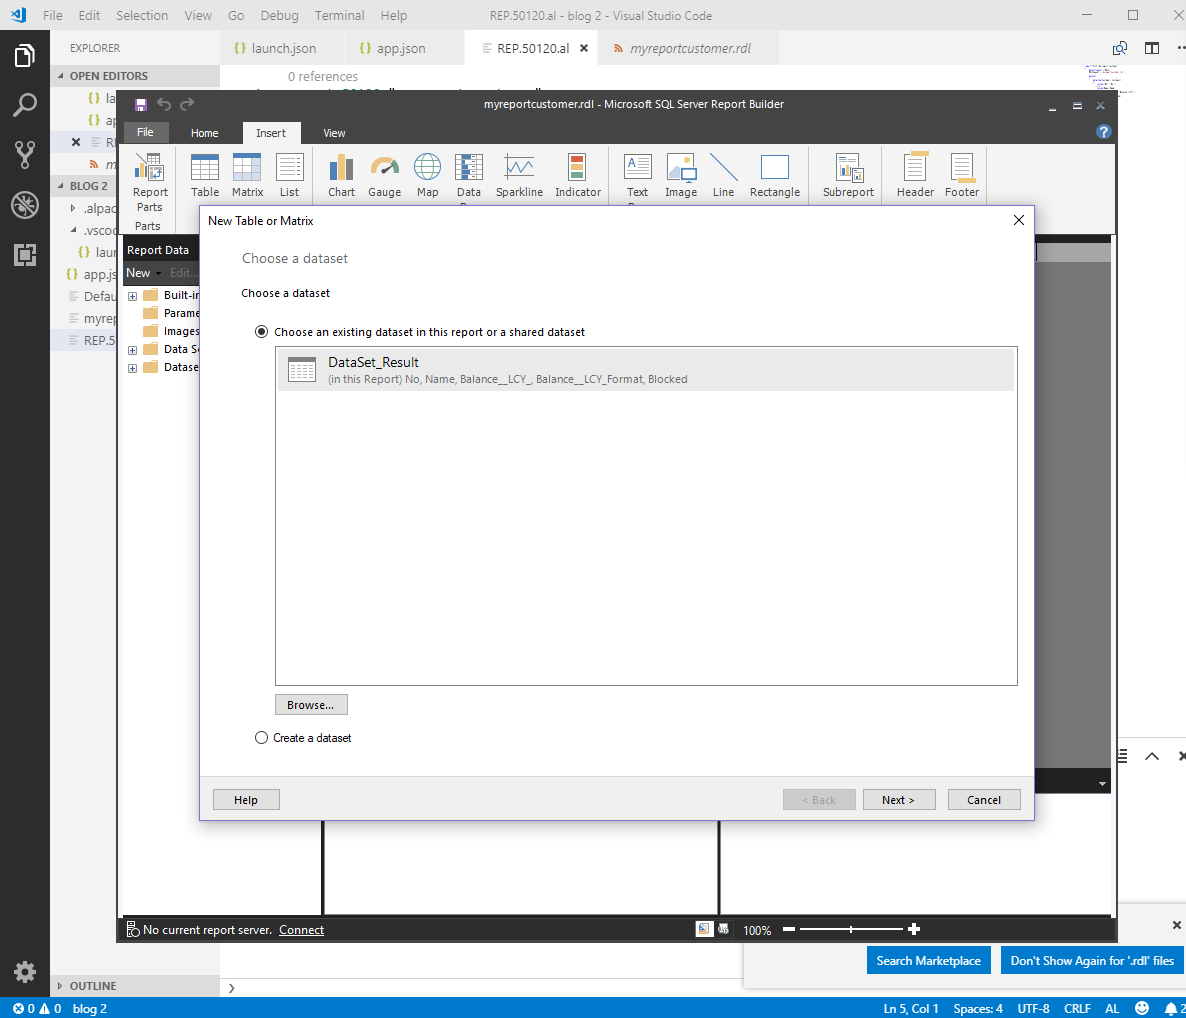
Figure 9 – Window in which members of the report are arranged in the Report Builder in Dynamics 365 Business Central/NAV
- Select the members and drag them to the “∑ Values”.
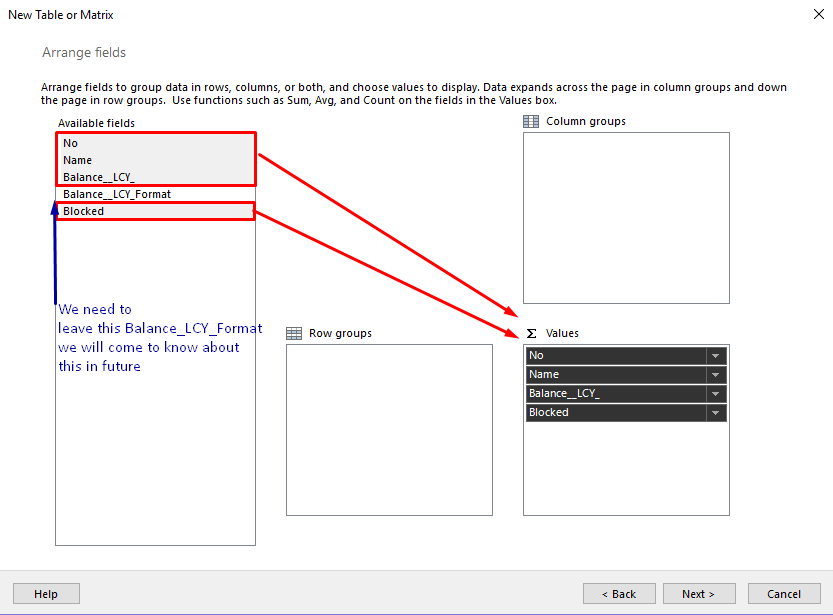
Figure 10 – Selecting members of a report in the Report Builder in Dynamics 365 Business Central/NAV - You will see a preview similar to Figure 11 that will display how the table will be prepared as per the order of the fields selected.
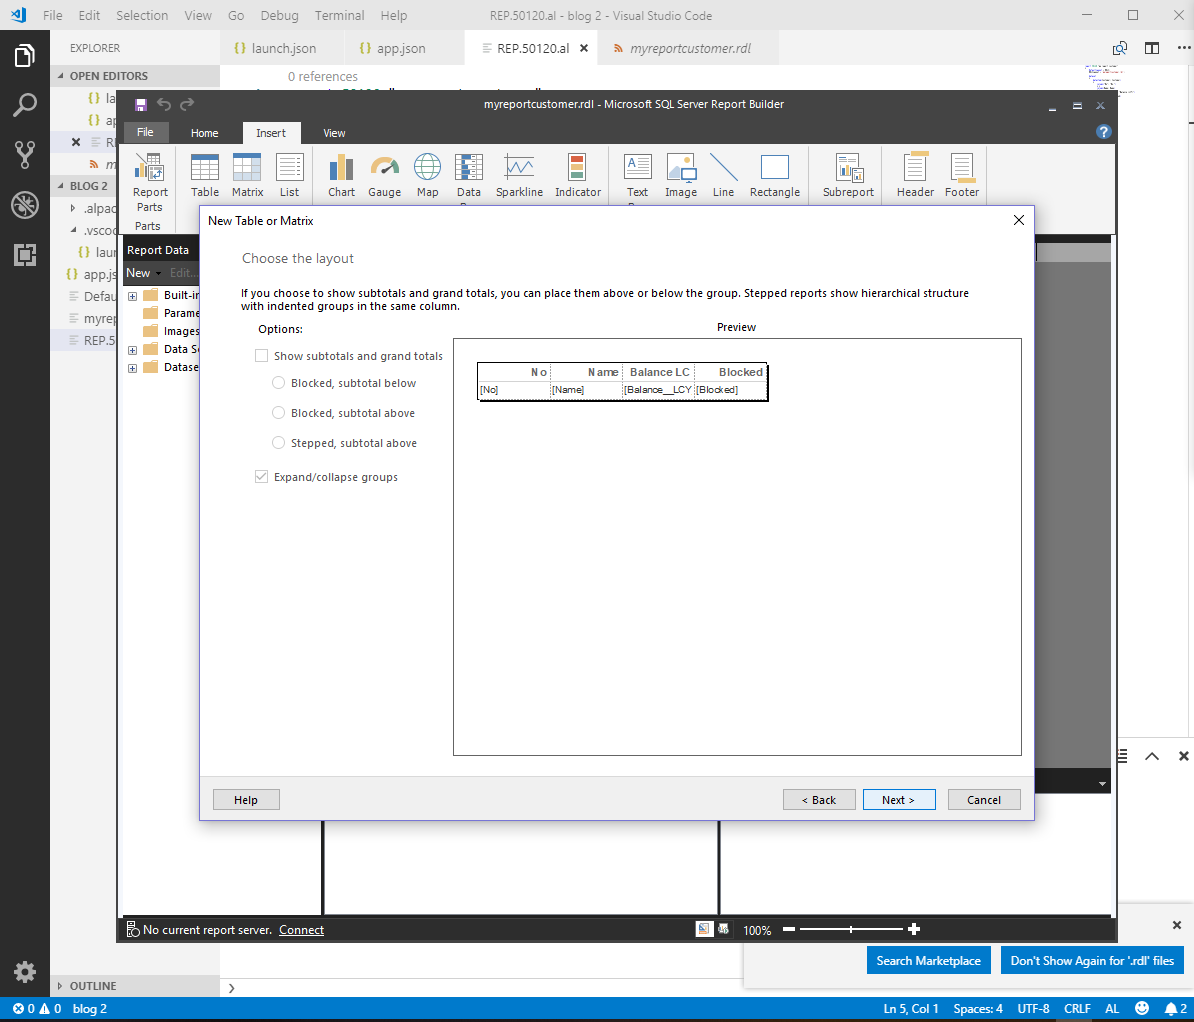
Figure 11 – Preview of table display in the Report Builder in Dynamics 365 Business Central/NAV - Click Finish and head to the designer part of the table.
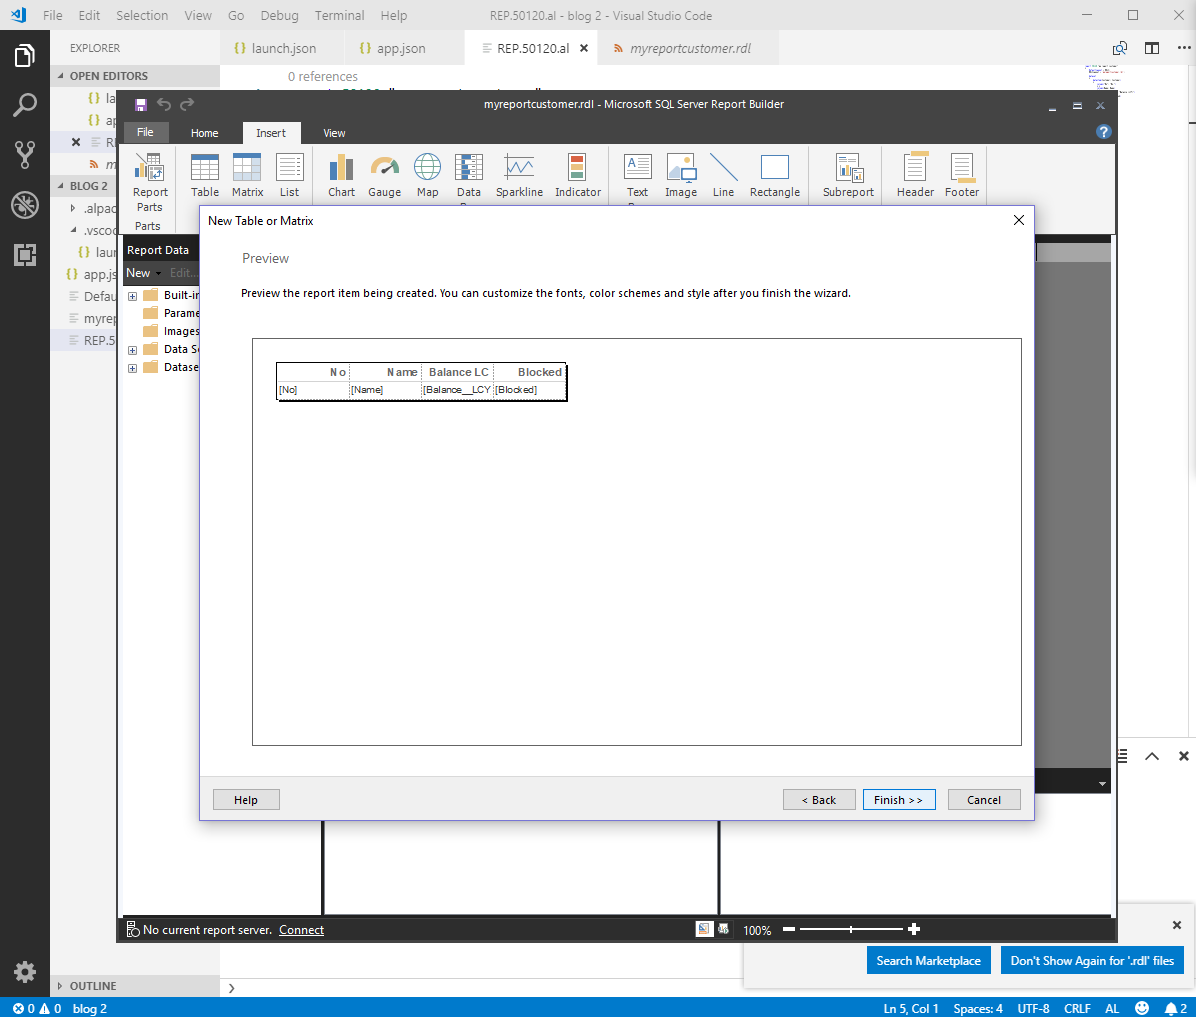
Figure 12 – Designer in the Report Builder in Dynamics 365 Business Central/NAV - The figure below helps you understand how the report is built with the help of a wizard.
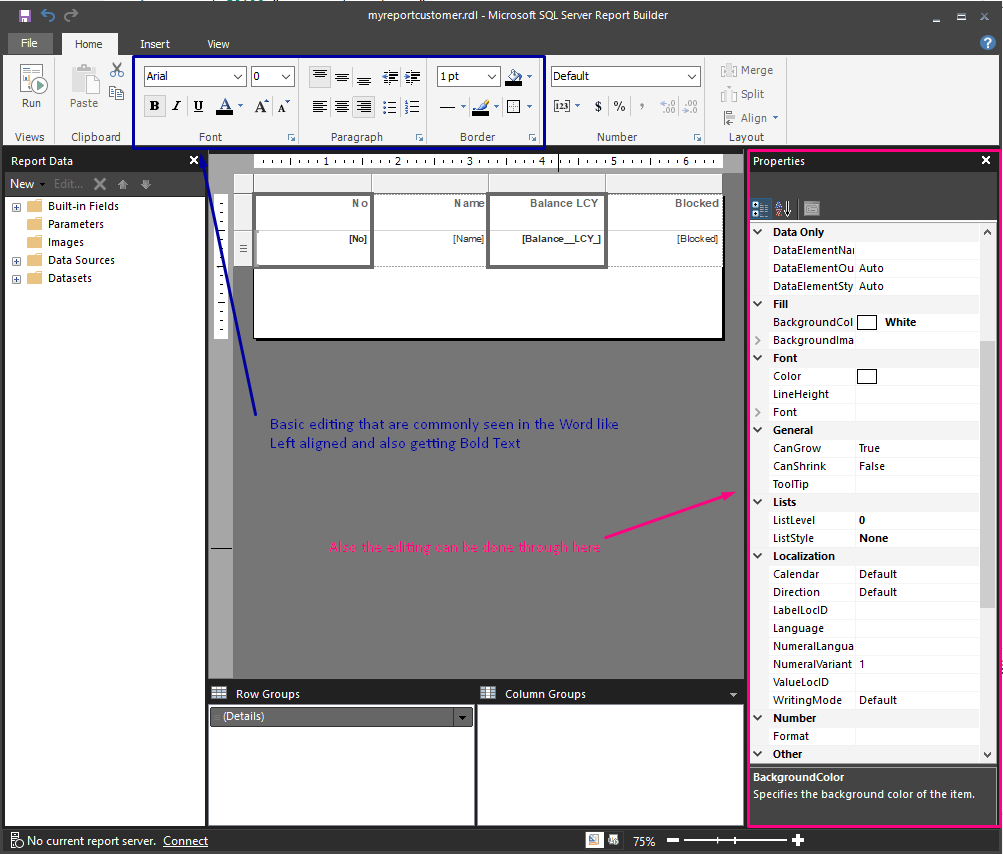
Figure 13 – Designing a report with the help of a wizard in the Report Builder in Dynamics 365 Business Central/NAV
Note: In this example, basic changes are demonstrated with personalization as per standard requirements of a customer.
- Once the customizatom is completed, save the report and open visual studio. Create the page extensions so that they will be visible on the web client. You can also add a button wherever you want to place it.
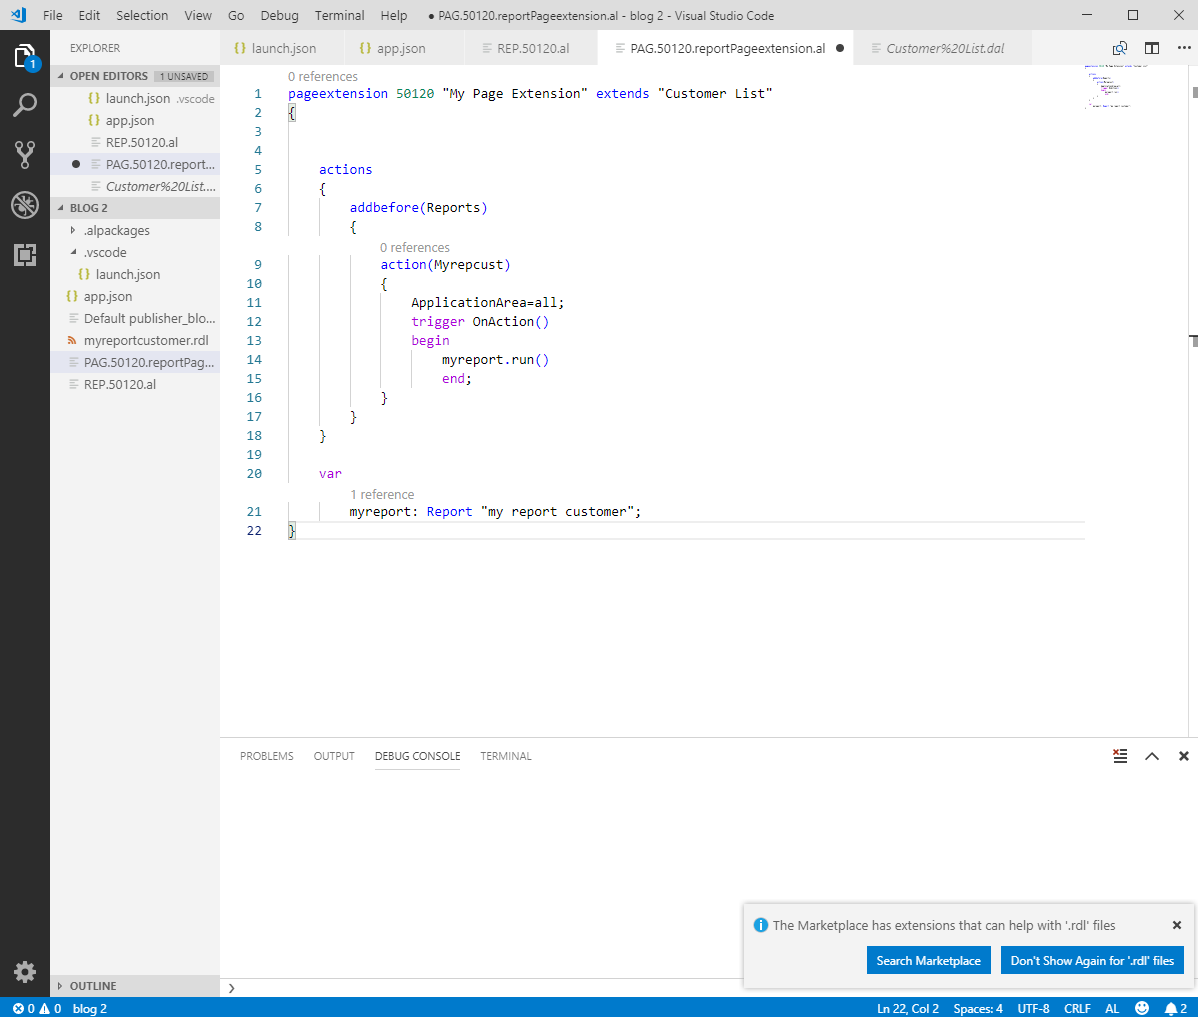
Figure 14 – Using visual studio to create page extensions that will be visible in the web client in the Report Builder in Dynamics 365 Business Central/NAV - Once the page extension is created, publish it.
- Once it is published, go the web client and check to see if the report is working properly.
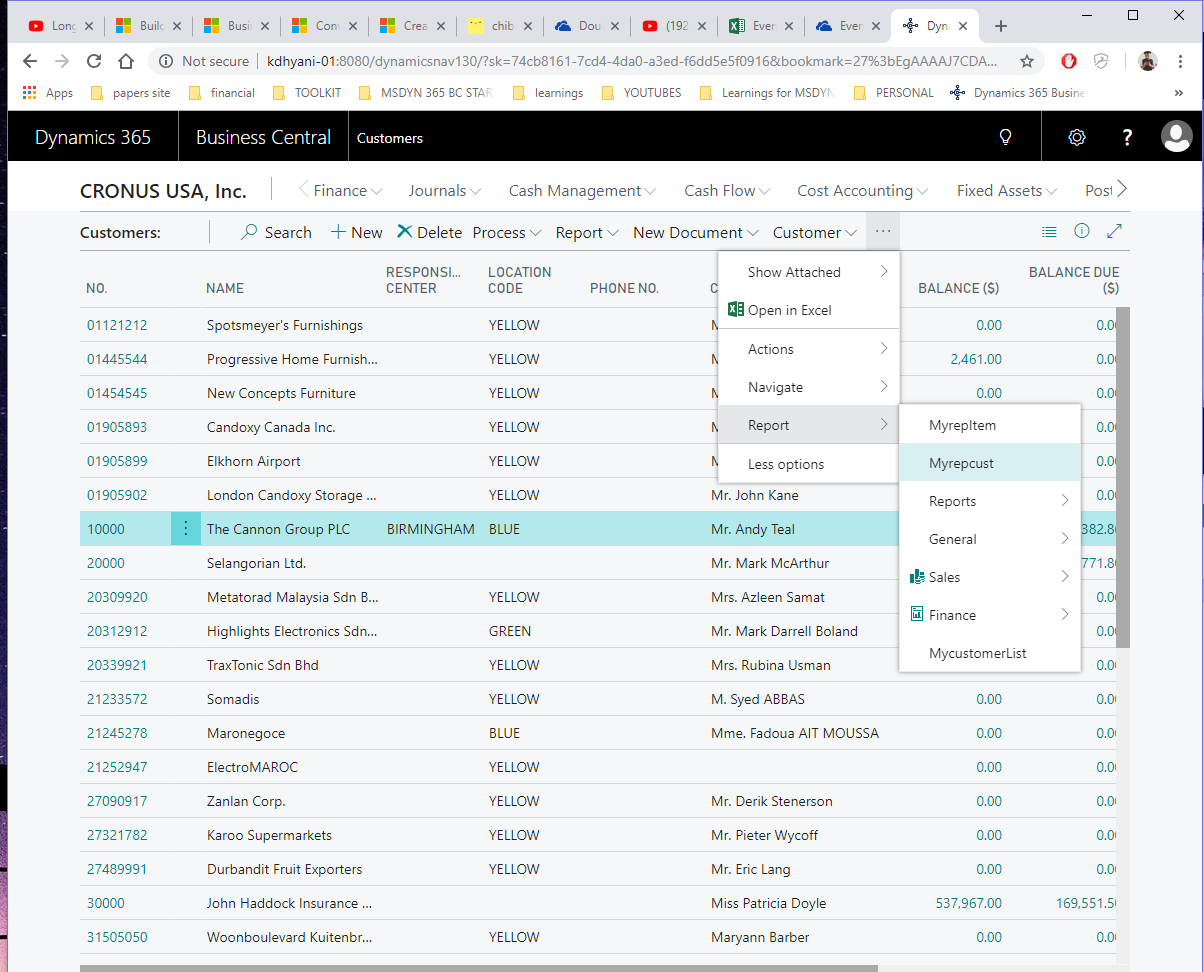
Figure 15 – Report created in the Report Builder in Dynamics 365 Business Central/NAV
You can see the button placed earlier and can add more as needed.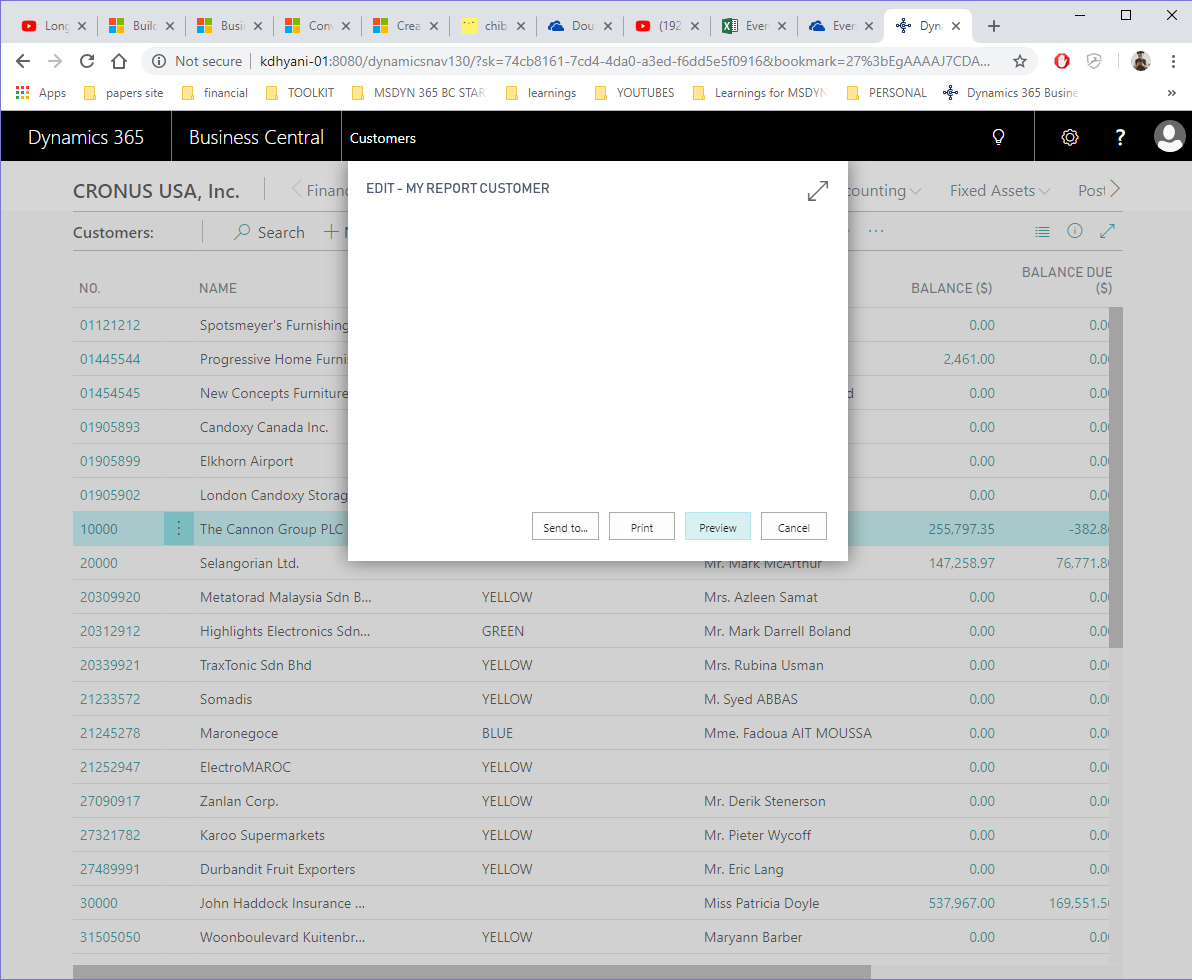
Figure 16 – Adding a button in the Report Builder in Dynamics 365 Business Central/NAV
- From here, you can preview the report, print it, schedule a time for it to be printed later, or send it to email.
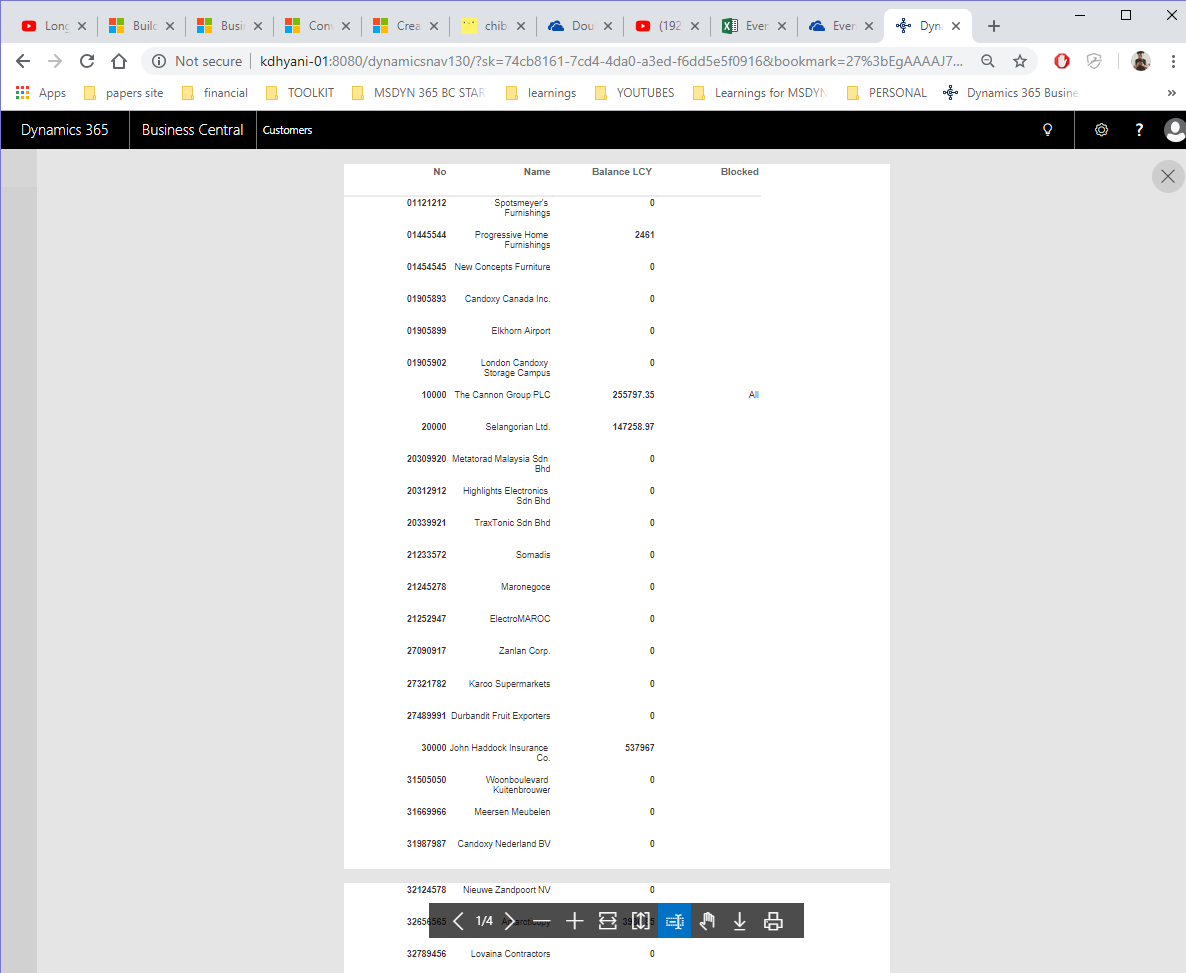
Figure 17 – Options for what to do with a report after creating it in the Report Builder in Dynamics 365 Business Central/NAV
If you have any questions about report building or other Dynamics NAV or Business Central questions for any version, contact ArcherPoint.
Read more “How To” blogs from ArcherPoint for practical advice on using Microsoft Dynamics Business Central or NAV. If you are interested in NAV/Business Central development, check out our collection of NAV Development Blogs.
Trending Posts
Stay Informed
Choose Your Preferences
"*required" indicates required fields

