Customizing Microsoft Dynamics Business Central on premises using Extensions

Extensions make it easy and convenient to create customizations in Microsoft Dynamics Business Central without interfering with the way the base code operates or affecting future upgrades. This blog demonstrates how to use Extensions for adding fields to the Customer table, using the AL programming language.
- Create a new file for table extension.Figure 1 – Creating a new file for a table extension in Dynamics Business Central on-premises
You should define a standard file name format for files. For creating the table extension, use the shortcut: tt. By doing this, we have many options for selecting the ttableext.
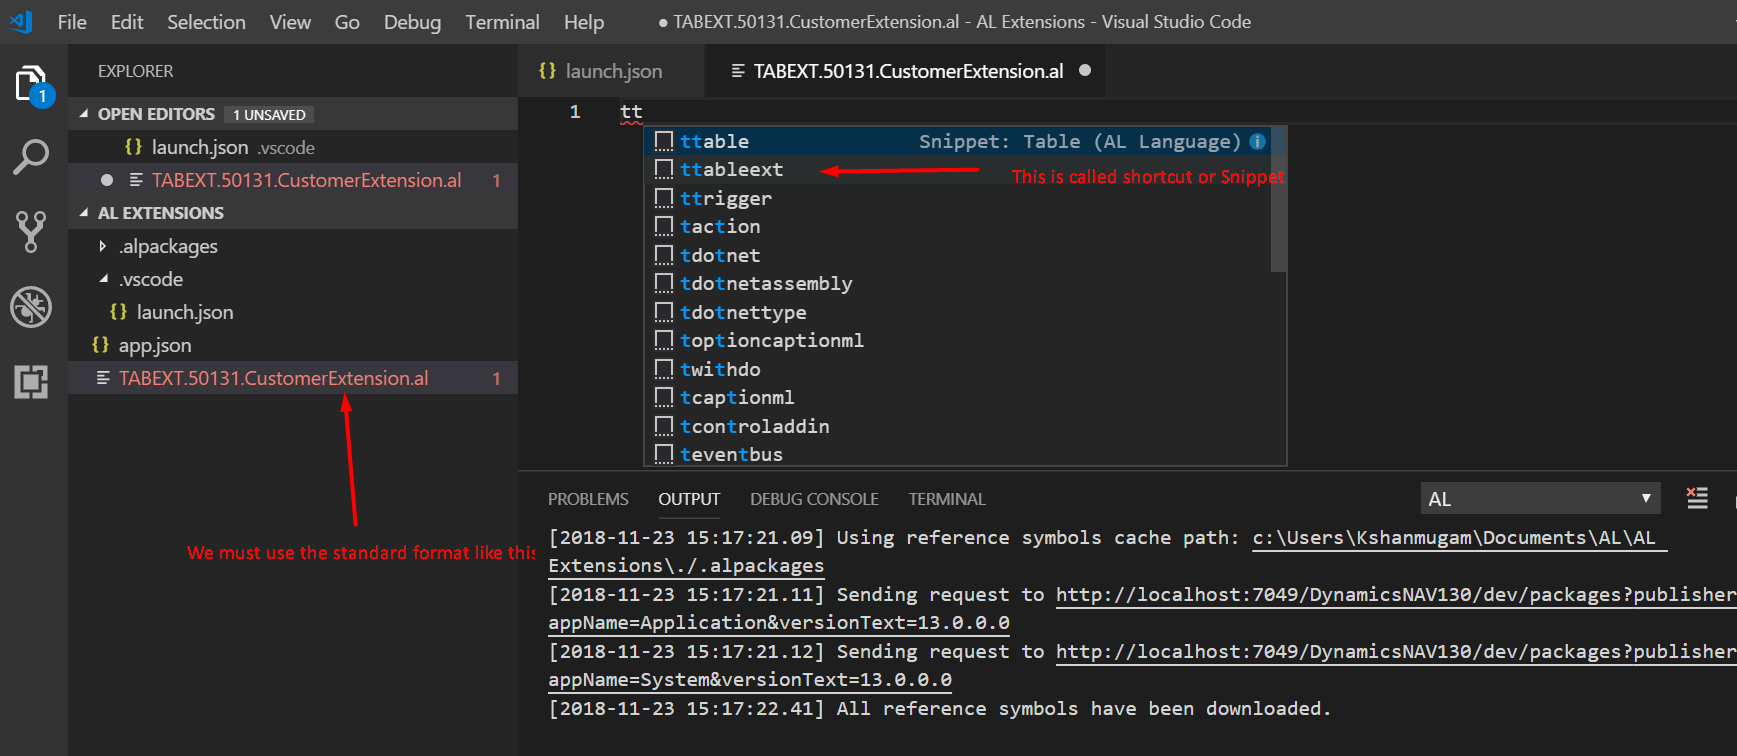
Figure 2 – Naming the file for the table extension in Dynamics Business Central on premisesA model table for the table extension follows:
Figure 3 – Model table for a table extension - Now that we have discussed the concepts used in the table extension, it’s time to add some fields using the snippet tf(tfield) as shown below.
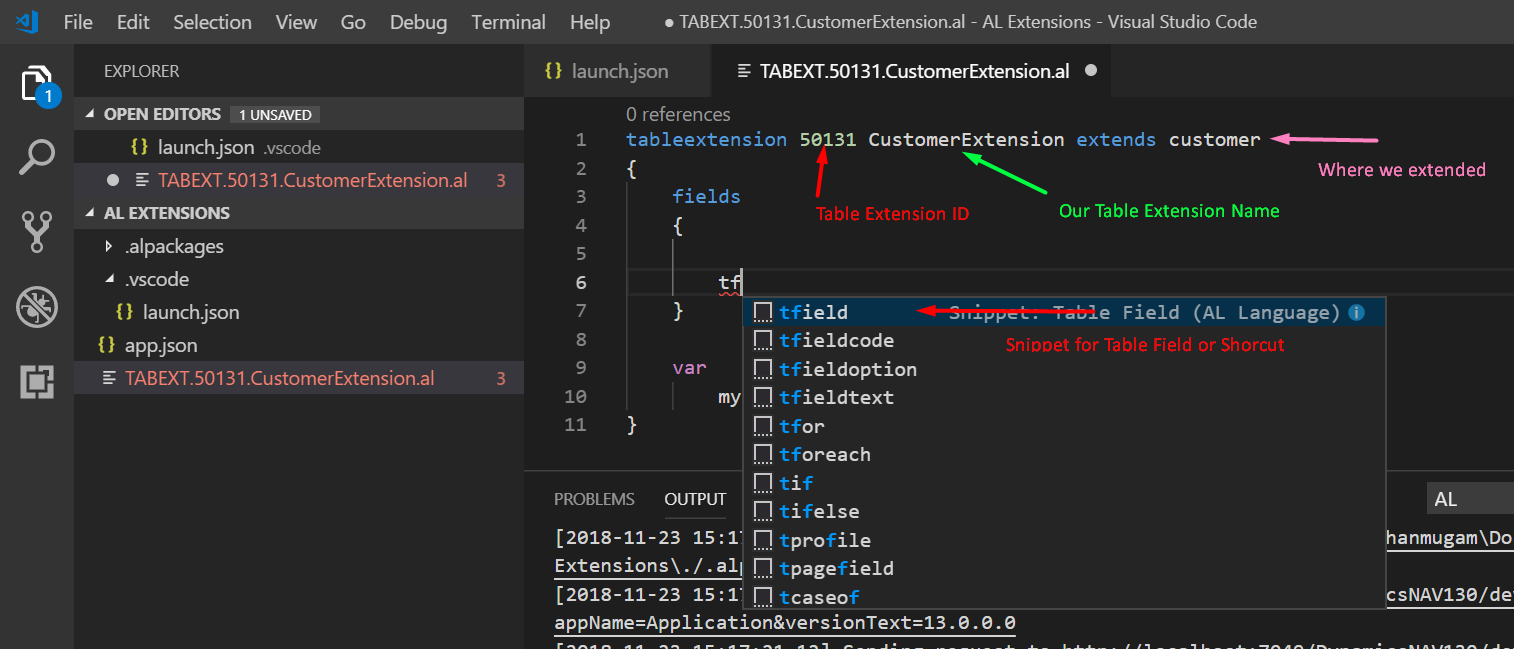
Figure 4 – Adding fields to a customer card
After adding four fields, the table extension is complete, as shown below.
Figure 5 – Customer card with four new fields - Create a new file for page extension (as shown below). For a table extension, use the snippet tpageext (similar to table extension).
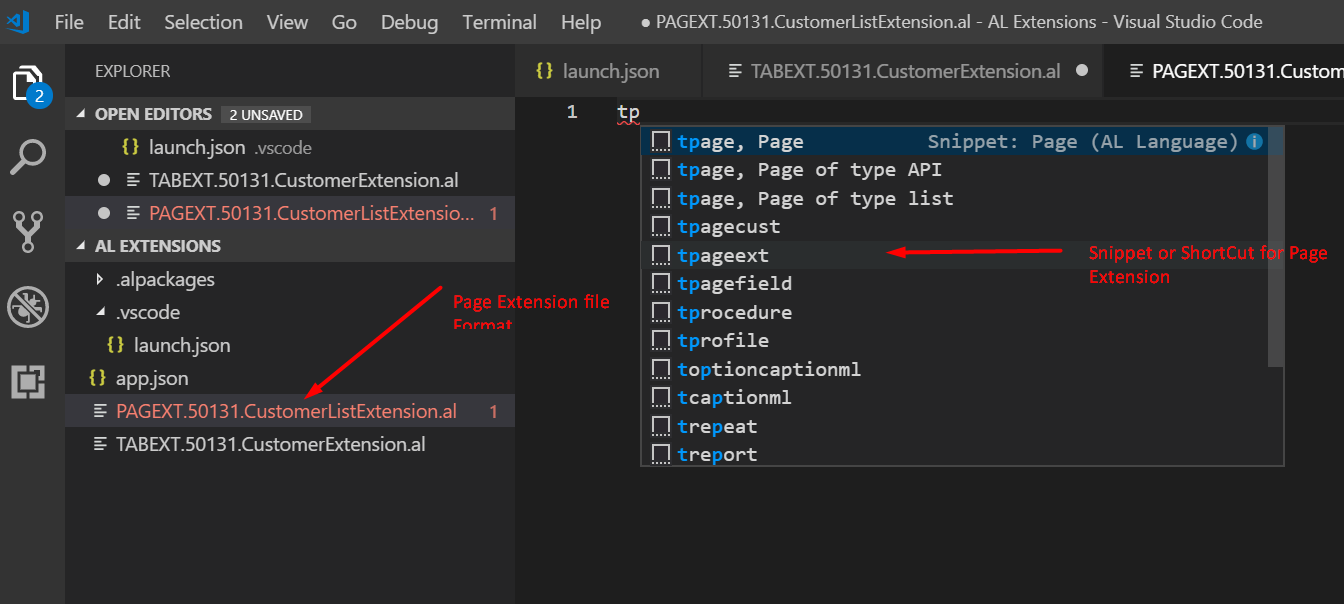
Figure 6 – Creating a new file for a page extension
The following screenshot shows some additional tips about page extensions; choose the action where you want to add your Extensions.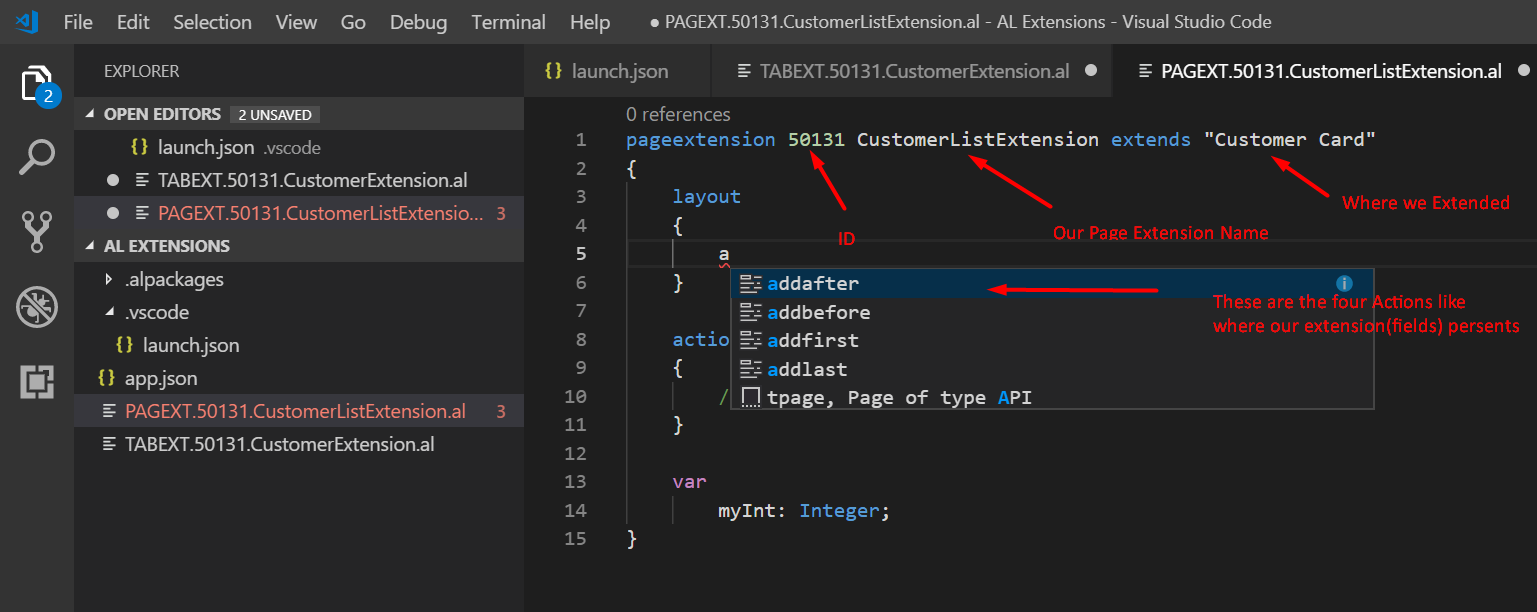
Figure 7 – Additional tips about page extensions in Business Central - Then for creating the page field, you can use the snippet called tpagefield, as shown below.
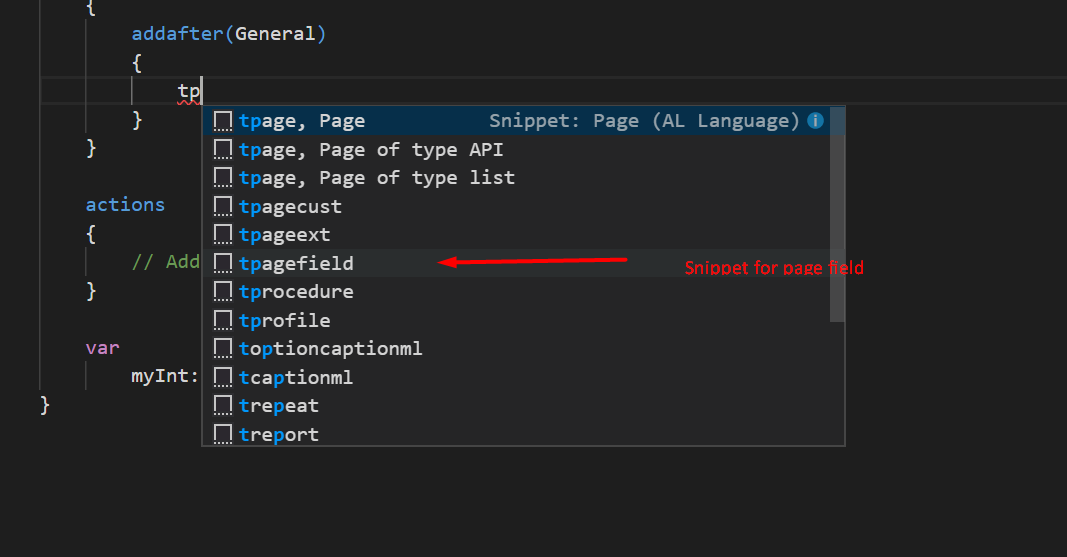
Figure 8 – Select the tpagefield snippet in Business Central
The following shows the page fields.
Figure 9 – Business Central page fields - After completing all these steps, open the Command Palette or →AL:Publish or use the F5 keyboard shortcut.
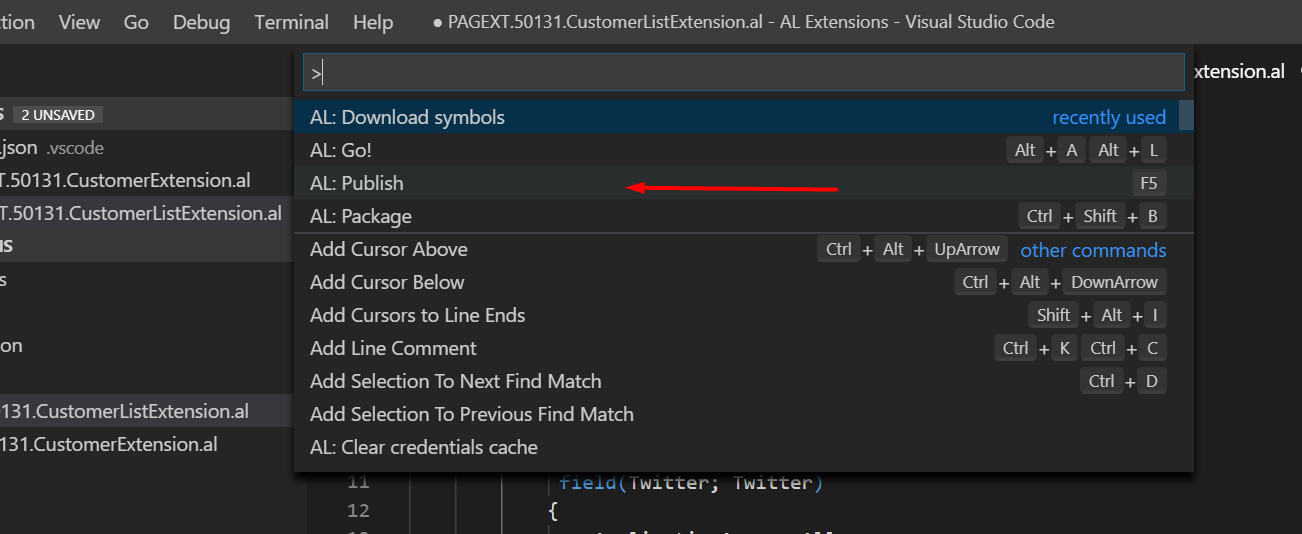
Figure 10 – Open command palette in Business Central on-premises
You can now see the fields see the new fields, added to the Customer table.
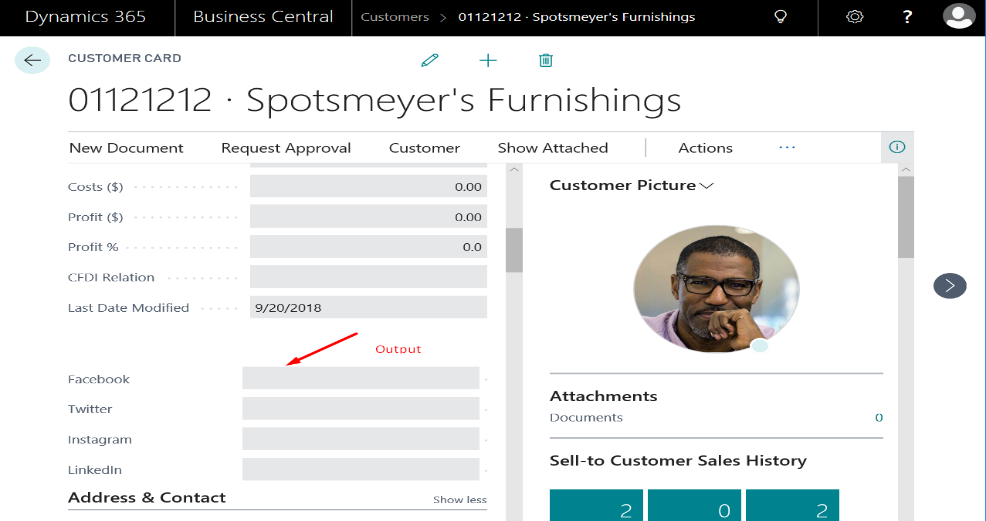
Figure 11 – New field shown on the Business Central customer card
If you have any questions about Extensions for Dynamics NAV or Business Central or other questions about any version, contact ArcherPoint.
Read more “How To” blogs from ArcherPoint for practical advice on using Microsoft Dynamics Business Central or NAV.
If you are interested in NAV/Business Central development, check out our collection of NAV Development Blogs.
Trending Posts
Stay Informed
Choose Your Preferences
"*required" indicates required fields

