Grouping in RDLC Report in Microsoft Dynamics NAV or Business Central

This blog explains how to do grouping in the RDLC Report in Microsoft Dynamics Business Central or NAV. There are two steps involved: designing the data set and using the Report Builder to set the grouping.
Step 1: Design the Data Set
- In Developer Environment, there are two options to select a new and to modify the existing data set: New and Design. Create a new one by selecting “New.”
- Choose the source as required. In the example in Figure 1, the data source is Customer.
- Provide the fields by selecting Field Menu option and choosing the fields you want.Figure 1 – Selecting a data source and fields for grouping in RLDC report in Microsoft Dynamics Business Central or NAV
The designer set is now complete. - Save the report by providing an ID and Name
Step 2: Create the Group in the Report Builder
- To open the Report Builder, select “Layout” From the “View” menu.
- Provide the fields in the dataset in a table by right-clicking ->insert -> table.
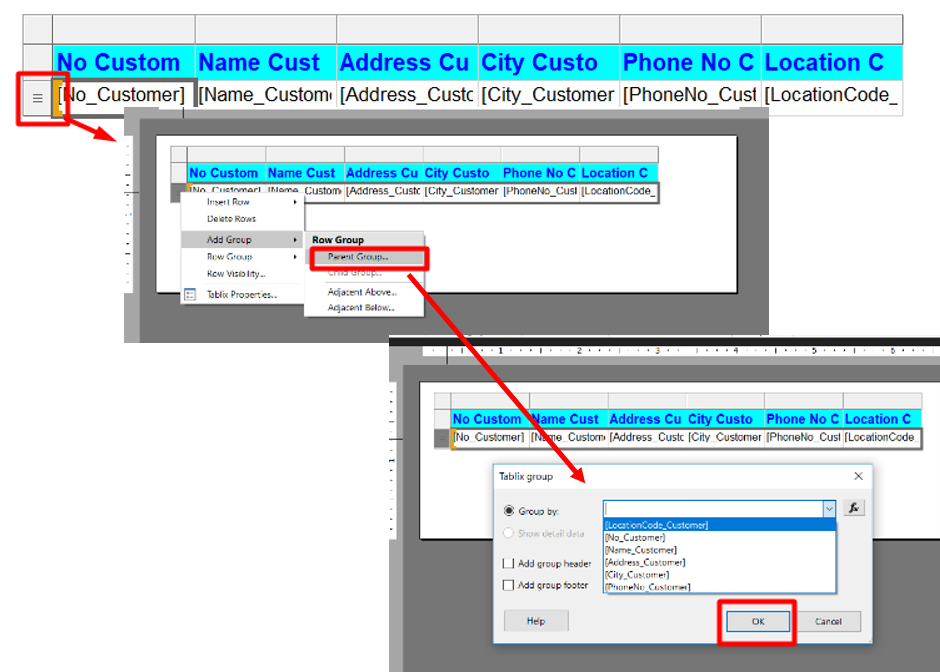
- To create a group, on the left side of the screen, right-click and choose Add Group ->Row Group ->Parent Group.
- Choose the required option for grouping. In the example in Figure 2, the grouping is done by Location code. Click ok.
Figure 2 – Grouping according to Location code in Microsoft Dynamics Business Central
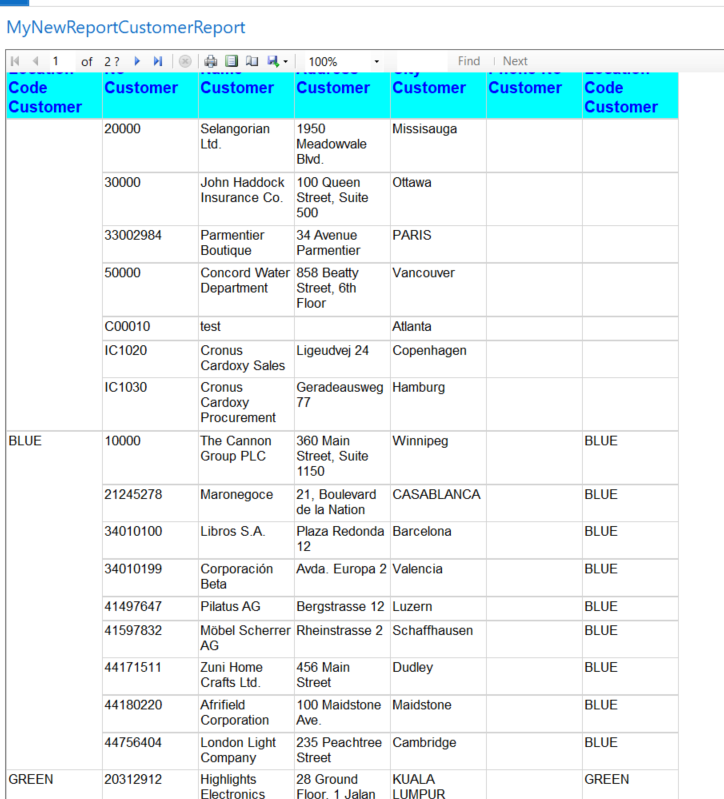
The output generated will be similar to that shown in Figure 3.
Figure 3 – Report with grouping in Microsoft Dynamics Business Central
If you have any questions about reports or other Dynamics NAV or Business Central questions for any version, contact ArcherPoint.
Read more “How To” blogs from ArcherPoint for practical advice on using Microsoft Dynamics Business Central or NAV.
If you are interested in NAV/Business Central development, check out our collection of Business Central and NAV Development Blogs.
Trending Posts
Stay Informed
Choose Your Preferences
"*required" indicates required fields


