
How to Use Dynamics NAV 2016 OCR to Improve Data Entry, Part 1

Microsoft Dynamics NAV 2016 has a new feature that uses OCR technology to help automate the data entry process for vendor invoices. OCR is an acronym for Optical Character Recognition and is defined as “…the mechanical or electronic conversion of images of typed, handwritten or printed text into machine-encoded text”.
With this feature, you can take an image of a vendor invoice, send it to a service provider, and then import the invoice back into NAV. This process should save on the time spent performing data entry and reduce keystroking errors.
Microsoft has recently paired up with Lexmark to provide their OCR technology to read images of invoices and import them into Dynamics NAV 2016.
The setup is easy and can be performed in using the following steps:
Registration with Lexmark
- Register the service with Lexmark with the Lexmark Invoice Capture Service for NAV. There, you can set up an account with Lexmark for their OCR services. There a two different plans available, and you will need to decide which is best for your organization.
Perform the Setup in Microsoft Dynamics NAV 2016 for the OCR service
- From the CRONUS USA, Inc./Departments/Administration/IT Administration/Services Menu, select OCR Service Setup
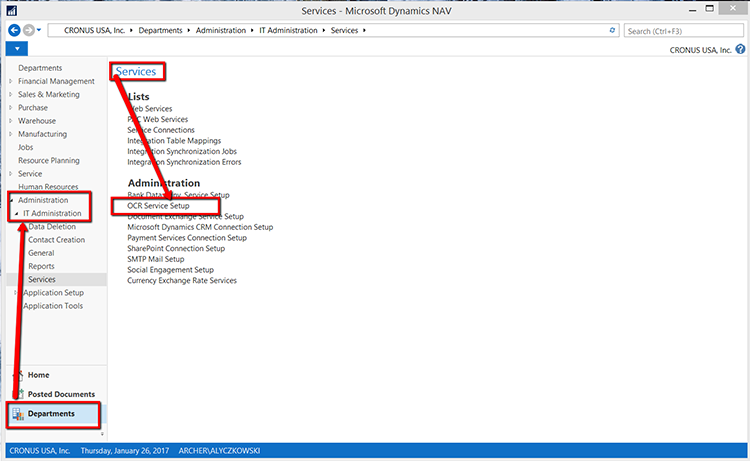
Figure 1. Departments/Administration/IT Administration/Services Menu – OCR Setup.
- On the OCR Service Setup page, select the Set URLs to Default
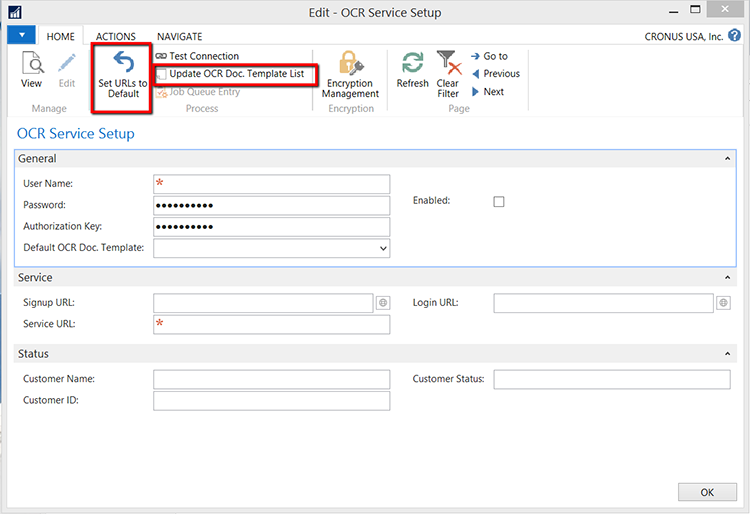
Figure 2. OCR Service Setup page.
- Enter the User Name, Password, Customer Name and Customer ID (From Lexmark Registration) and click Update OCR Doc. Template List
- Click Test Connection to verify your License and Connection to Lexmark.
- After testing the connection, select the Default OCR Doc. Template form the List of Documents and place a checkmark in the Enabled field.
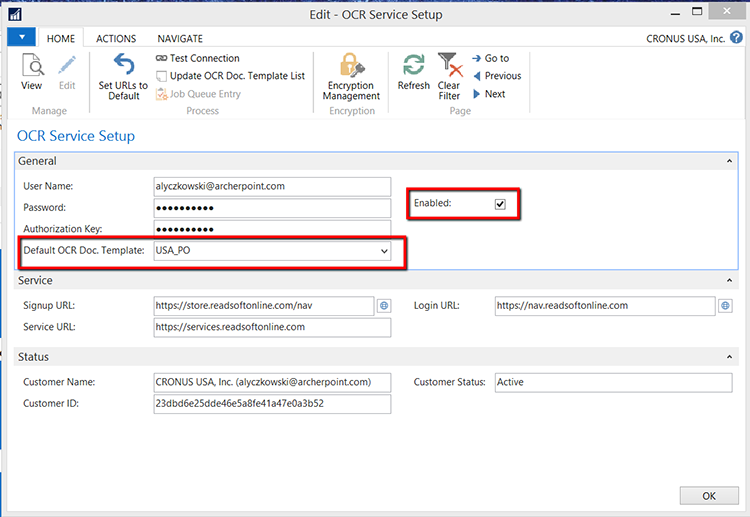
Figure 3. OCR Service Setup page with Default OCR Doc. Template and Enabled fields highlighted.
You have now completed the setup requirements for using this service.
Part 2 of this blog series will cover using OCR for entering invoices. If you have any questions about using the OCR feature or other questions about Dynamics NAV 2016, contact ArcherPoint.
If you have any questions about this blog, contact ArcherPoint.
For more step-by-step instructions on how to perform specific tasks in Microsoft Dynamics NAV, see our collection of How-To blogs.
Trending Posts
- Login Error: Communication protocol mismatch between client and server
- How to Make Measures Total Correctly in Power BI Tables
- The Microsoft Technology Stack – What Is It & Why Should You Care?
- MRP vs. MPS: Choosing the Right Planning Approach for Your Manufacturing Business
- Guide to How Manufacturers Can Implement Quality Control Systems Using Business Central
Stay Informed
Subscribe to Communications
"*required" indicates required fields