Using Arrays and Array Functions in Microsoft Dynamics Business Central NAV

This blog discusses how to use arrays and array functions in Microsoft Dynamics 365/NAV.
What is an Array?
An array is a collection of items stored at contiguous memory locations. The idea is to store multiple items of the same type together. Following are the important terms to understand the concept of an Array:
- Element − Each item stored in an array is called an element.
- Index − Each location of an element in an array has a numerical index, which is used to identify the element.
An array can be represented as a row of values:
| 2 | 3 | 1 | 4 | 5 | 6 | 7 | 11 | 85 | 100 |
Figure 1 – Representation of an Array
Syntax: Array [Dimension] of Type;
The Dimension defines the length of the array and type defines the data type of array.
There are number of array functions:
ARRAYLEN METHOD
COPYARRAY METHOD
COMPRESSARRAY METHOD
The ArrayLen Method
The ArrayLen method returns the total number of elements in an array or the number of elements in a specific dimension.
Syntax: Length:=ArrayLen(Array,[,Dimension])
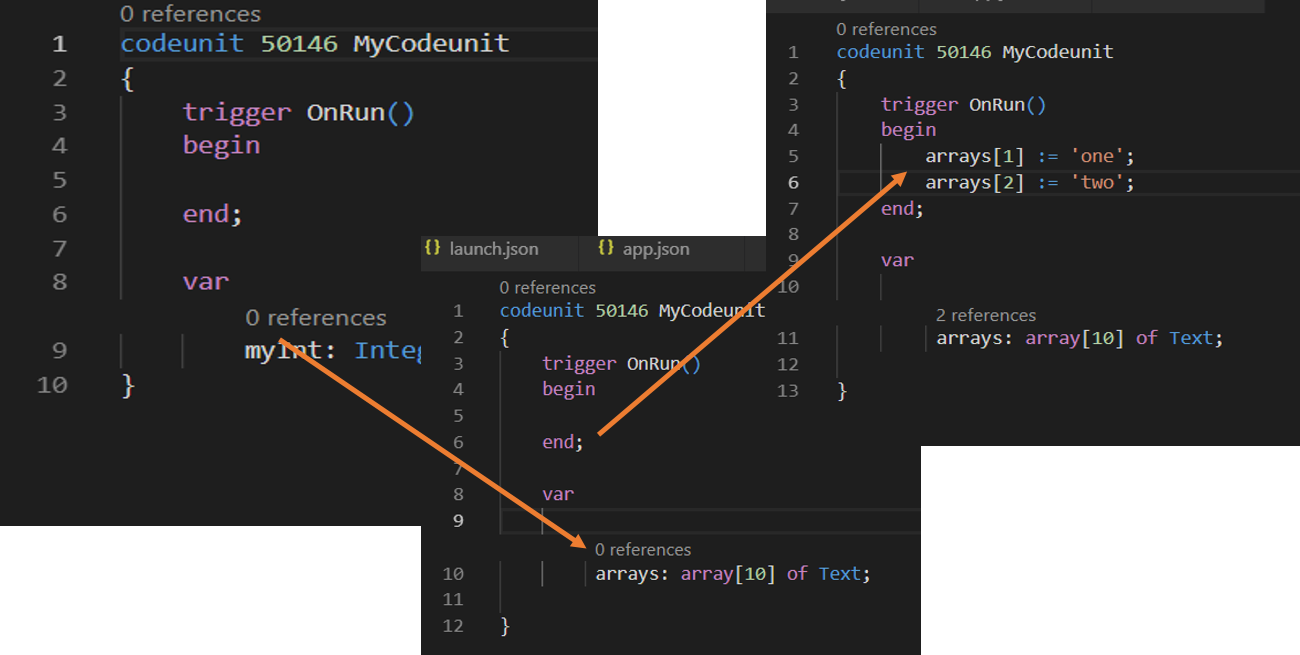
- Create a CodeUnit.Figure 2 – Creating a CodeUnit
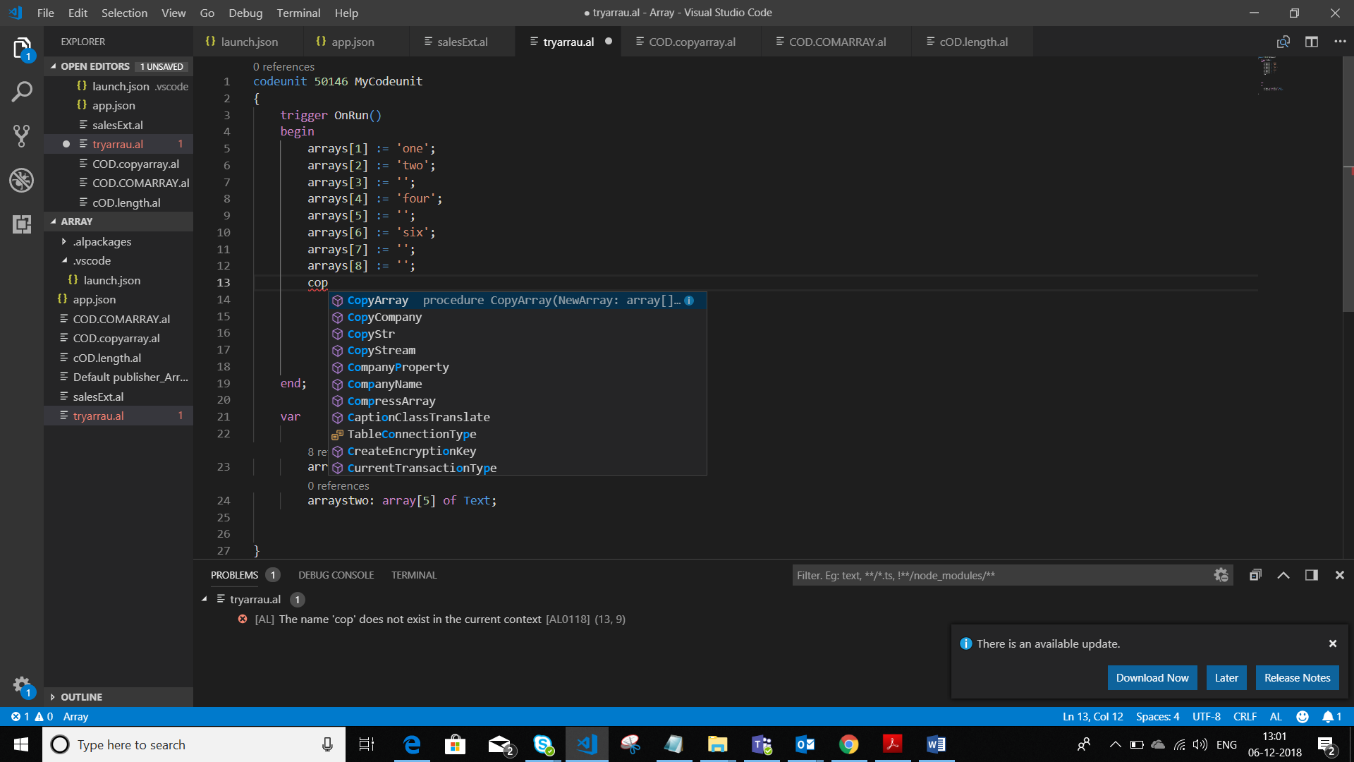
- Declare the array and assign values to each element.
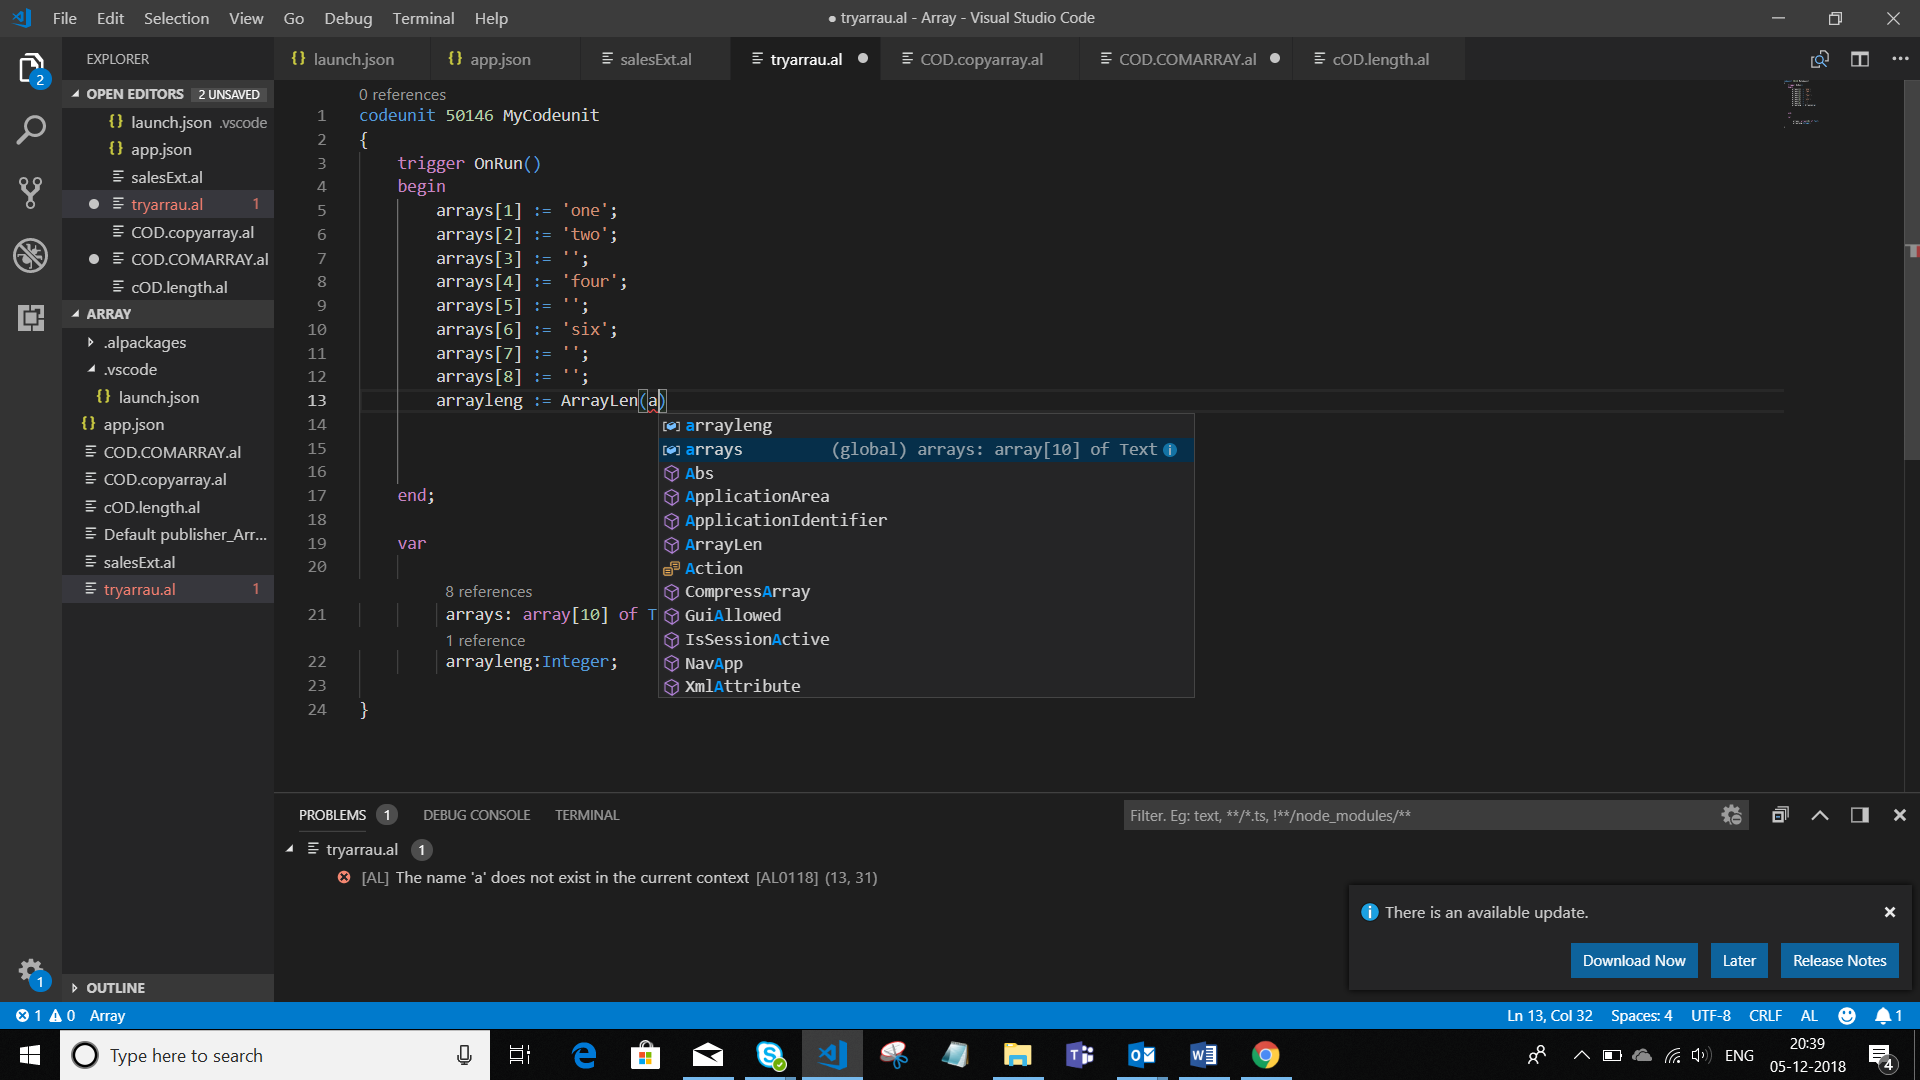
Figure 3 – Declaring an array and assigning values - Calculate the length of the array using the ArrayLen function.
- Assign a variable to store the length of the array.
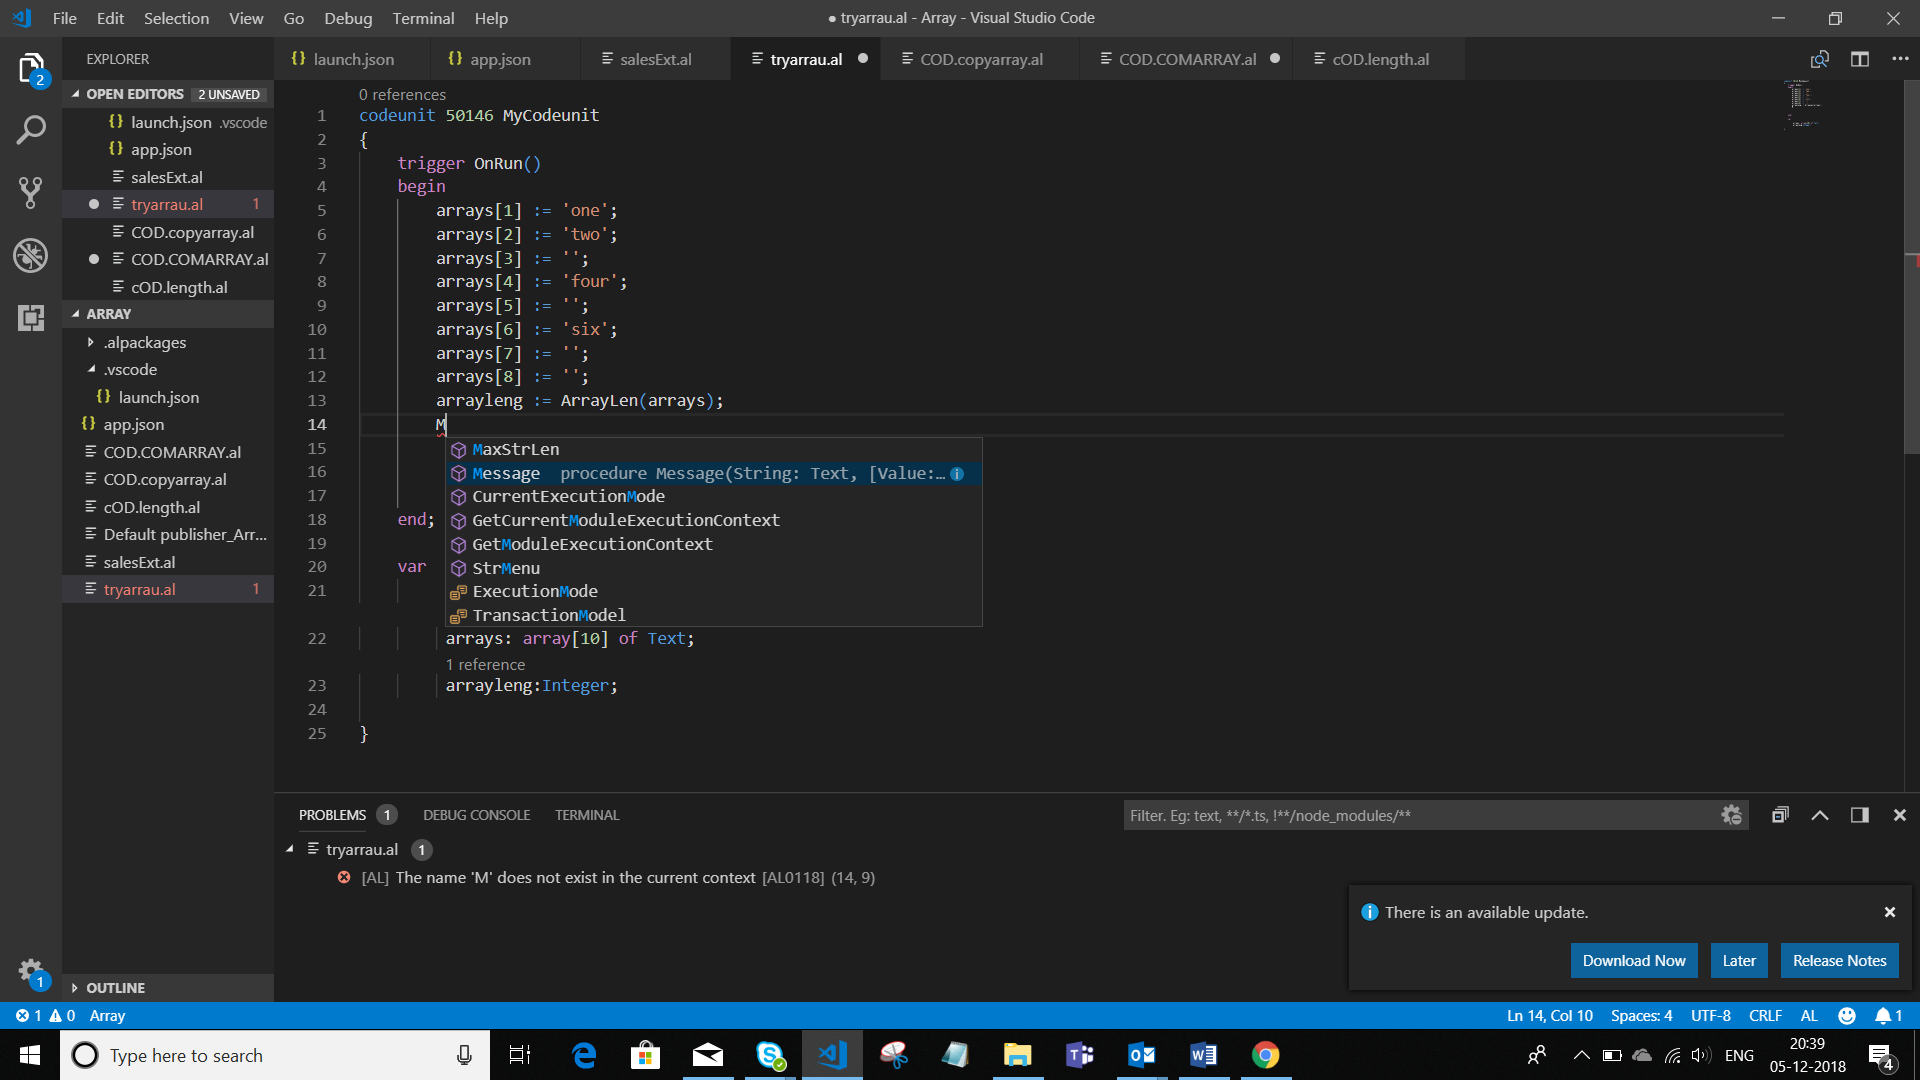
Figure 4 – Assigning array lengths into a variable - Display the length of the array using a message.
Figure 5 – Displaying the array length in a message
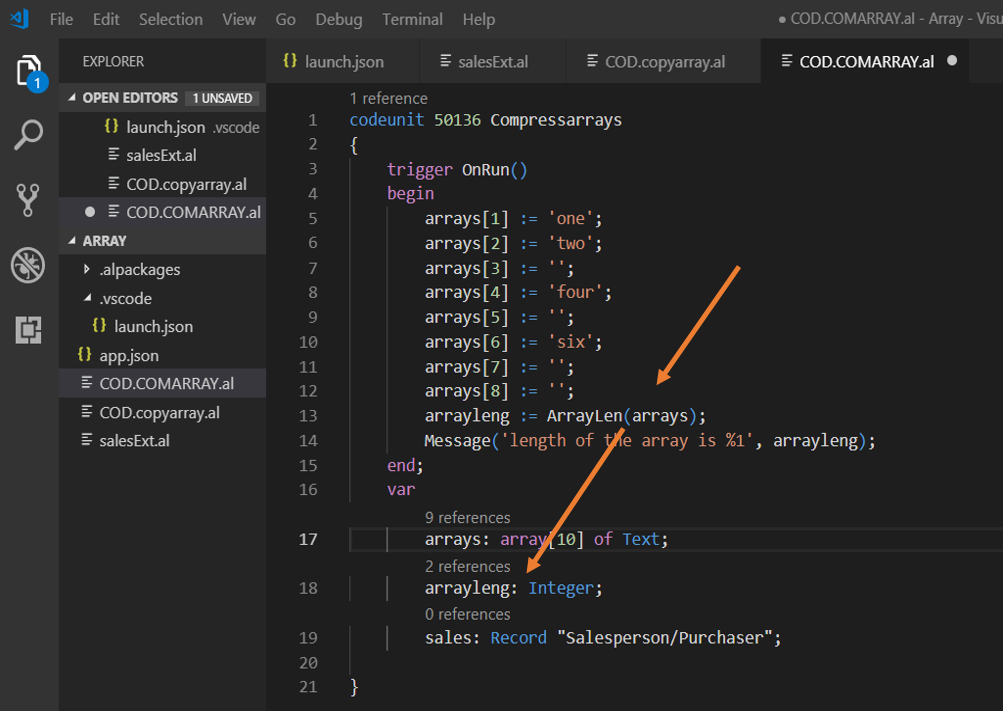
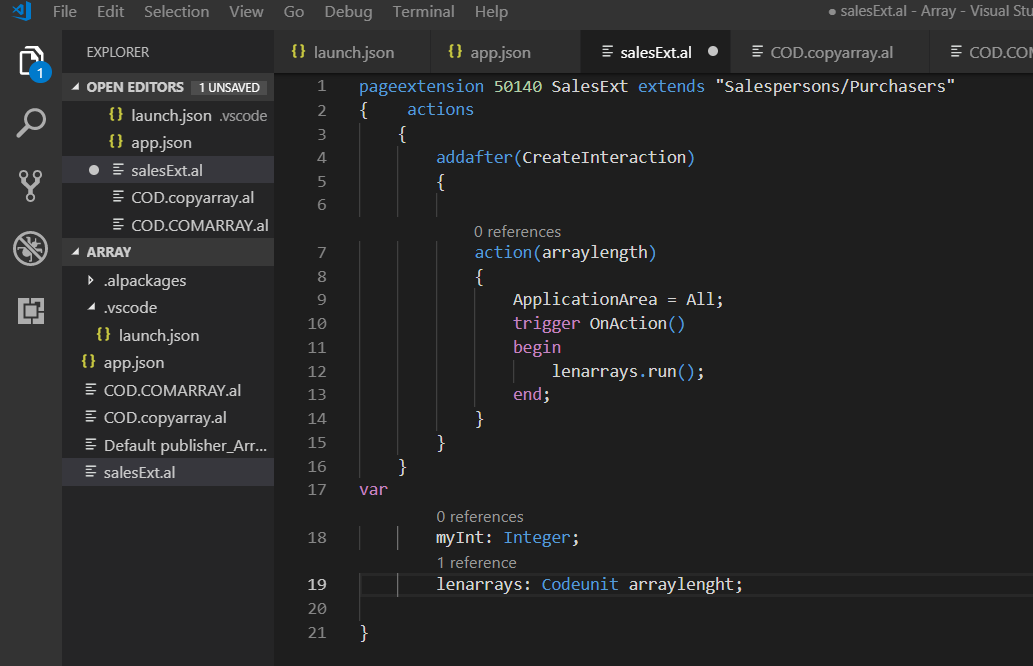
Figure 6 – CodeUnit for displaying the length of an array - Create the page extension using the tpageext snippet. Inside the action, specify the location. For this, you can use one of the following: addafter, addbefore, addlast, addfirst. Specify the name of action that should appear in BC/NAV. Inside the action, write the code to get triggered.
- Create a variable for the codeunit and specify the name. When the action is called, the trigger is activated.
Figure 7 – PageExtension of the array
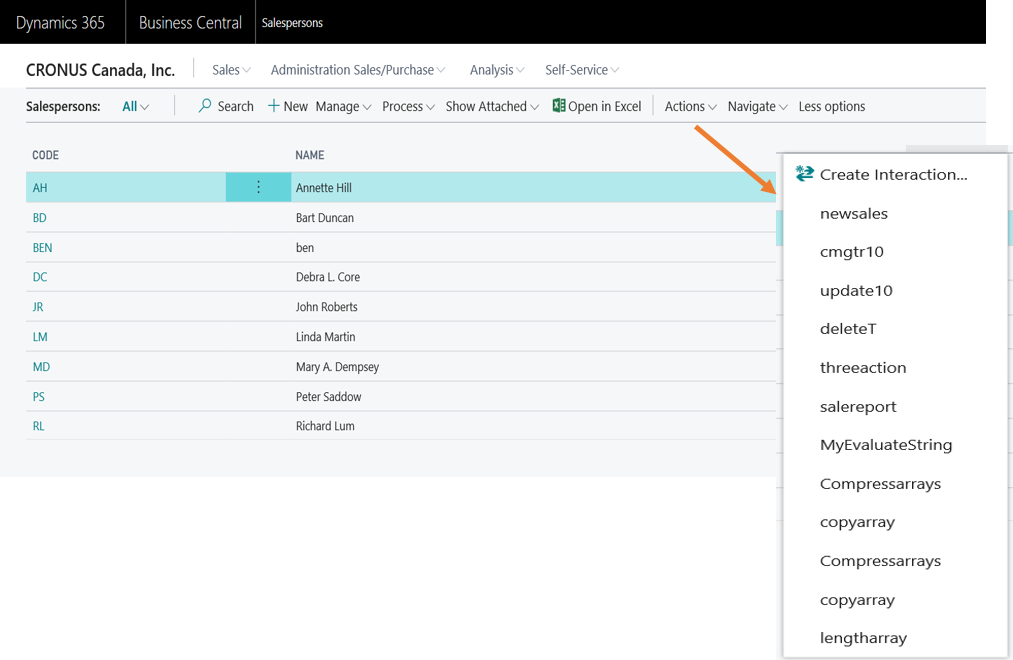
Figure 8 – Navigating to choose the option
The CopyArray Method
CopyArray is used to copy elements of one array to another.
Syntax: Copyarray:=CopyArray(Newname,ArrayName,Position[,Length]);
- Create a code unit as shown earlier or create another array for the copy array and another variable to store the copied array.
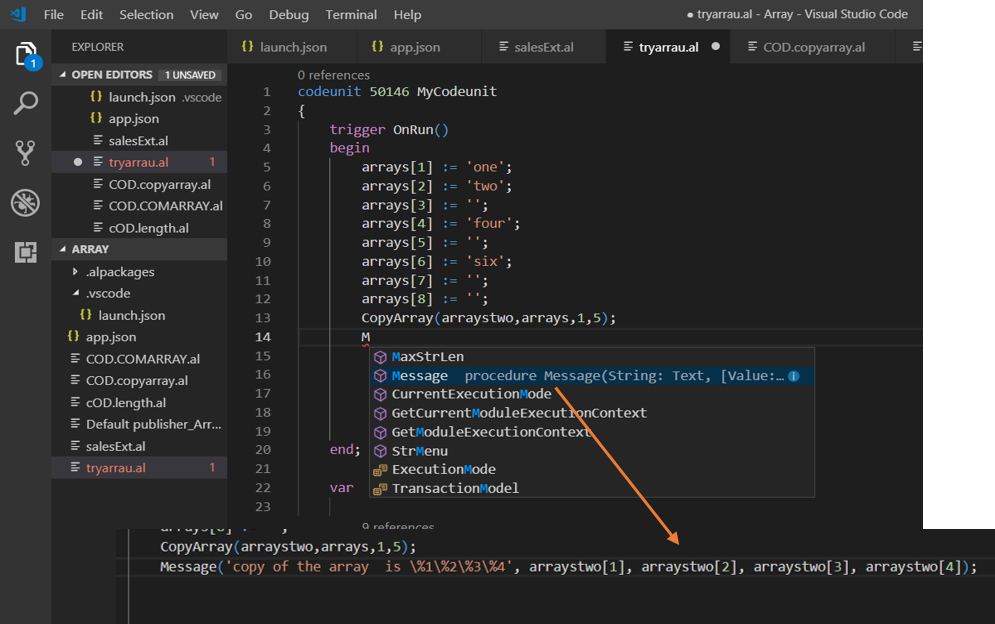
- Use the CopyArray function to copy the array. Inside the function, specify the name of the newly created array. Specify the name of the array to be copied, then specify the position of the elements—from where you want to start the copy. Finally, specify the length of the newly created array.
Figure 9 – Creating a copy of an array with the CopyArray function - To display the copied array, it needs to be displayed in a message. Use Message() for that and specify elements of newly created array.
Figure 10 – Message to display a newly created array - Create a page extension for the copied array.
Figure 11 – Page extension for creating a copied array
The CompressArray Method
The CompressArray method moves all non-empty strings (text) in an array to the beginning of the array. The resulting String Array has the same number of elements as the input array, but empty entries appear at the end of the array.
Syntax: Count:= CompressArray(StringArray);
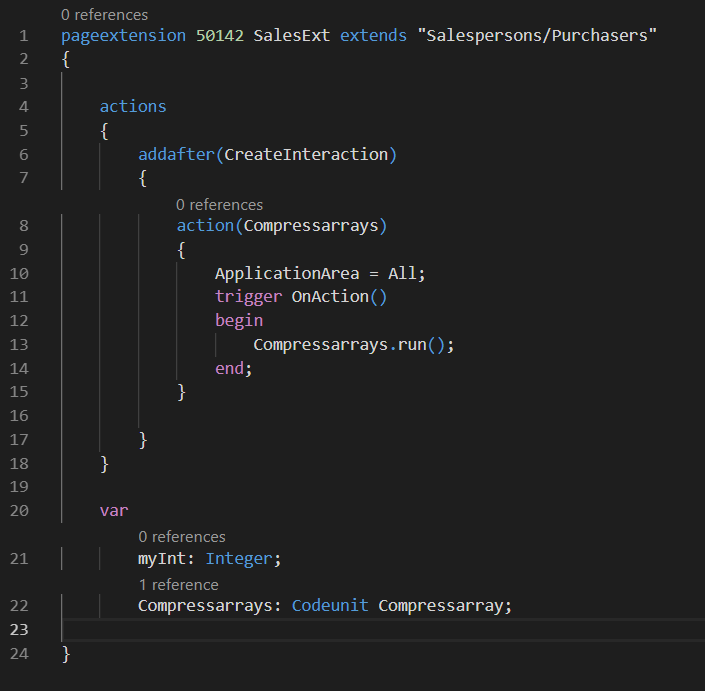
For the CompressArray, you also need to create a code unit as well as page extension, or you can use the previous code unit by declaring new necessary variables.
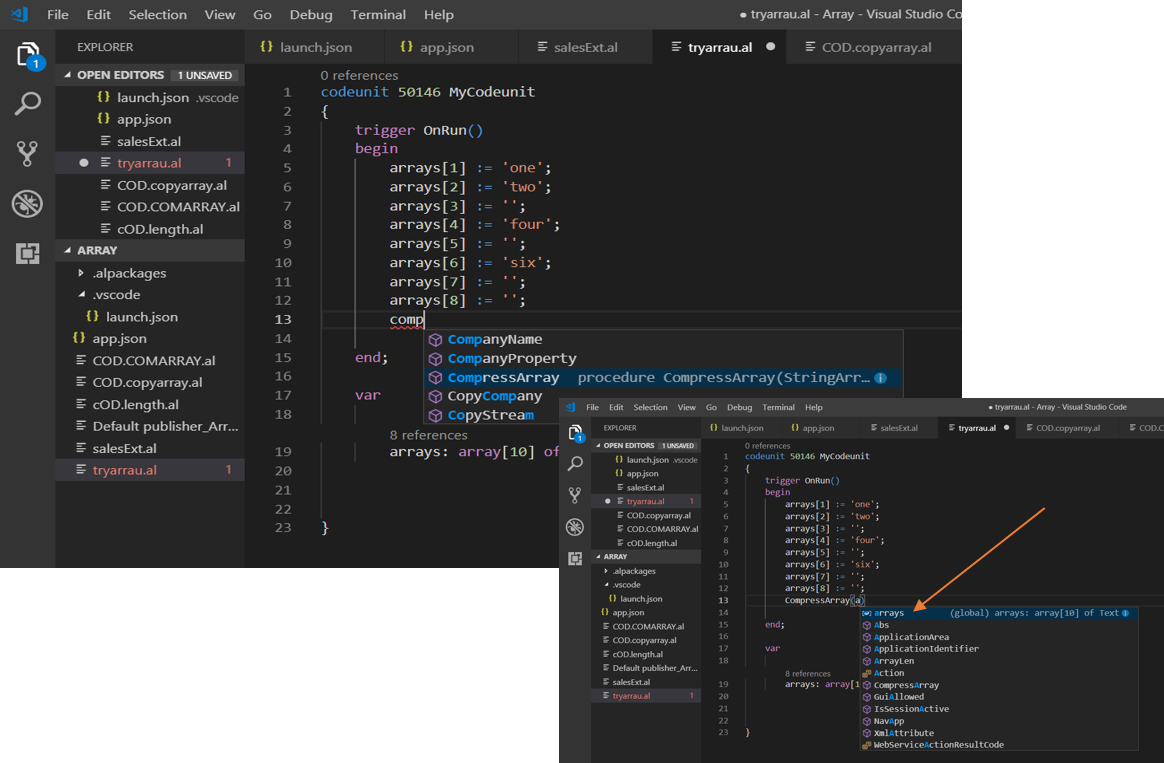
- Declare the array and variable. Use the CompressArray function to compress the array.
- In the CompressArray function, specify the array name to be compressed.
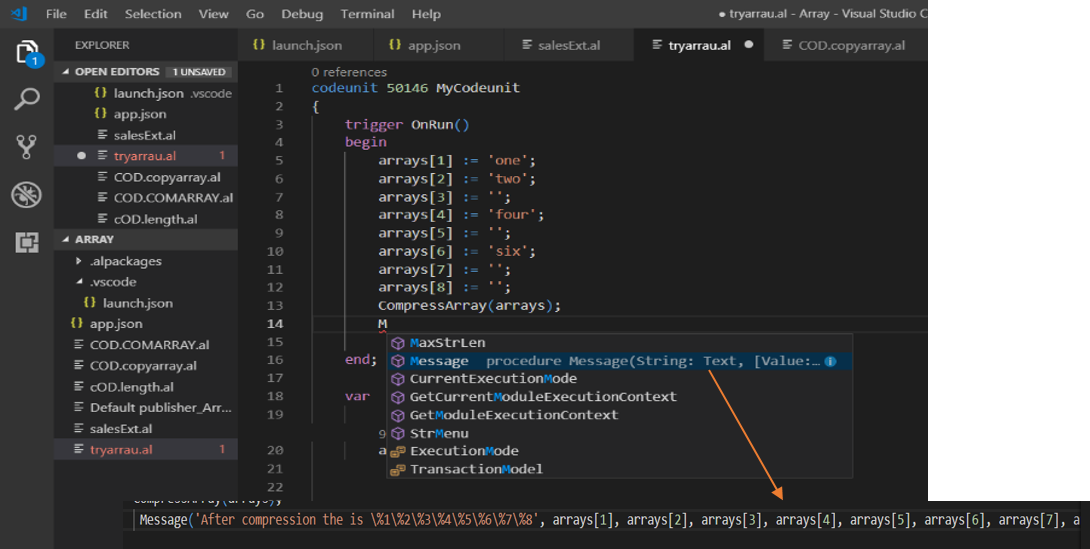
Figure 12 – Using the CompressArray function - After preparing the CompressArray Function, use Message() to display it.
Figure 13 – Message to display CompressArray
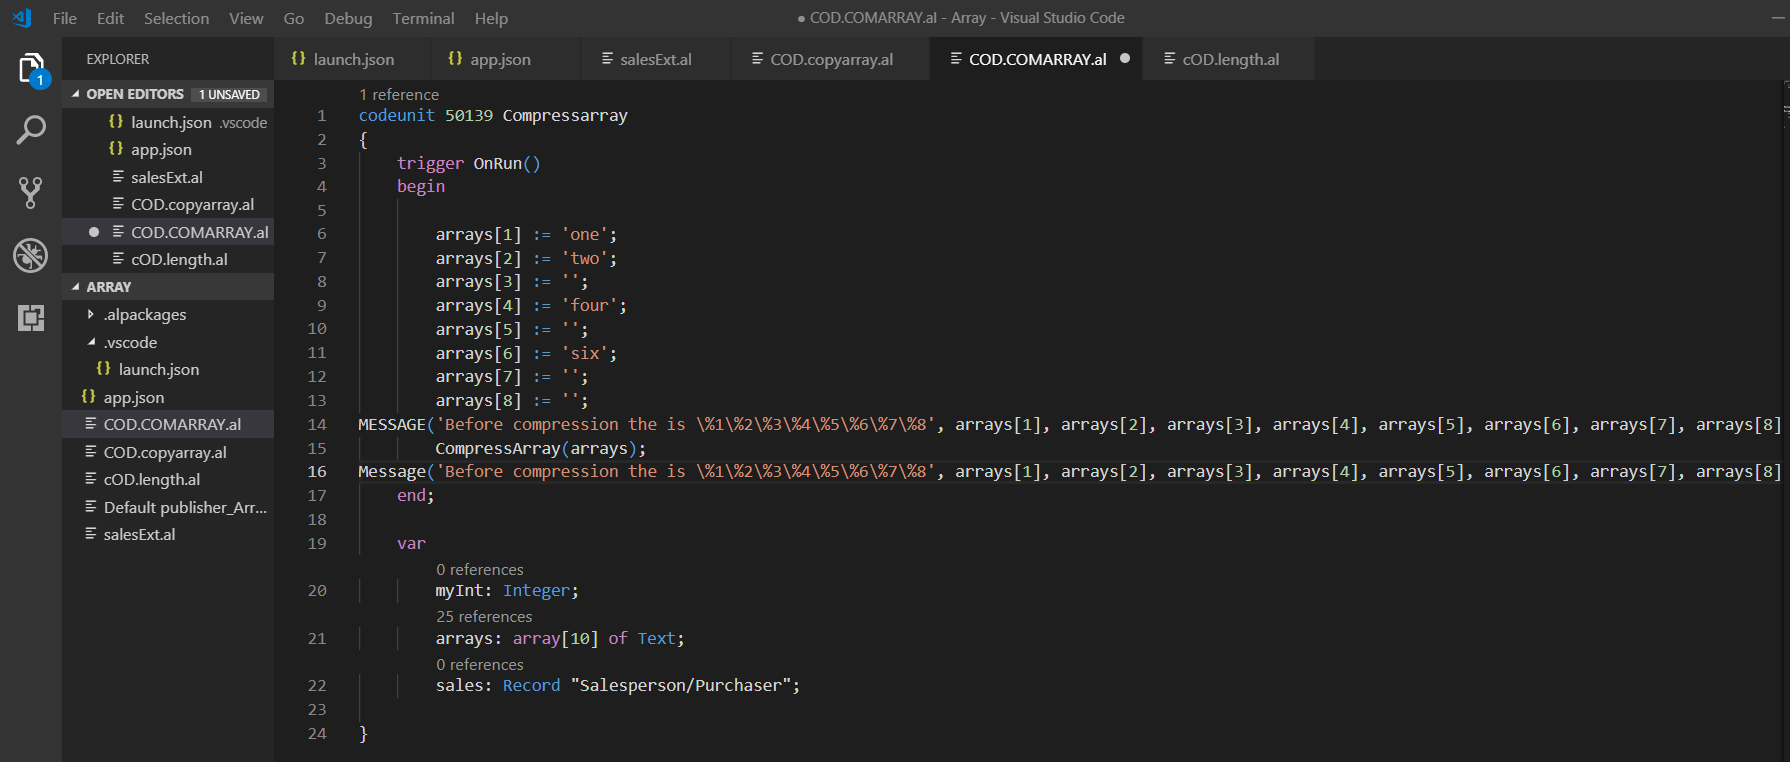
Figure 14 – CodeUnit to display CompressArray - Create a page extension for this CompressArray as discussed earlier, or as shown below.
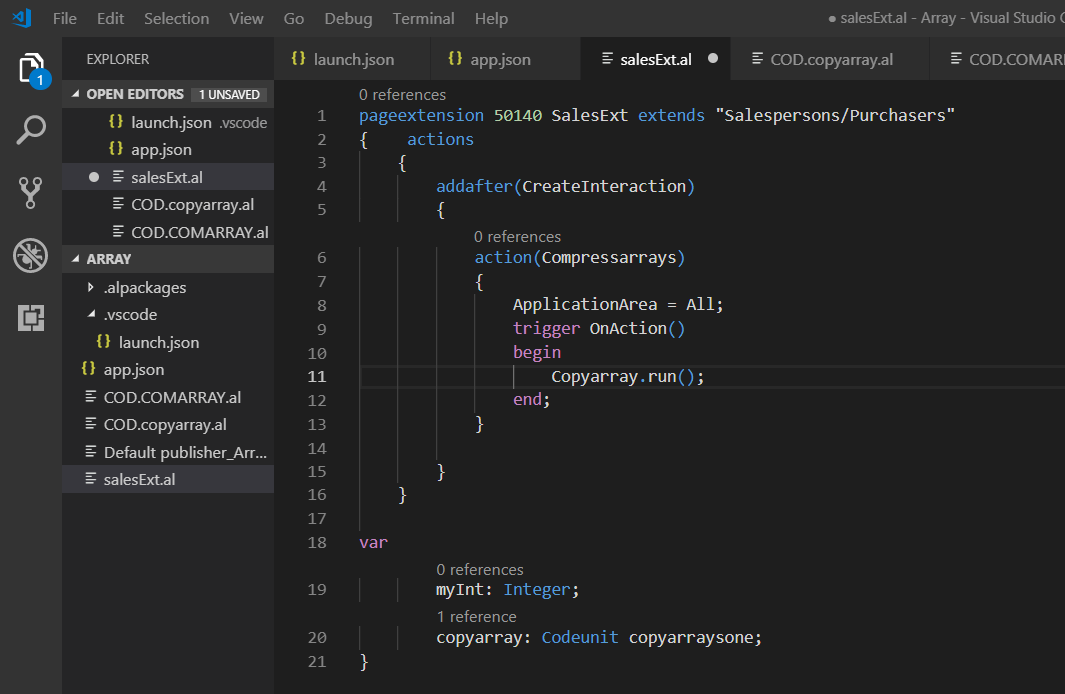
Figure 15 – PageExtension to display CompressArray
If you have any questions about this process, contact ArcherPoint.
Read more “How To” blogs from ArcherPoint for practical advice on using Microsoft Dynamics Business Central or NAV.
If you are interested in NAV/Business Central development, check out our collection of NAV Development Blogs.
Trending Posts
Stay Informed
Choose Your Preferences
"*required" indicates required fields

