Publishing and Testing Webservices in Microsoft Dynamics NAV or Business Central

Create an XML Port for Customer
The following example illustrates creating a new XML port and adding required customer fields:
- Open the XML port: NAV Development Environment → Objects → XML Port → New.
- Add XMLRoot as element in the first row.
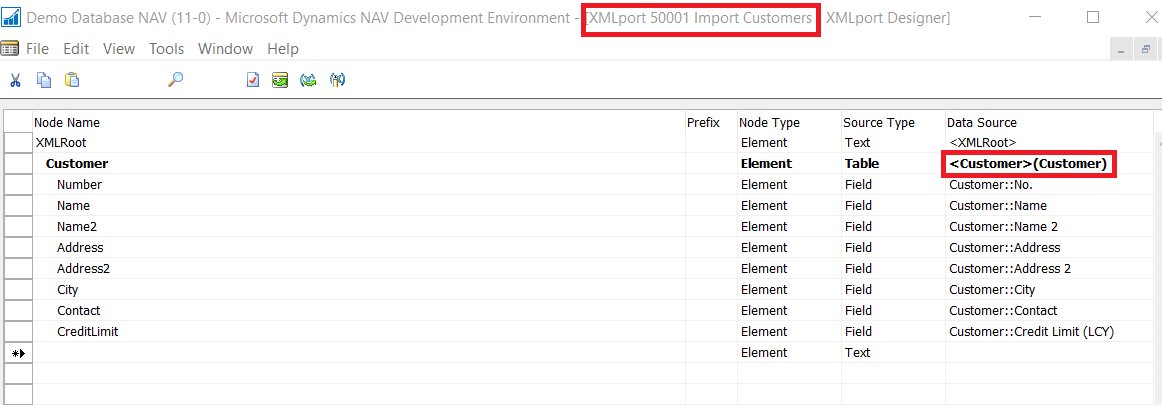
- Add a Customer table and indent the row, then add required customer fields.
Figure 1 – Dynamics NAV / Business Central Customer Table
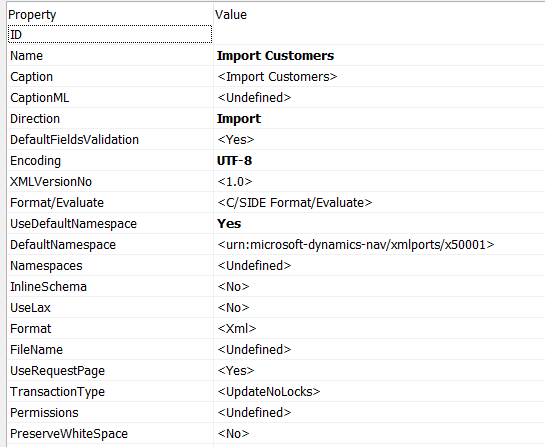
- Set the XML properties, Directions: Import, encoding: UTF-8 and Default Namespaces – YES.
Figure 2 – Setting Optional Fields in Dynamics NAV and Business Central
Run the XML Port from the Codeunit
- There is no provision to publish XML port in Dynamics NAV/BC, so write a code in the Object codeunit to run the XML port.
- Create a function, ImportCustomer, with Parameters XMLport and StatusText Variable.
Figure 3 – Import Customer Function in Dynamics NAV or Business Central
Publish the Codeunit in Web Services
- Open Web services: Go to → Web Services page from Search.
- Click “New” to create new Webservice records.
- Set the Object Type as Codeunit.
- Set the Object ID as 50001.
- Set the ServiceName as ImportCustomer.
- Publish – True (SOAPURL is generated automatically. This is the URL to be used for testing).
Figure 4 – Publishing a Codeunit in Web Services for Dynamics NAV or Business Central
Test Using Chrome Wizdler
- Ensure Chrome is installed on your testing machine.
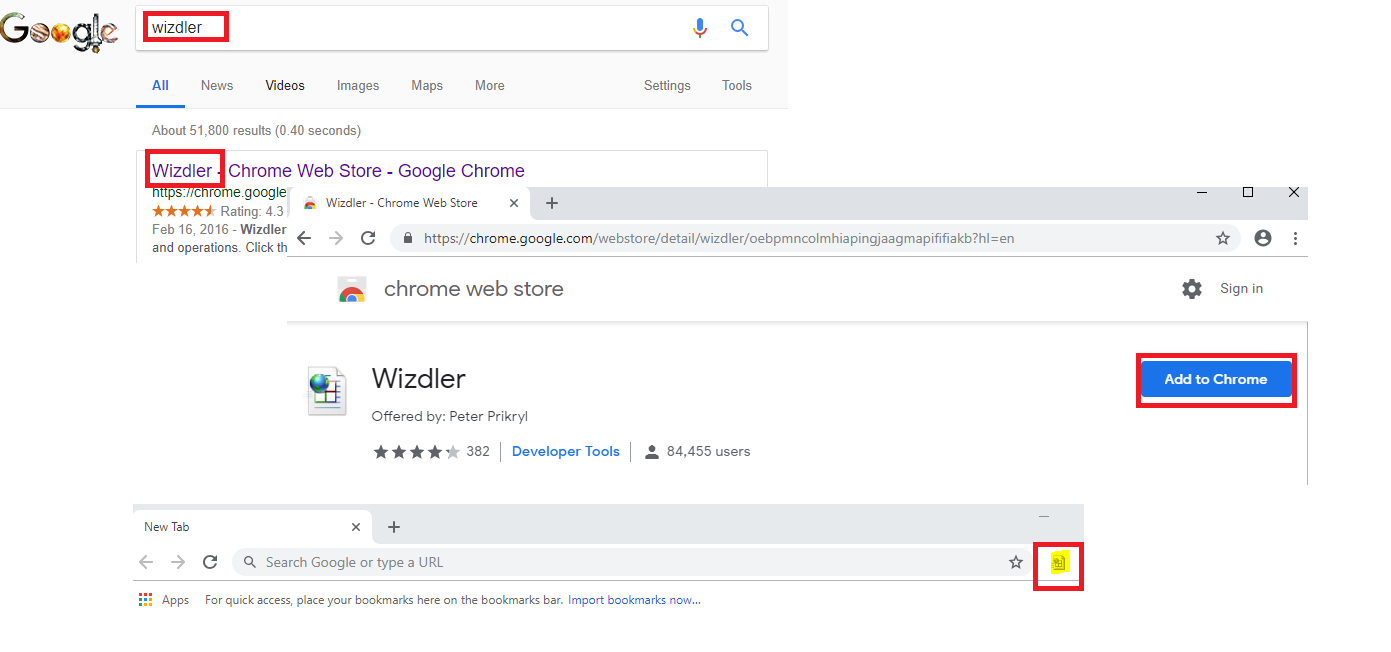
- To enable Chrome, go to Google Search and type “Wizdler”.
- Click “Add” to Chrome →Add Extension to enable Wizdler, then reopen the browser.
- Once Wizdler is added successfully, the icon will be enabled in your browser.
Figure 5 – Chrome with Wizdler Enable (icon highlighted in lower right of image)
- Paste the Soap URL copied from NAV/BC.
- Click the Wizdler icon as shown in Figure 5.
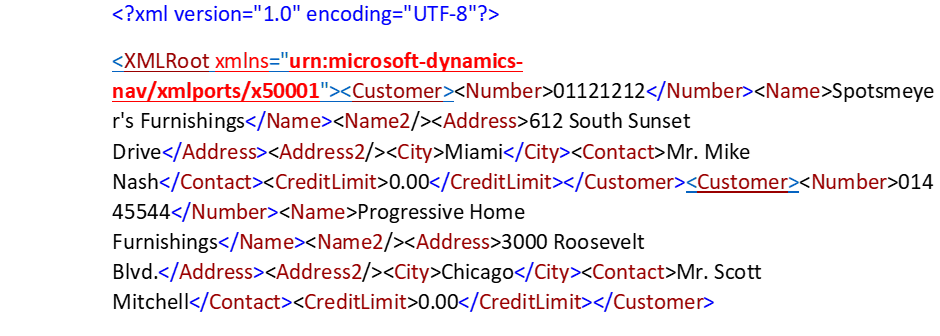
- You will get an XML file structure, and you can add or edit the XML files.
Figure 6 – XML File Structure - Fill the required values and click “GO” from the Wizdler. You will receive an acknowledgement.
Figure 7 – Acknowledgement from Wizdler
Enable Debug from NAV/BC Administration
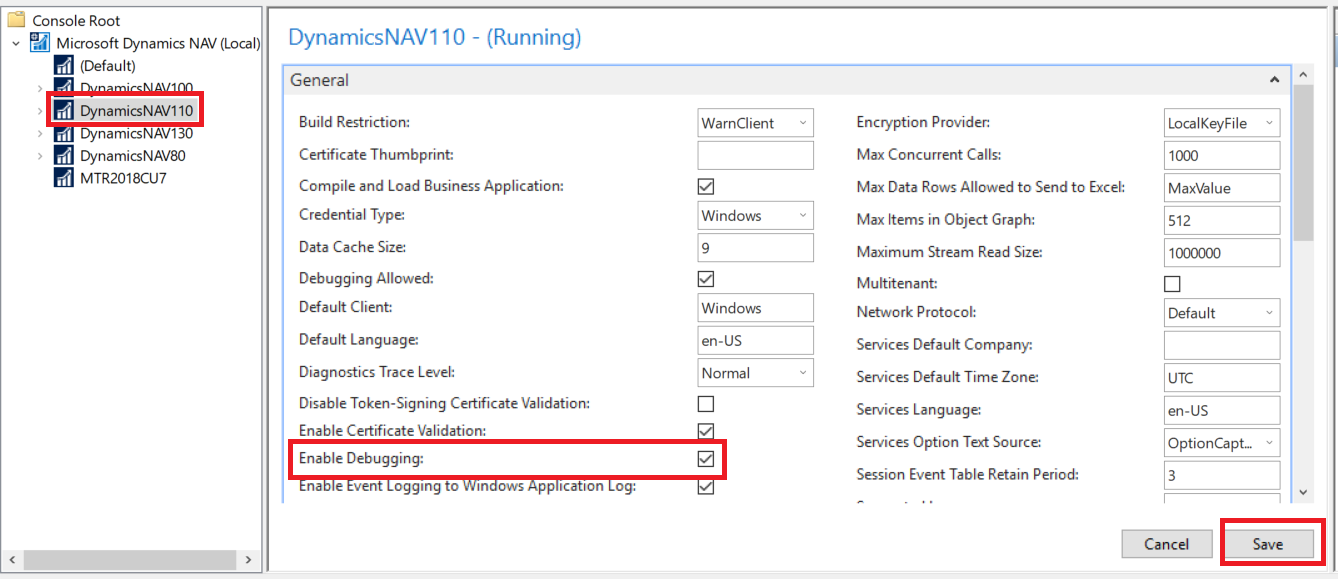
- Open NAV/BC Application administration and select the service NAV. “Enable Debugging” should be enabled in the General tab.
Figure 8 – Dynamics NAV and Business Central Application Administration with ‘Enable Debugging’ Enabled
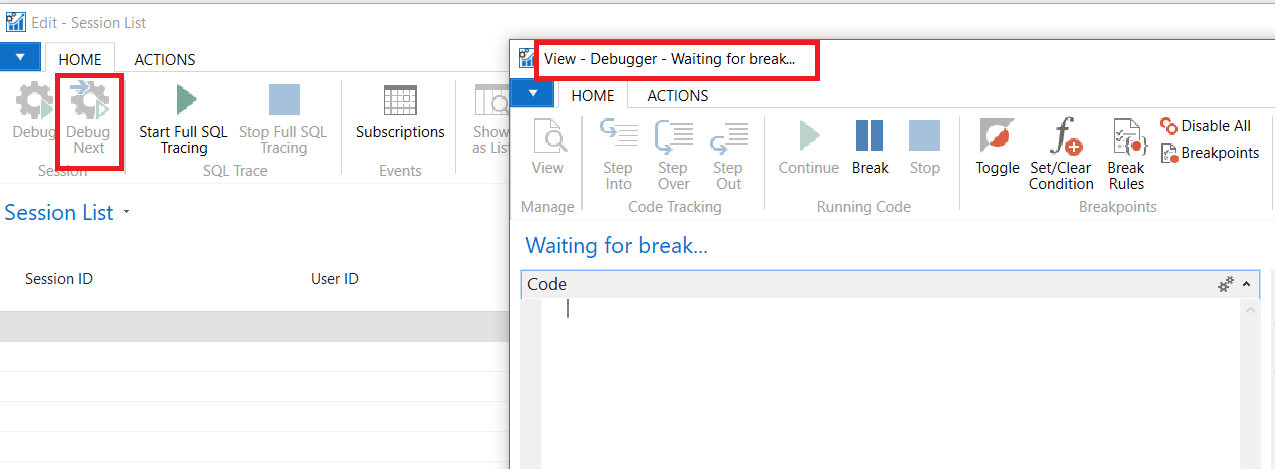
- Open the Debug Session Mode from development environment. and activate “Debug Next”.
Figure 9 – Debug Session Mode in the Dynamics NAV or Business Central Development Environment
Trending Posts
Stay Informed
Choose Your Preferences
"*required" indicates required fields

