
May 8, 2019
Creating a new job in Microsoft Dynamics Business Central
This blog describes two ways to create a new job that includes budgets in Microsoft Dynamics Business Central. By including budgets, you increase visibility into cost, which helps you predict cost overruns and maximize revenue.
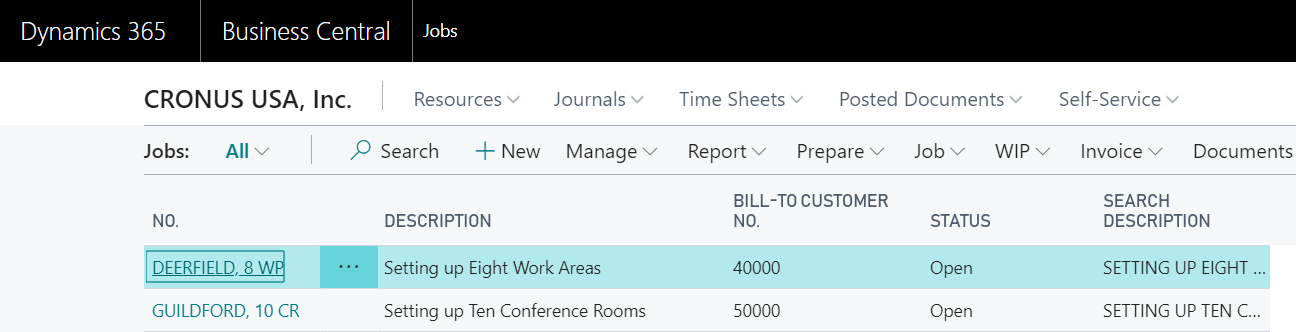
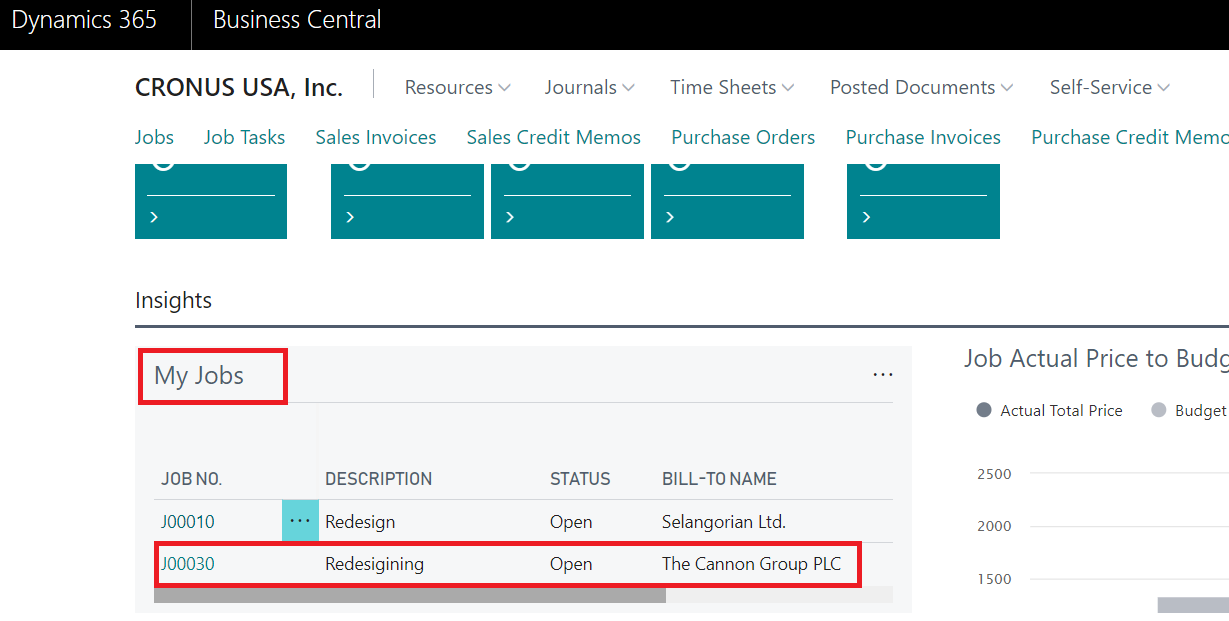
From the Project Manager Role Center, use the navigation list to see the list of jobs.
- Set Up the Role Center Page as a Project Manager Role Center. Click on My Settings in the upper right corner.
- Change the Role Center to “Project Manager” from drop down and click OK.
- From the Project Manager Role Center, click on Jobs, and you will see the list of jobs.

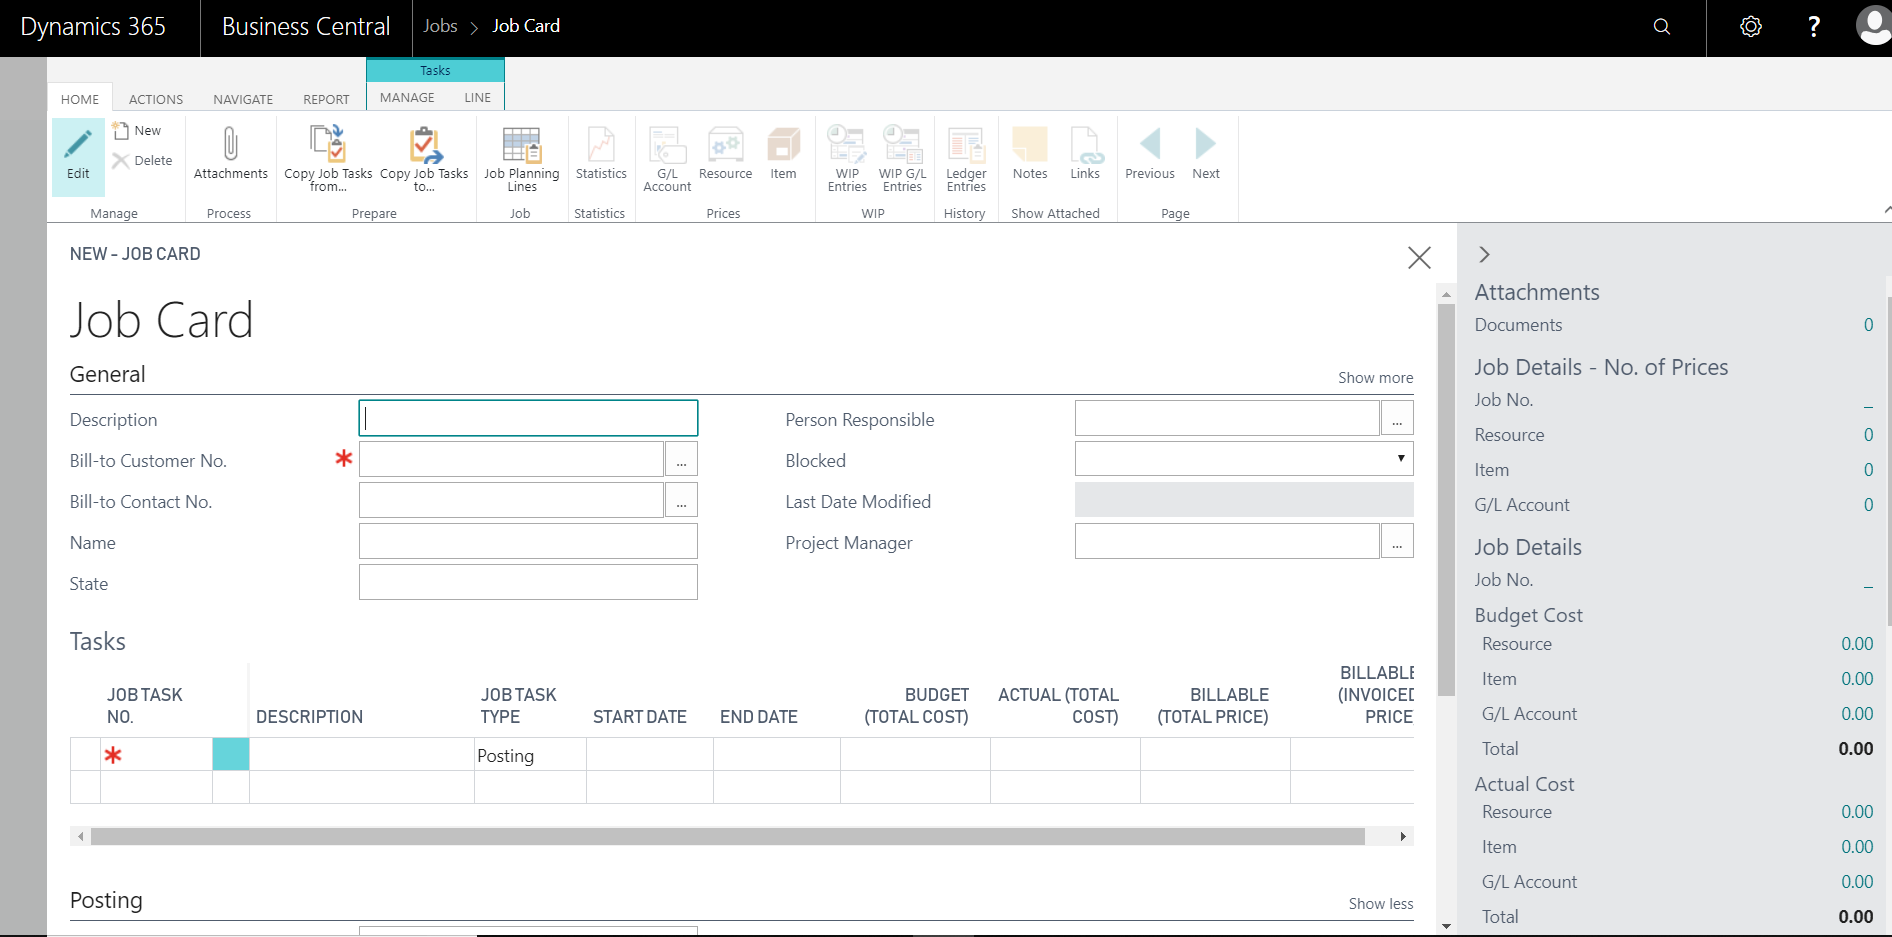
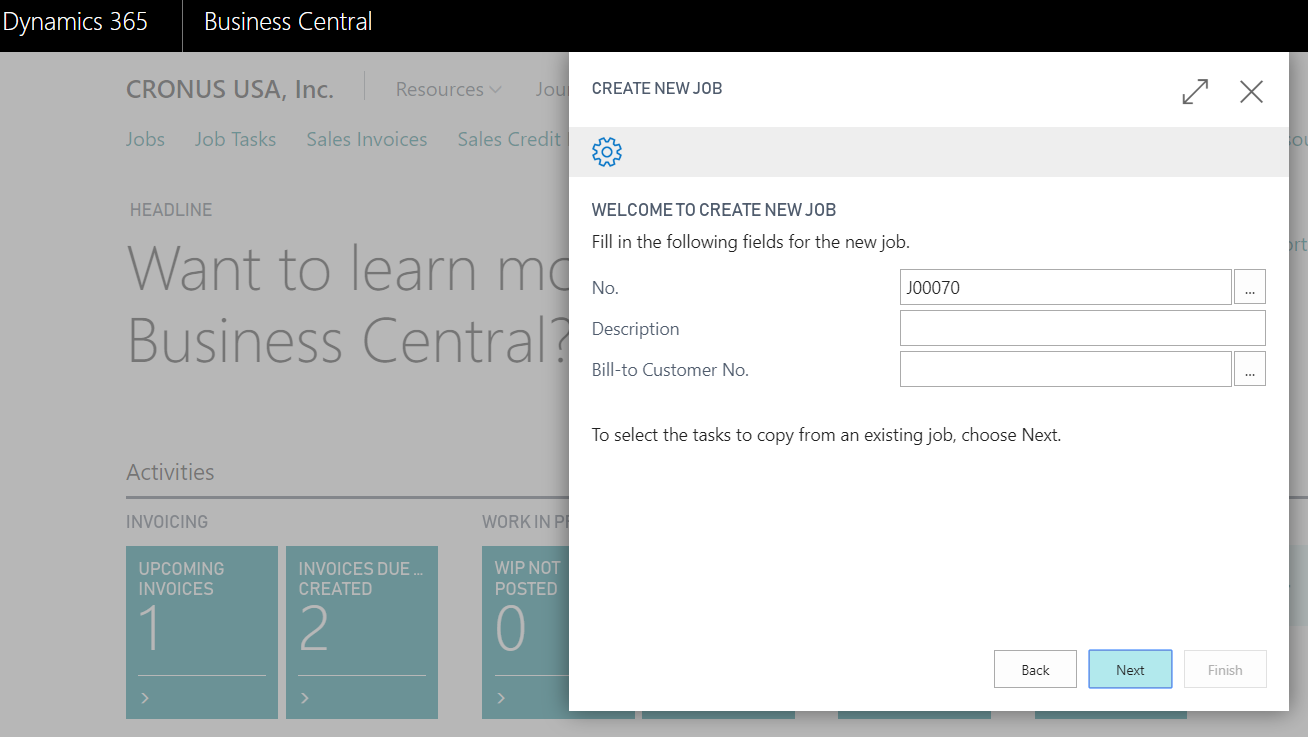
Figure 1 – List of jobs in the Role Center in Microsoft Dynamics Business Central - Create a new job. Click New, and a blank Job Card Page will open in Business Central. Business Central will assign the Job No.

Figure 2 – New job opened in Microsoft Dynamics Business Central - Enter all the basic information like Description and Bill to Customer No., and assign yourself as a Project Manager, so that the Role Center will display the new job.
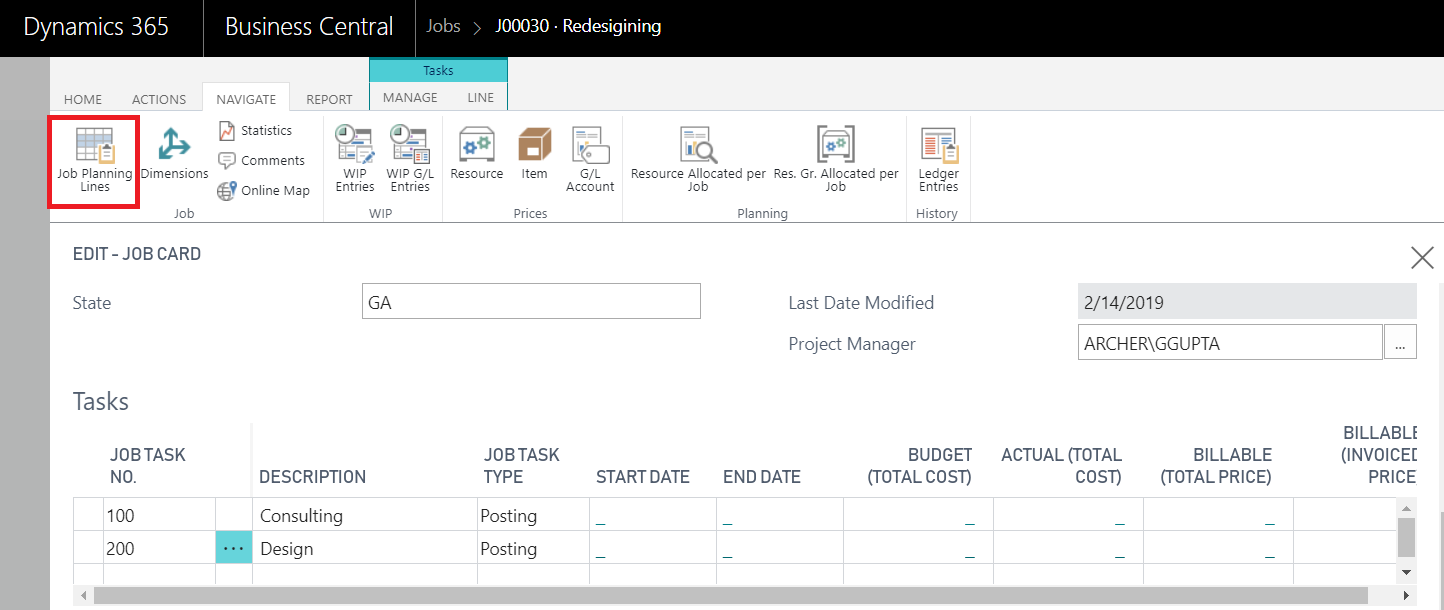
- Assign the Task. Typically, the JOB TASK NO is part of the No. sequence you defined. Keep it simple, for example 100, 200. Define as many tasks as needed.

Figure 3 – JOB TASK NO. assigned by Microsoft Dynamics Business Central - Set the JOB TASK TYPE as Posting so you can add the budget information on the Planning Line.

Figure 4 – Setting the JOB TASK TYPE to Posting in Microsoft Dynamics Business Central - To add budget information, open the Job Planning Line window.

Figure 5 – Job Planning Line window in Microsoft Dynamics Business Central - Enter the Job Task No., assigned previously.
- Fill in the Line Type, which can be Budget, Billable or Both Budget and Billable depending on the Line Cost or how it is done with that customer.
- Set the Planning date or the Document No.
- Set the Type “Resource”, “No.” and the Quantity.
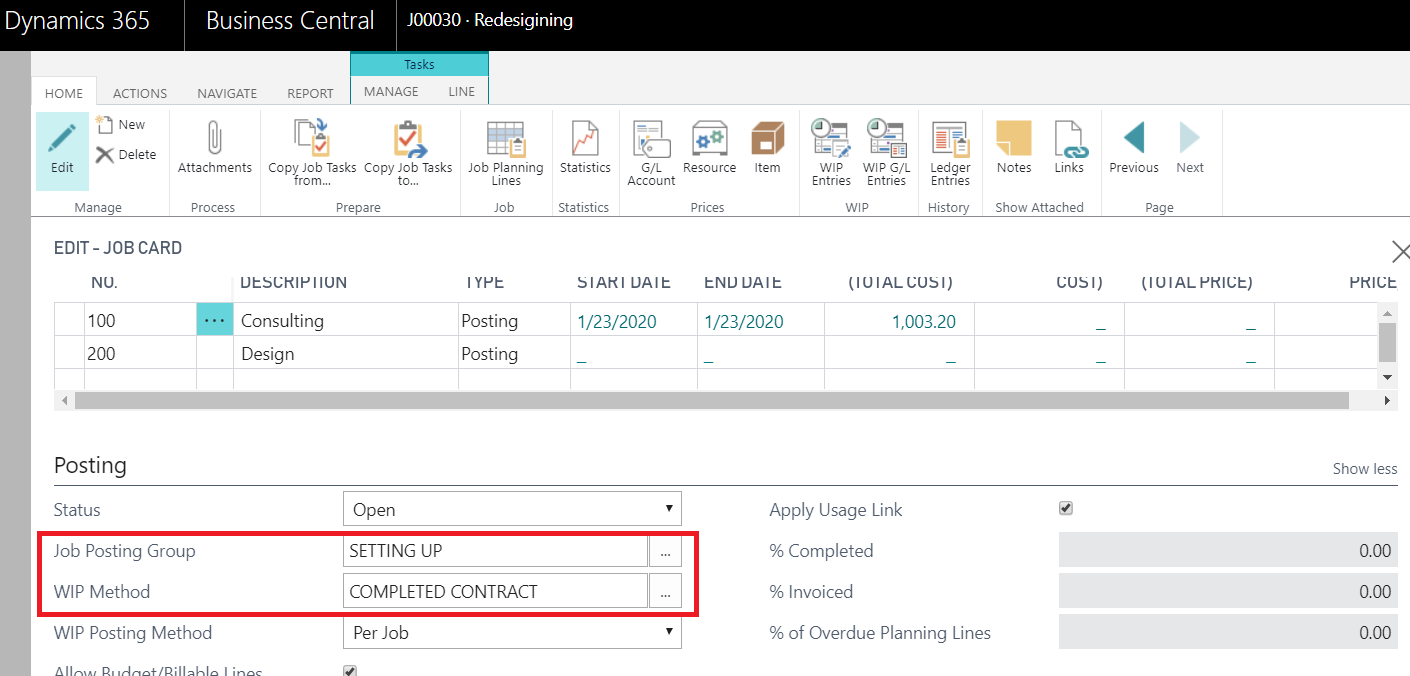
The cost and the price amounts come from the Resource or the Item resides. - Go back to the Job Card. The task will show the totals for the Cost and the Invoicing in the Job details pane, which will help you stay within your budget.
- Move to the Posting fast tab, which is also very important when creating a new job.
- Choose the Job Posting Group, WIP Method. You can assign the Job posting group per Job, or in the Job setup window, you can specify the Job Posting group that Business Central will assign to the new Job.

Figure 6 – Job Card with Job Posting Group and WIP Method set in Microsoft Dynamics Business Central
The Job list in the Project Manager Role Center will now display the Job you have created.

Figure 7 – Job list in the Project Manager Role Center with new job displayed in Microsoft Dynamics Business Central
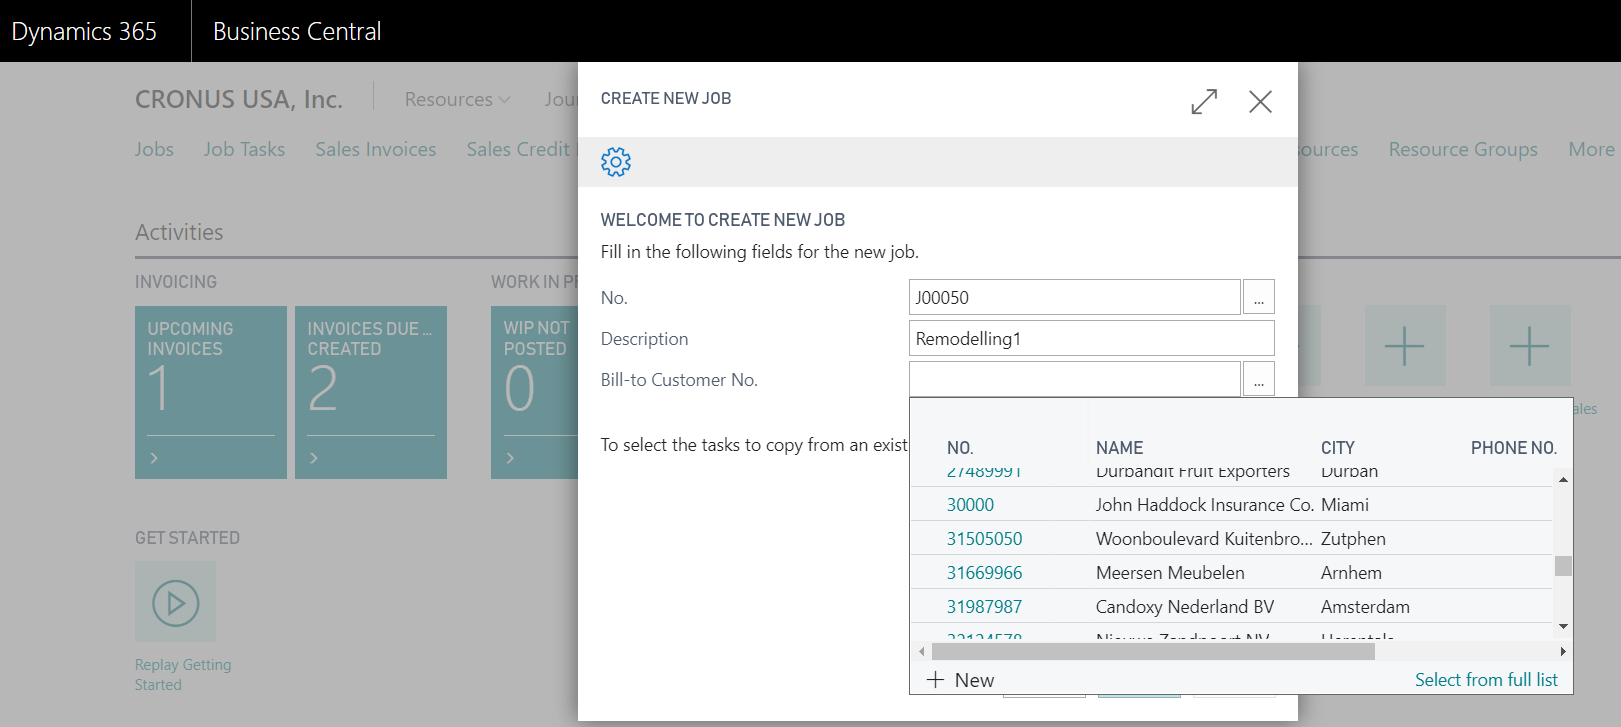
To set up more jobs, you can save time by copying the tasks from an existing job. - In the Project Manager Role Center, select New Job.
- Create New Job in Business Central through the Assistance setup guide. In the Create New Job window, select “Yes” and click Next.
- Since you will be copying an existing job, click Next to select the tasks you will copy.

Figure 8 – Create New Job window in Microsoft Dynamics Business Central - Select the Description and Bill–to–Customer No. you want to copy and click Next.

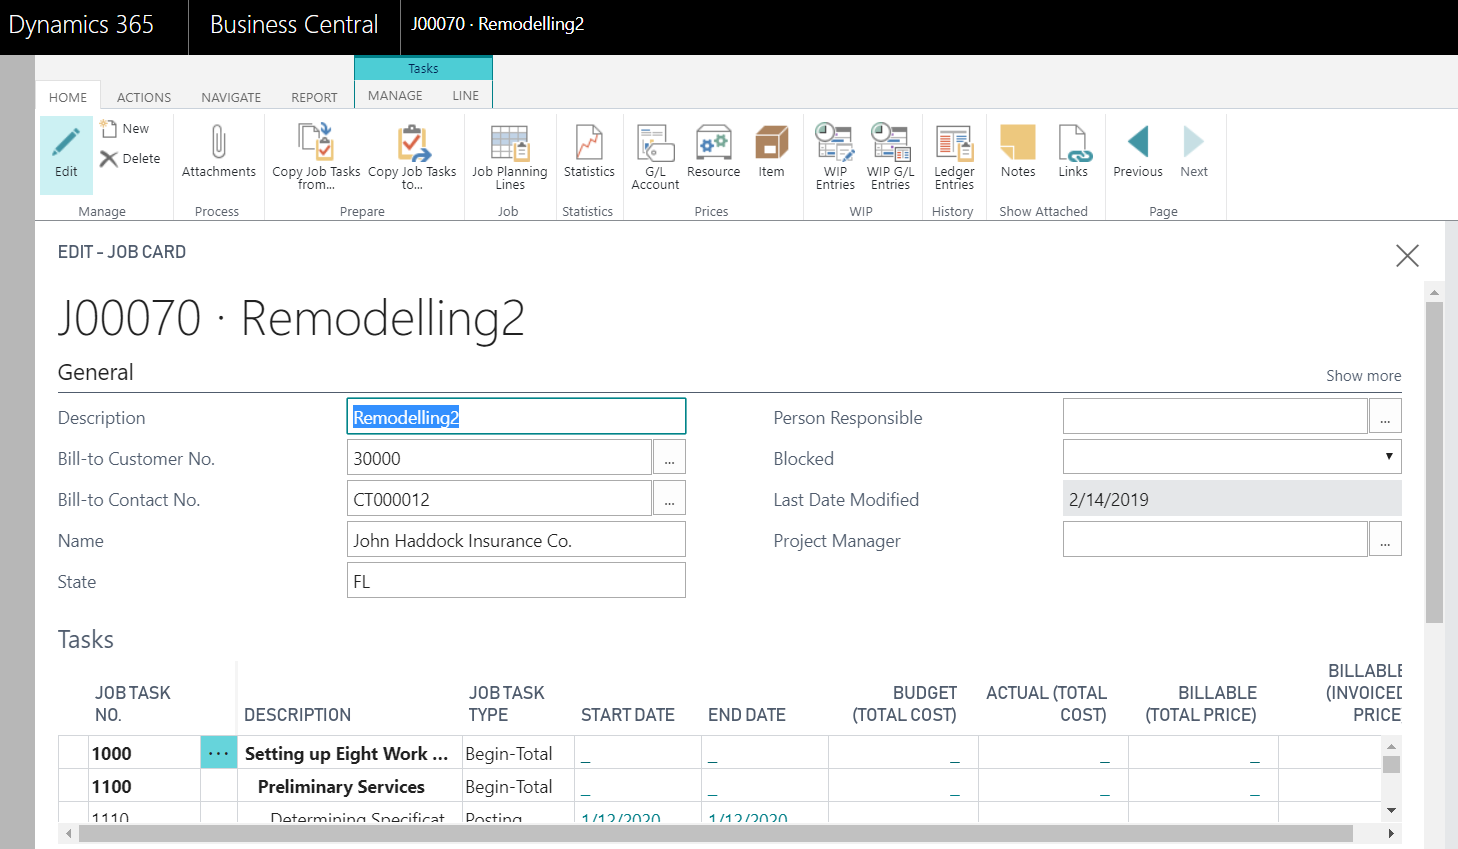
Figure 9 – Selecting a Description and Bill-to-Customer No. to copy in Microsoft Dynamics Business Central - Select the Job to copy from and specify task to allow it to copy all tasks. NOTE: On the Apply Fast tab, you can copy the quantity and the dimensions. Click OK, then OK again on the “The job was successfully copied” window. Then click “Finish.”
You will now see the new job.

Figure 10 – New job created in Microsoft Dynamics Business Central by copying an existing job


If you have any questions about creating jobs or other Dynamics NAV or Business Central functionality for any version, contact ArcherPoint.
Read more “How To” blogs from ArcherPoint for practical advice on using Microsoft Dynamics Business Central or NAV.
If you are interested in NAV/Business Central development, check out our collection of NAV and Business Central Development Blogs.