
Setting Up and Using Time Sheets in Microsoft Dynamics NAV 2018

For companies that use Microsoft Dynamics NAV and have employees who need to track time against a job, for service, or for HR, there is a feature that does not typically get attention during the initial implementation or if your company is growing. This blog explains how to set up and use the Time Sheets feature in Microsoft Dynamics NAV 2018.
Setting Up the Time Sheets Feature
- For the Search Resource setup, you will need to fill in the following fields:
- Time Sheet Nos
- Time Sheet First Weekday
- Time Sheet by Job Approval
- Never = One the Resource card the approval user is the person to approve the time sheets
- Always = On the Job card, the “Person Responsible” approves the time
- Machine Only =
- If a machine time sheet is linked to a job, the “Person Responsible” on the Job card approves the time sheet
- If the machine time sheet is linked with a resource, the “Time Sheet Approver User ID” approves
Figure 1 – Resource Setup in Microsoft Dynamics NAV 2018
- Once you have the base settings set up, you will need to set up a Time Sheet Administrator:
- Search User Setup. Note: You are only allowed to have one Administrator
- Place your cursor on the line of the user you want to be the admin, then “Check Time Sheet Admin”.

Figure 2 – User Setup in Microsoft Dynamics NAV 2018

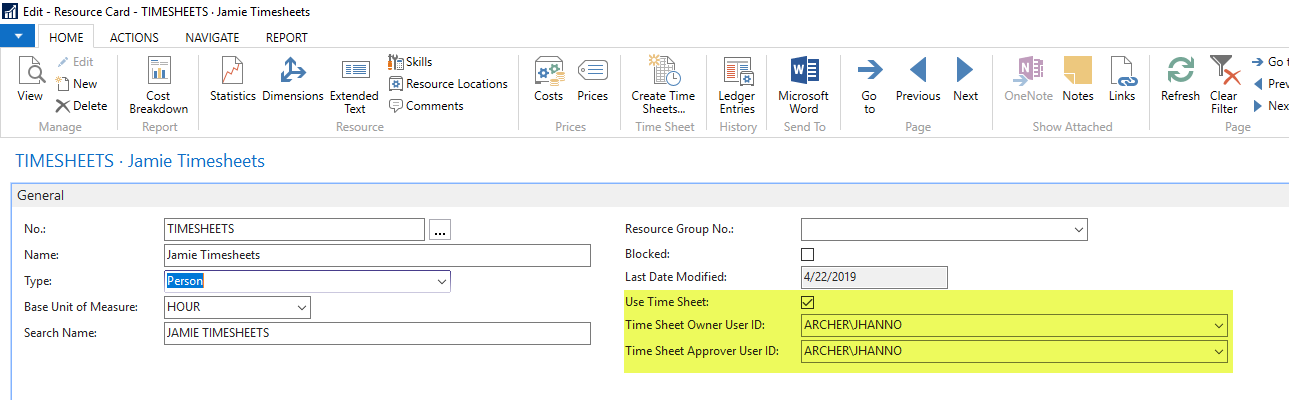
- Next, you will need to set up Resources to be allowed to be associated and linked with time sheets. Note: When you have an employee set up with time sheets, their time must go through time sheets and then to the appropriate areas.
- Search for Resources.
- Check “Use Time Sheet”.
- Select the time sheet user ID that will be linked with these resources. Note: Only one resource can be linked to a user ID.
- Select the time sheet to approve the user ID.

Figure 3 – Setting up a resource to be associated with a time sheet in Microsoft Dynamics NAV 2018
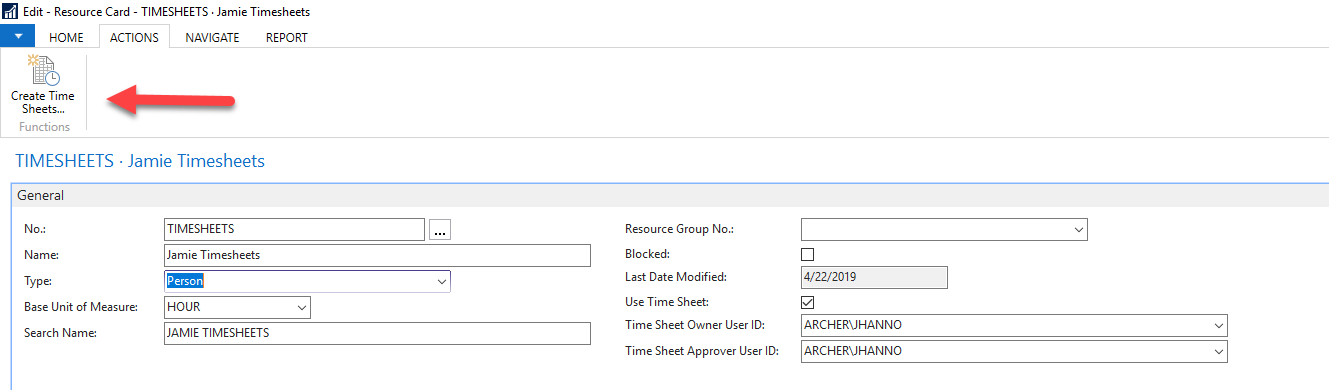
Once your resource is set up, you can create time sheets for your resource, employee, or contractor. There are two ways to create time sheets; one is from the Resource Card, and the other is from the time sheet. Note: Time sheets are created based on a week.
Creating a Time Sheet from the Resource Card
- From the Resource Card home tab or Actions tab, select Create Time Sheets.

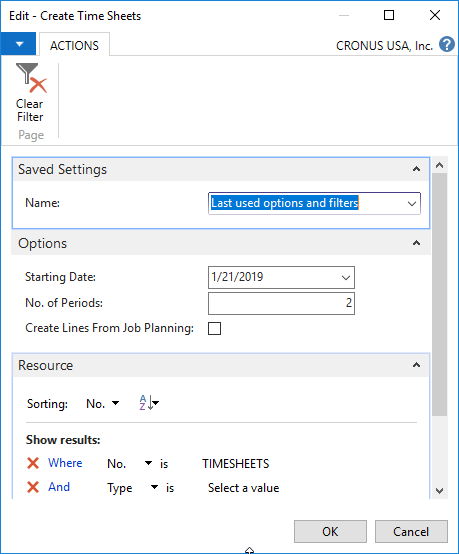
Figure 4 – Creating a time sheet from the Resource card in Microsoft Dynamics NAV 2018 - Enter the start date as Monday and the number of periods as the number of weeks. Click OK.

Figure 5 – Entering the Starting Date and No. of Periods for time sheets in Microsoft Dynamics NAV 2018
Entering Time Against a Time Sheet
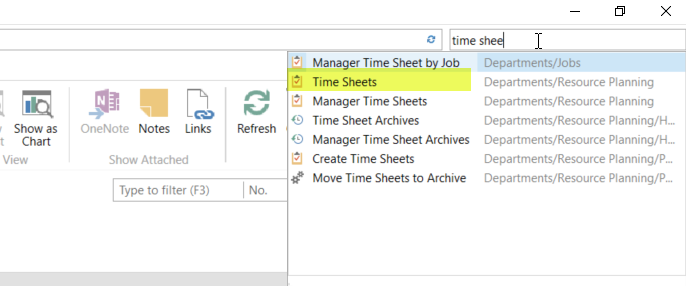
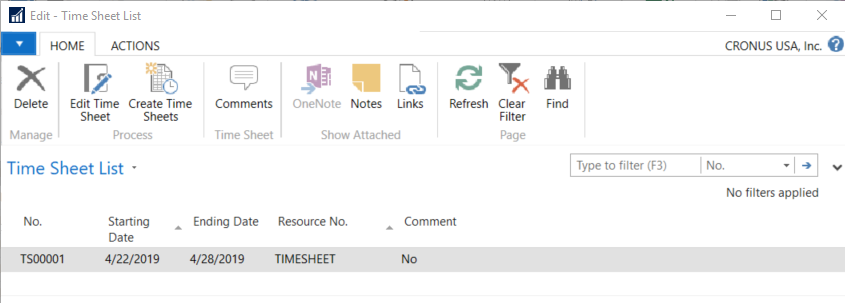
- Search for Time Sheets.

Figure 6 – Searching for Time Sheets in Microsoft Dynamics NAV 2018 - Edit the proper time sheet.

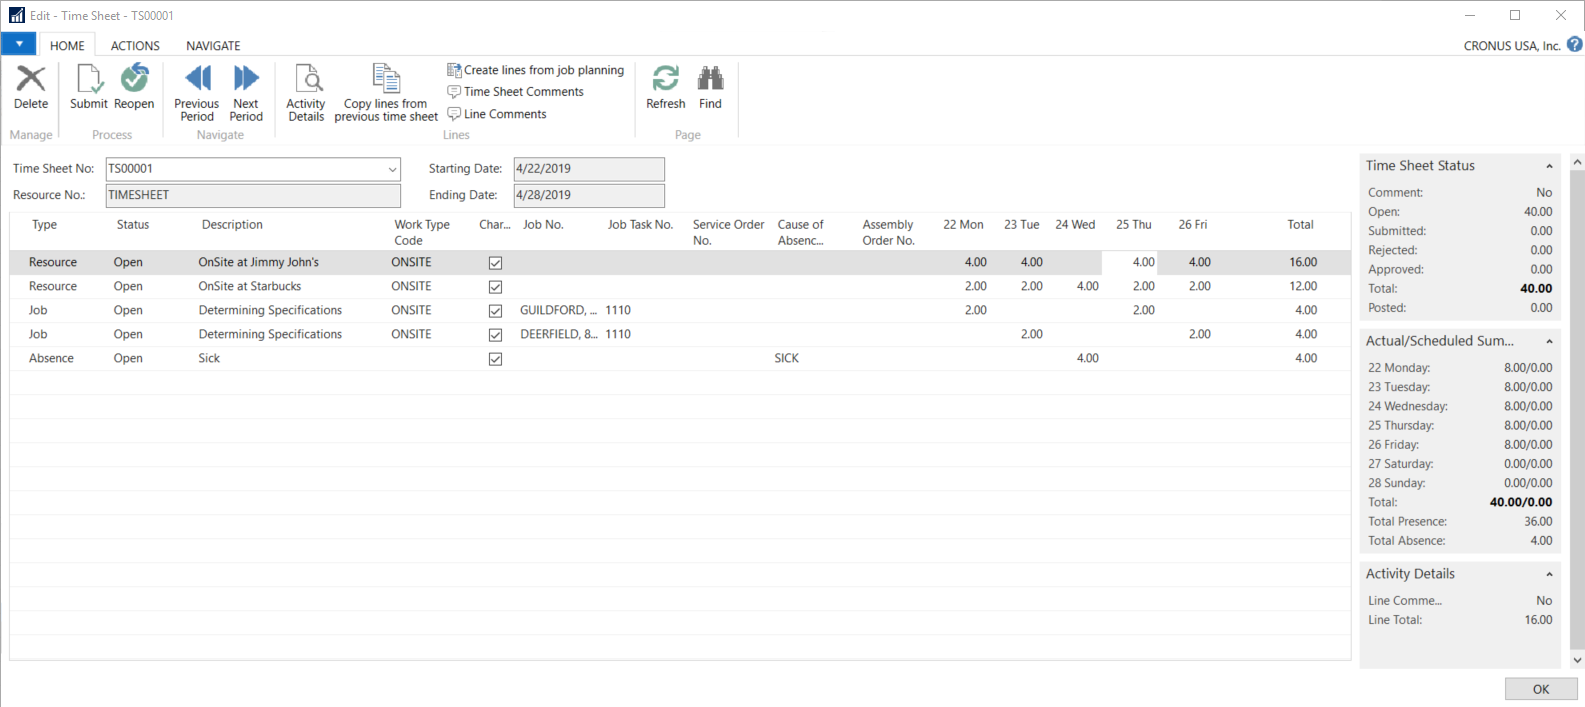
Figure 7 – Editing a time sheet in Microsoft Dynamics NAV 2018 - Enter the activity/time as your business processes indicates:
- Type – Select Resource, Job, Service, Absence, or Assembly Order.
- Description – You leave what is defaulted, but you can change the description as to what best fits your work.
- Work Type Code – This field is associated with the resource’s cost and or price for different rates, depending on the type of work.
- Enter the number of hours by day for this task.
- Create as many lines as you need.

Figure 8 – Creating lines in a time sheet in Microsoft Dynamics NAV 2018 - When ready, you can submit your time sheets. You will have the option to submit just one line or multiple lines. Note: Look on the right in the Fact Box Actual/Budget Summary.
When you submit the lines, that status will change from Open to Submitted.
Note:
For days absent from work, you must have a resource and employee set up and linked together.
If needed, you can re-open your time sheet and make changes as needed, but you will need to submit it again.
Reviewing and Approving or Rejecting Time Sheets
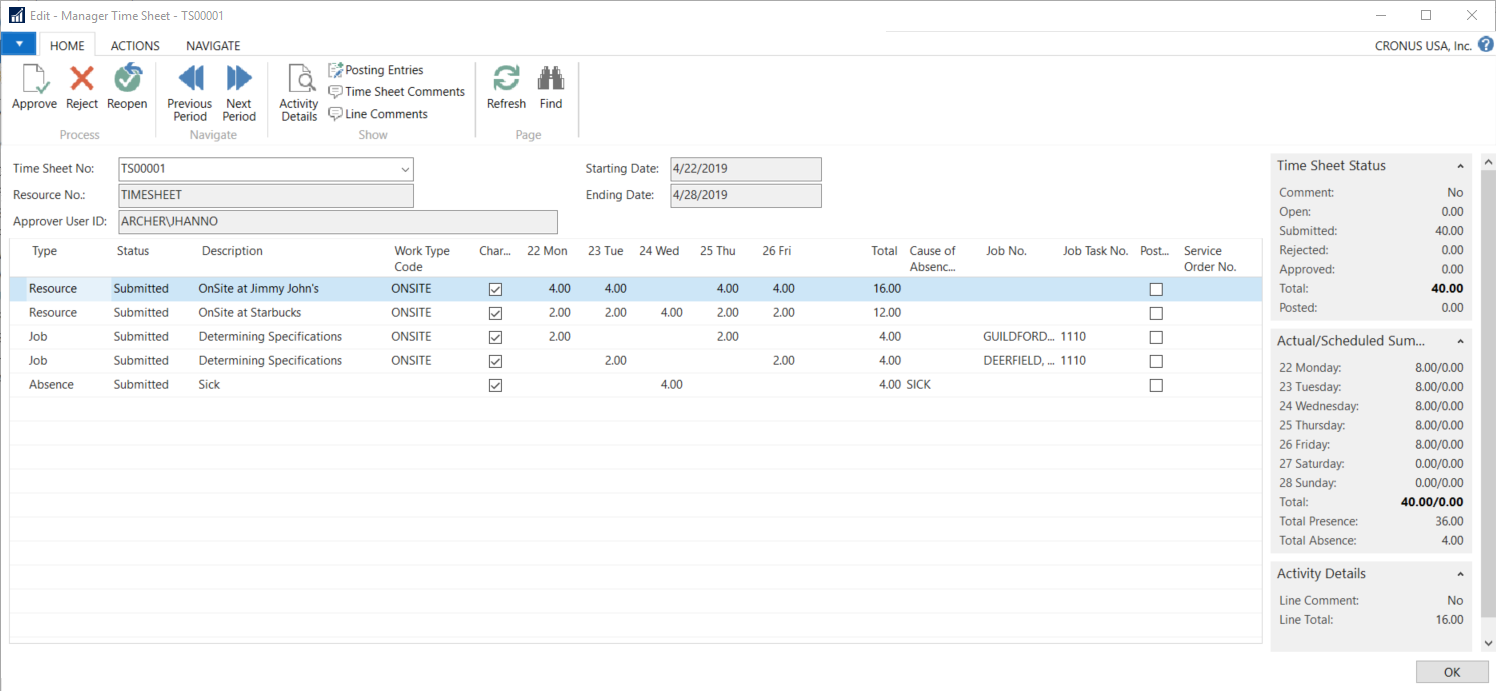
- Approver settings come from the Setup option in “Resource Setup,” depending on the rules you have set.
- To review submitted time, search “Manager Time Sheets”; for NAV 2017, search “Time Sheets to Approve”.
- Review and approve or reject as needed. Place your cursor on the line; then in the ribbon, select Approve. The Status will change. You can also reject the line. Note: Look on the right in the Fact Box Actual/Budget Summary.

Figure 9 – Reviewing, approving, or rejecting a time sheet in Microsoft Dynamics NAV 2018 - When all lines have been approved or rejected, you can move on to the next time sheet.
Note: If you have time entries that need to go to a different area based on the type of activity, you will need to open the appropriate journal and process the lines.
Posting Time to the Resource Journal
- Open NAV.
- Search for Resource Journal.
- From the Resource Journal, select “Suggest Lines from Time Sheet”. Click OK.
- Review the lines and make any adjustments as needed.
- When ready, select Post.
Note: The lines are posted to the resource journal to hit the Resource ledger entries for proper reporting.
Posting to the Job Journal
- Open NAV.
- Search for Job Journal.
- From the Job Journal, select “Suggest Lines from Time Sheet”. Click OK.
- Review the lines.
- When ready, select Post.
Note: The lines are posted to the Job journal to hit the Job Cost for proper budget vs. cost on Jobs.
If you have further questions about time sheet functionality or other Dynamics NAV or Business Central questions for any version, contact ArcherPoint.
Read more “How To” blogs from ArcherPoint for practical advice on using Microsoft Dynamics Business Central or NAV.
If you are interested in NAV/Business Central development, check out our collection of NAV/BC Development Blogs