Using Triggers to Display Messages in Microsoft Dynamics Business Central

Triggers are used in Microsoft Dynamics 365 Business Central for a variety of purposes, from validating input to controlling system behavior. This blog introduces using triggers by showing how they work with Tables and Fields.
In this blog, we will cover how to:
- Create a Table
- Create a Page for the table
- Publish it to the cloud
- Test whether our triggers are working
Using Page Triggers in Business Central
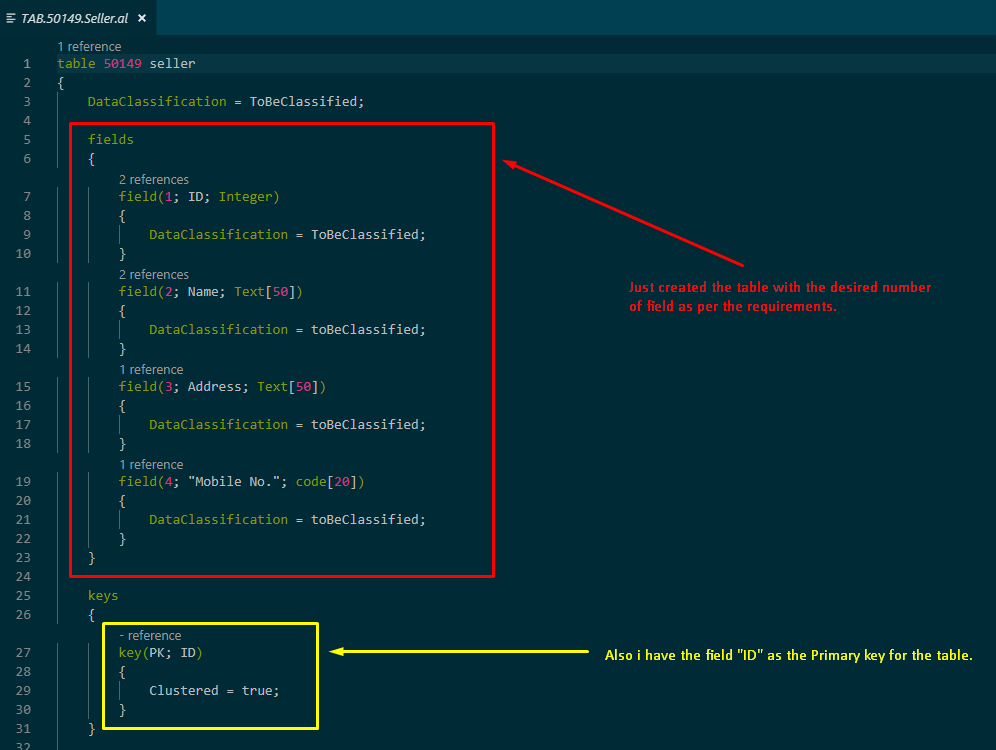
Open Visual Studio and, after completing all the prerequisites (changes in app.json and launch.json and downloading the symbols required coding using the AL Language), create a page and then create a table in it as shown in Figure 1.
Figure 1 – Creating a Table with a Primary Key of “ID”
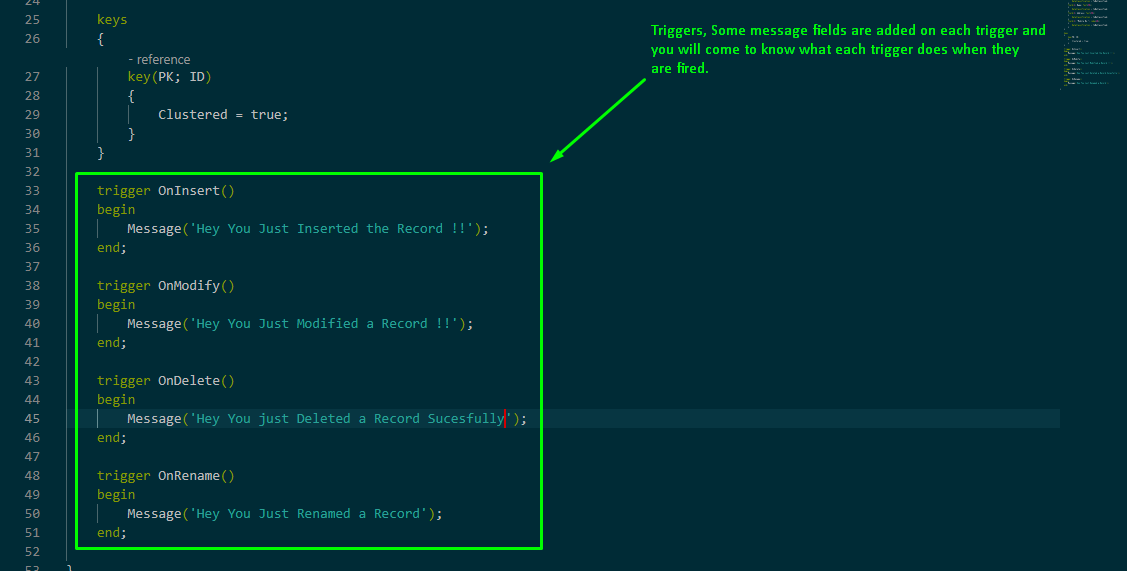
Figure 2 – Adding Triggers
Below is a list of the triggers used in the example and when they are fired:
- OnInsert(): When there is a new entry entered in the table
- OnModify(): When there is any modification performed on a field of the table
- OnDelete(): When any entity is deleted from the table
- OnRename(): When the primary key of the table is changed
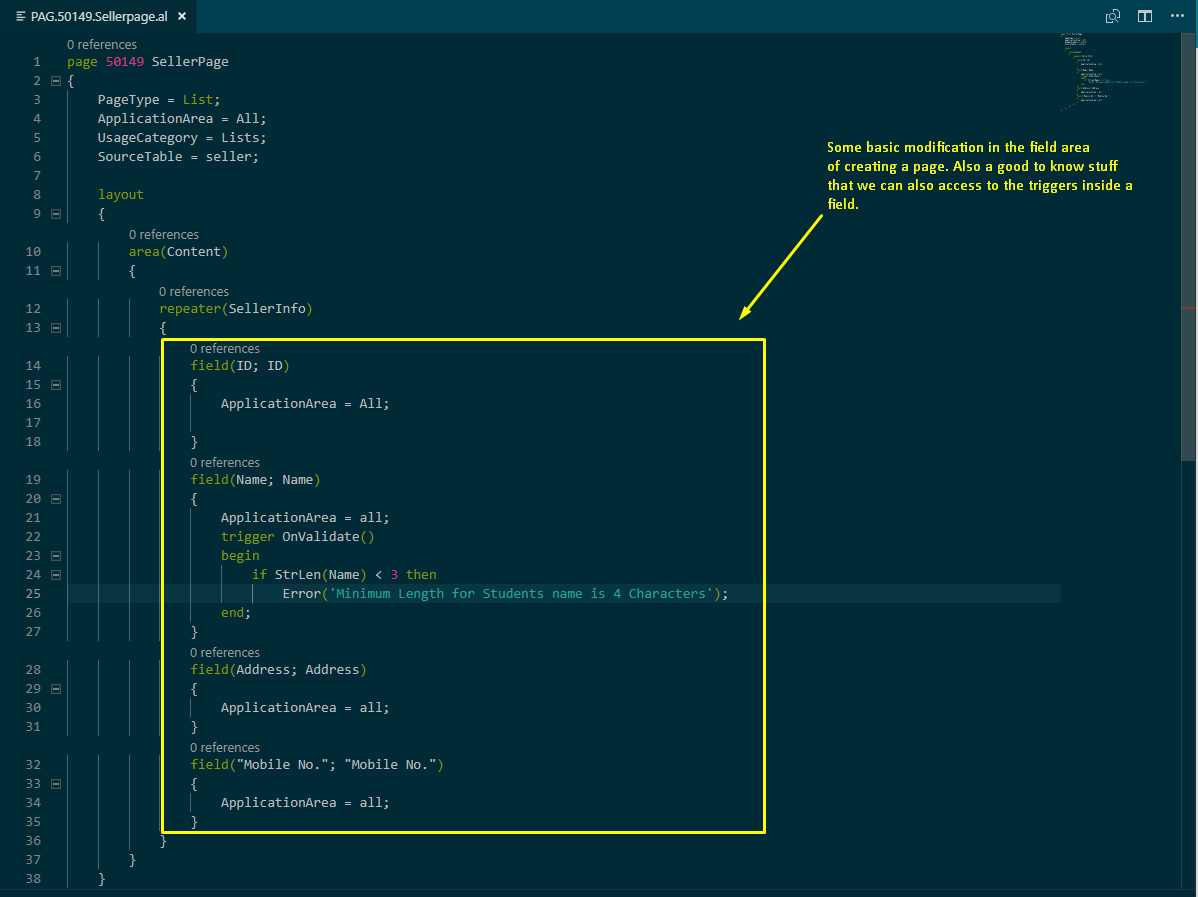
Figure 3 – An example of how to create a page and add a trigger inside a field
The trigger OnValidate() is helpful where we require a condition on the characters that can be entered in the field. In this example, we have required that the length of name in the field must be greater than three characters.
Once the page is created, publish it and move to the web client to see the trigger is working. Press F5 to publish it and a new window of the default browser opens.
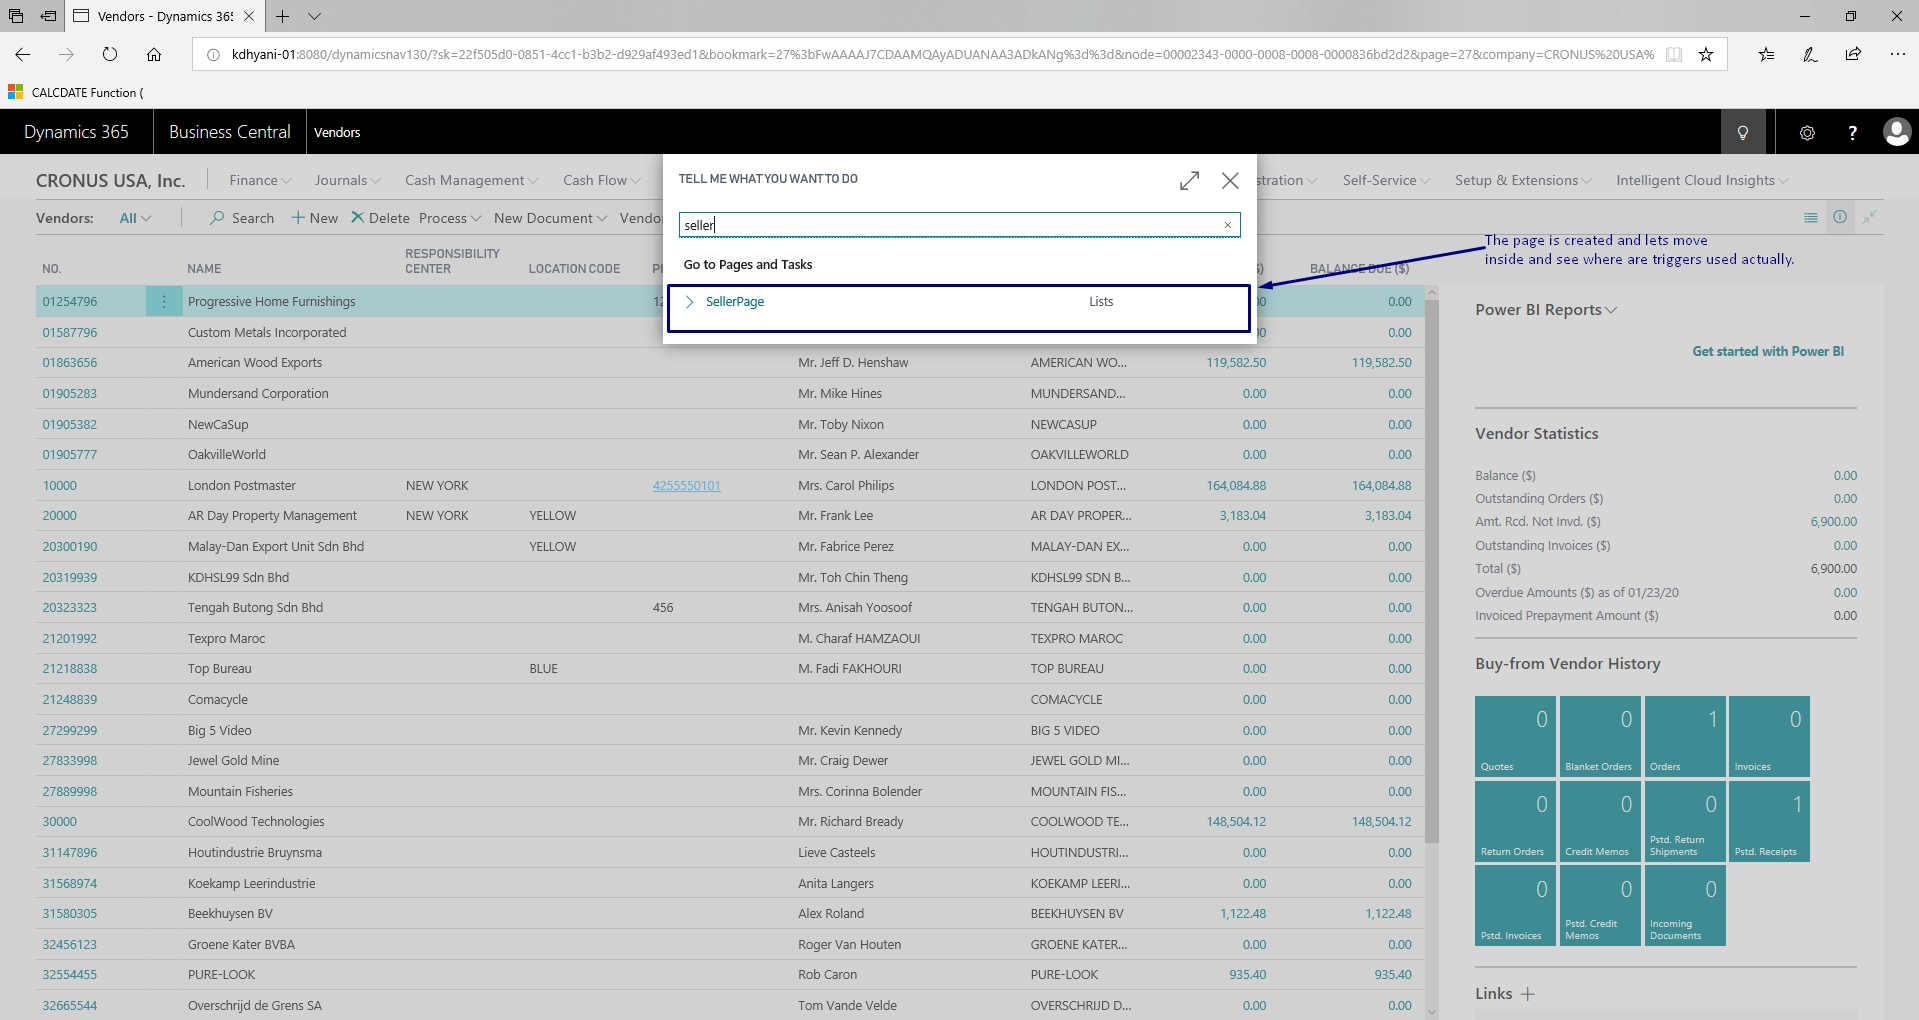
Figure 4 – Use IntelliSense to search for the page created
Testing the OnInsert() Trigger
Using IntelliSense (using the shortcut Alt+Q), type the page name and press Enter.
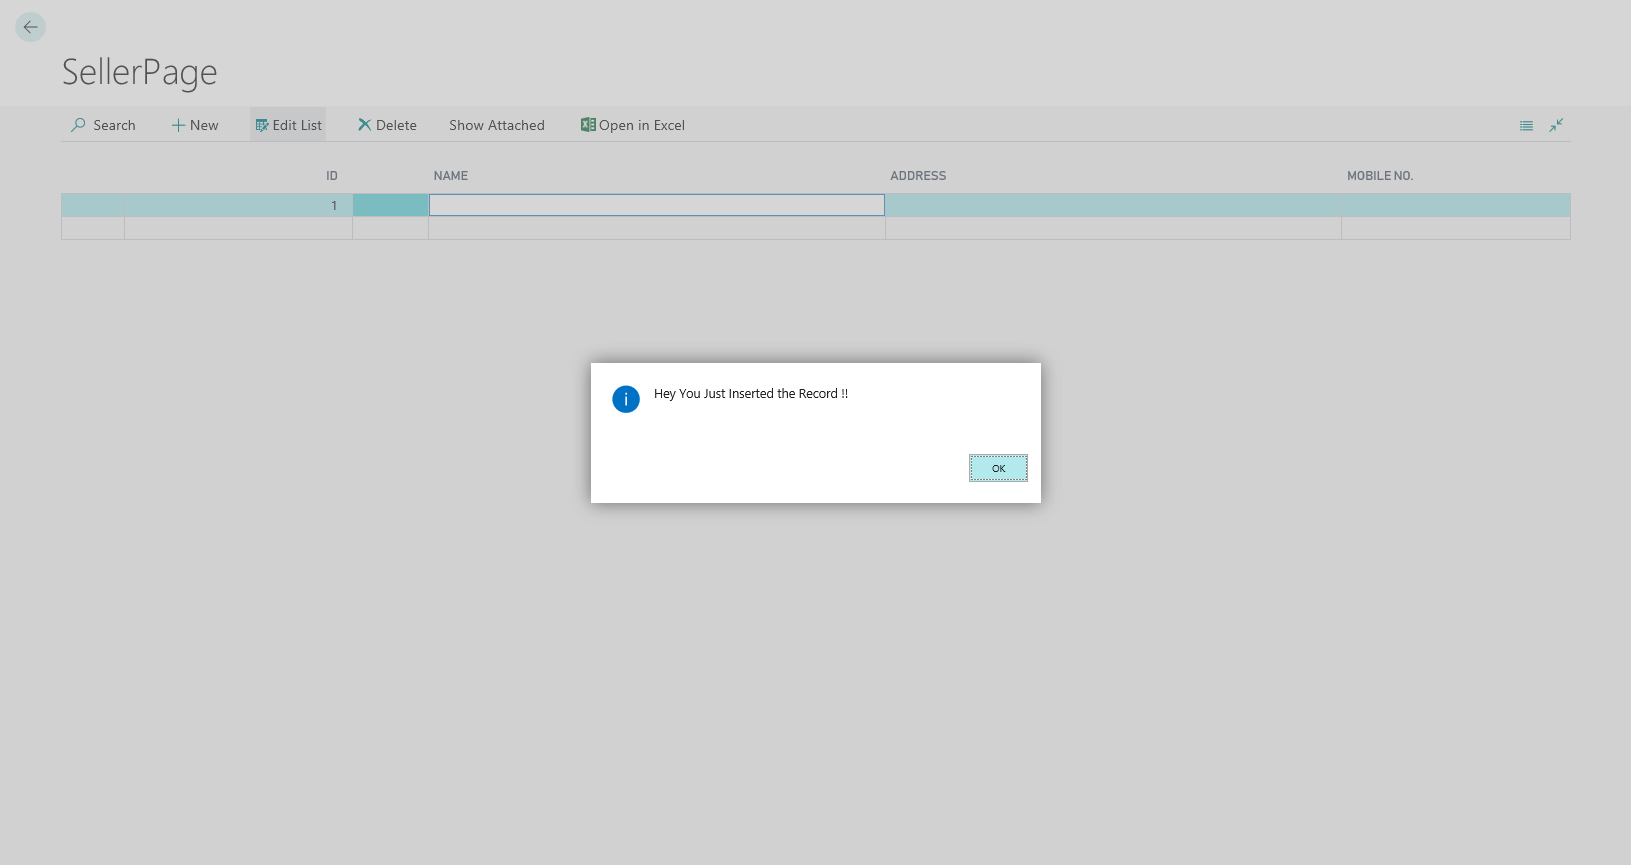
Figure 5 – The Insert trigger is fired as soon as the “ID” is entered in the page
Once the page name is inserted, the system indicates a new record was inserted. This is the initial message whenever a new entry is made on the page.
Testing the OnValidate() Trigger
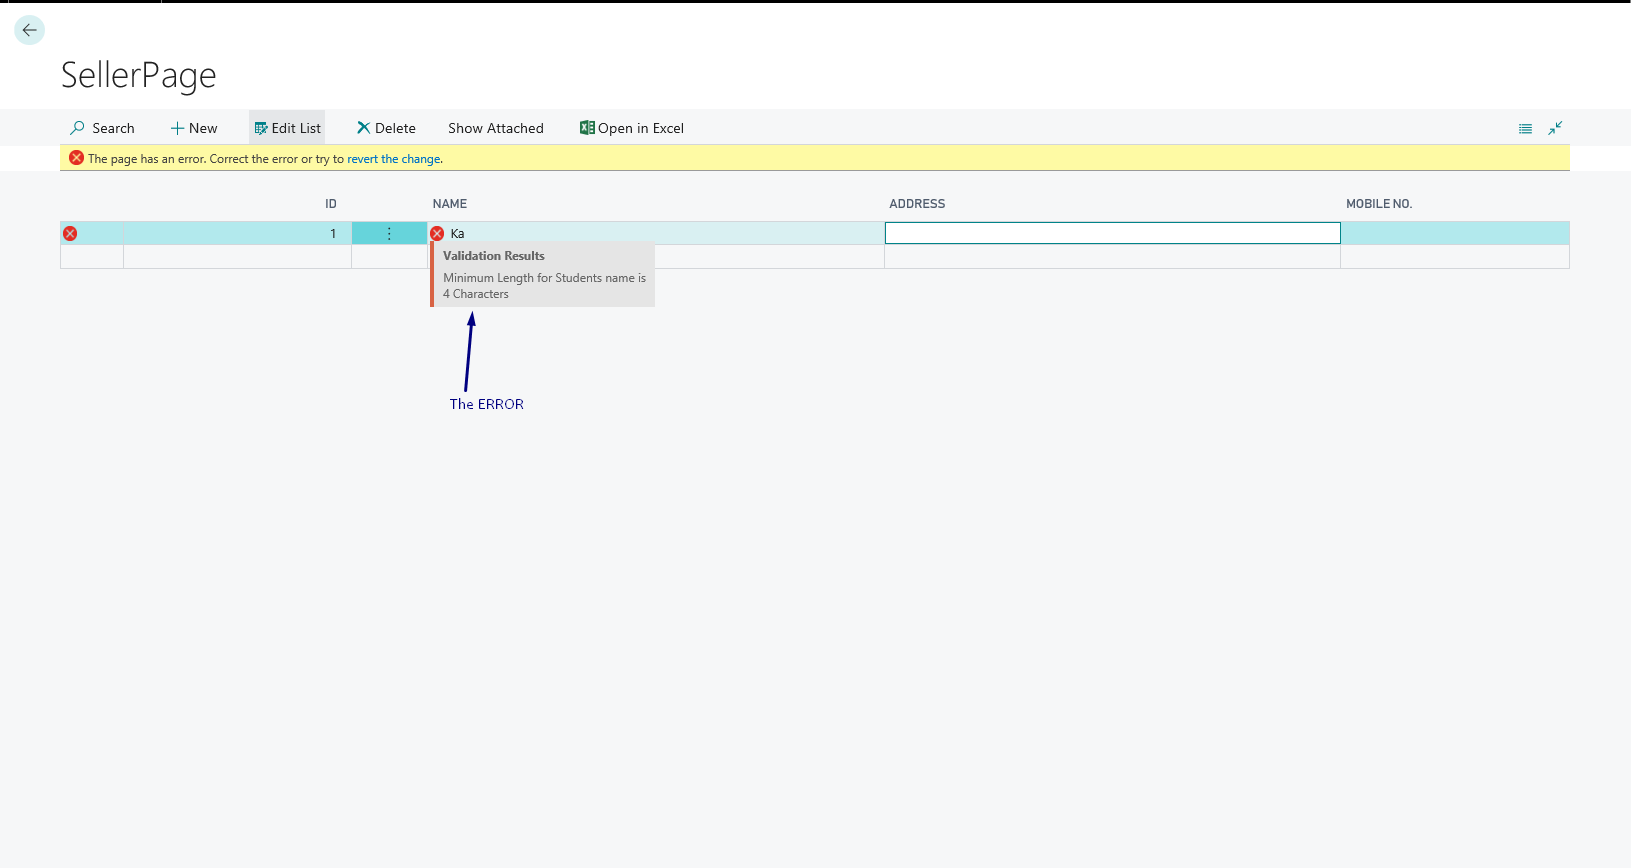
If you try to enter a name that violates the length condition, you will receive an error.
Figure 6 – The condition for the “Name” field triggers an error
The major difference between a Message and an Error is that Error won’t go away until and unless the condition is satisfied for that field.
Testing the OnModify() Trigger
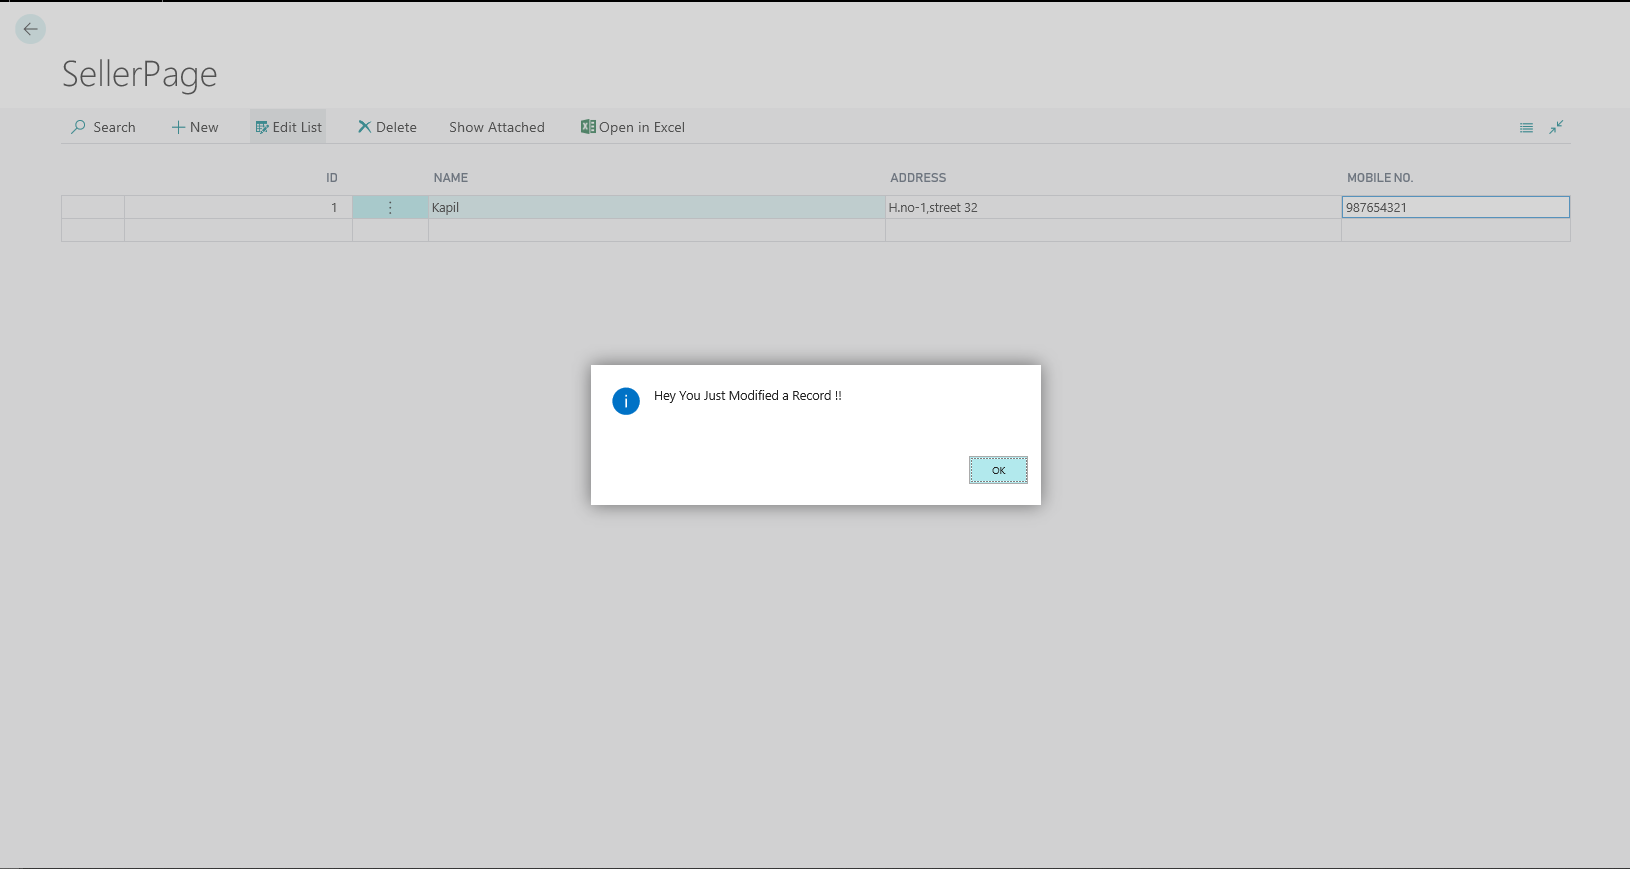
Once everything is added in the table, the OnModify trigger is fired.
Figure 7 – Modifying a record fires the OnModify() trigger
Testing the OnRename() Trigger
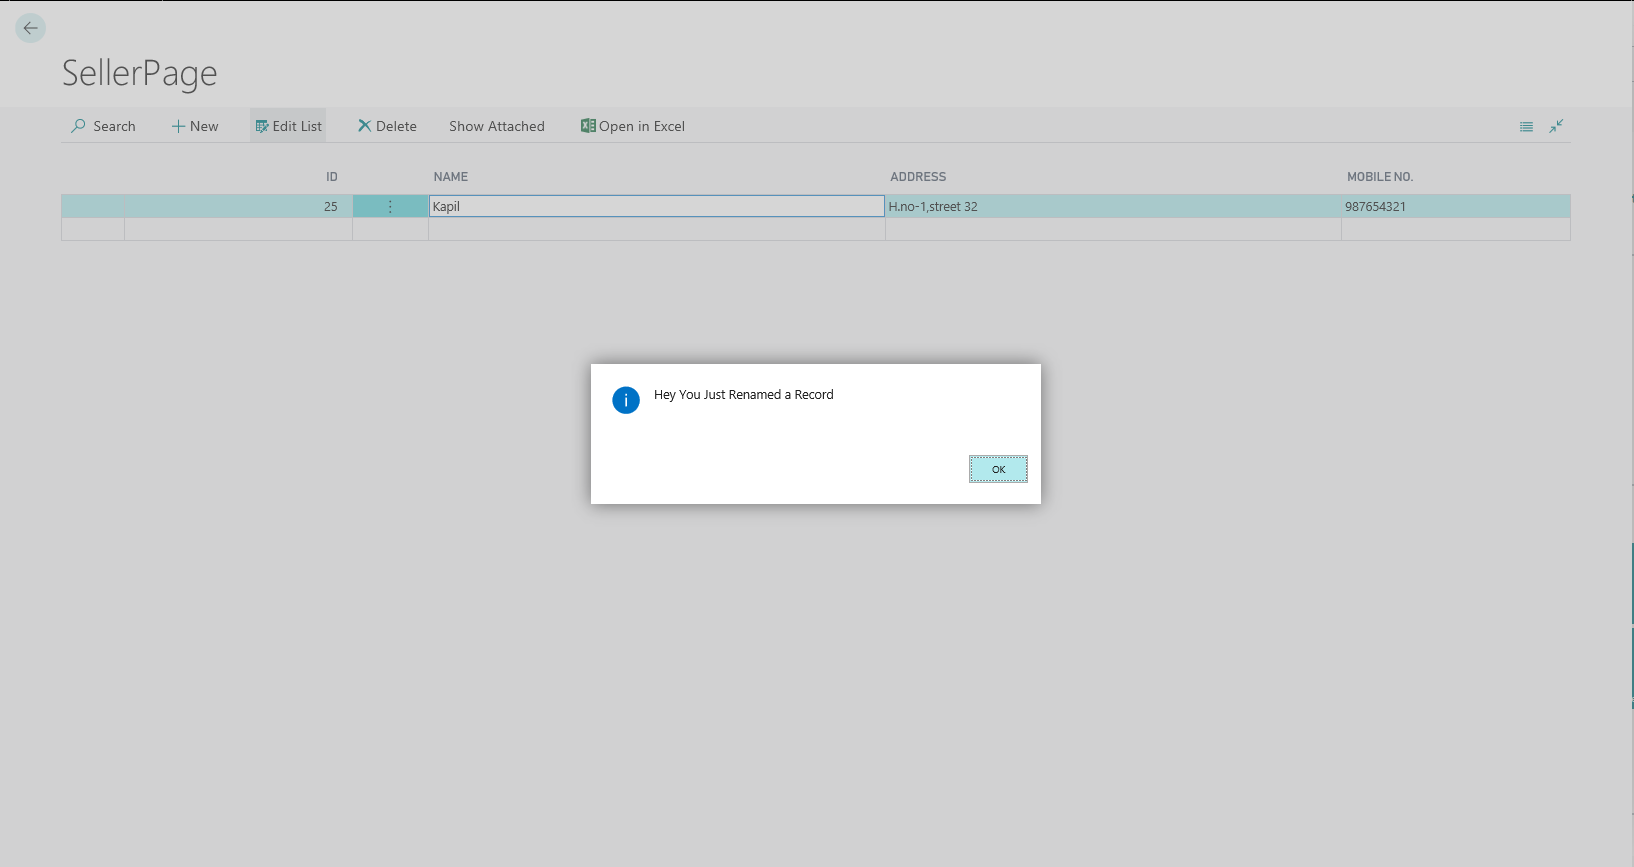
Now try to change the primary key of the entity in the table and see what all it gives you. The system will ask you to confirm whether you want to rename the primary key. If you select Yes, the OnRename() trigger is fired.
Figure 8 – The OnRename() trigger is fired when the Primary key is changed
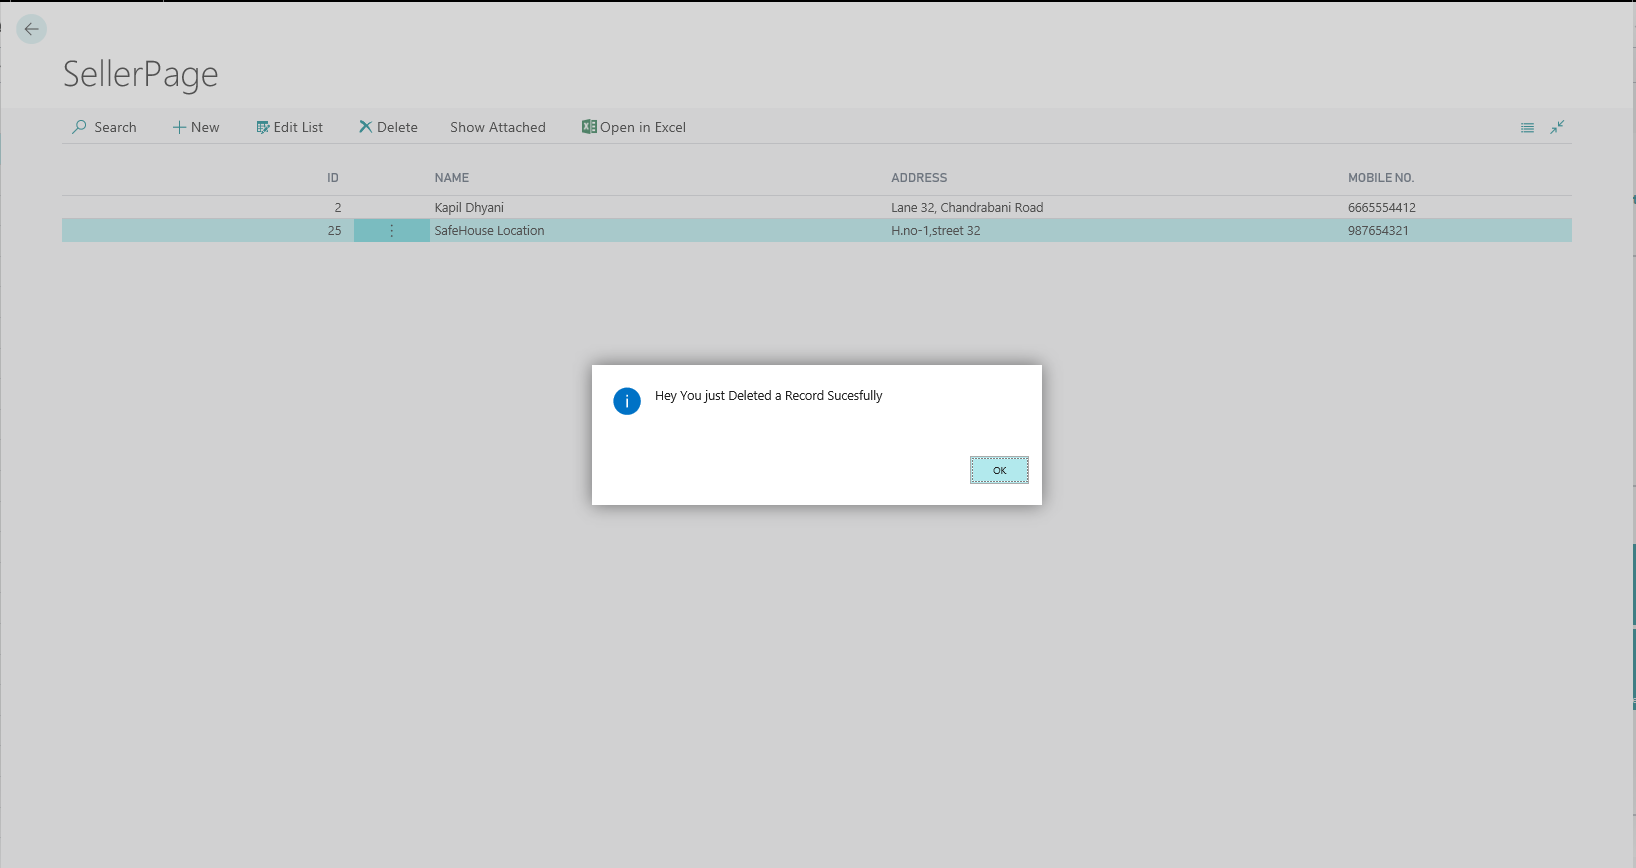
Testing the OnDelete() Trigger
Now observe what happens when you delete a record. When a record is deleted, the system fires the OnDelete() trigger.
Figure 9 – The OnDelete() trigger is fired when a record is deleted
If you have any questions about Extensions or other Dynamics NAV or Business Central questions for any version, contact ArcherPoint.
Read more “How To” blogs from ArcherPoint for practical advice on using Microsoft Dynamics Business Central or NAV.
If you are interested in NAV/Business Central development, check out our collection of NAV and BC developer blogs.

