
Dynamics NAV 2015: How to Apply Purchase Invoices and Credit Memos

NAV gives you the ability to apply Purchase Invoices and Credit Memos together for a Vendor.
1. Go to Departments > Financial Management > Payables > Vendors
2. Select Vendor – Select the Vendor you are wanting to apply one or more entries together. You can open Vendor Card or highlight the Vendor in the list and then select the Balance under Vendor Statistics.

Figure 1 – Select the desired Vendor
3. Balance – Select the Vendor Balance
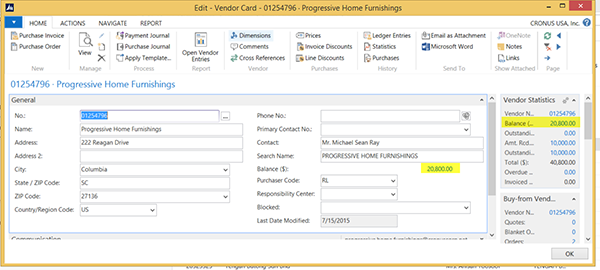
Figure 2 – Select the Vendor Balance
4. View – Vendor Ledger Entries – Select the Vendor Ledger Entry you would like to apply entries to.

Figure 3 – Select the Vendor Ledge Entry you will apply entries to
5. Apply Vendor Entries – Select ‘Apply Entries’ in the Tool Bar above.
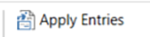
Figure 4 – Select Apply Entries
Select the line that you want to Apply and then select the ‘Set Applies-to ID’ in the tool bar at the top. NAV will populate the Login Users ID. Repeat process until all items are applied.
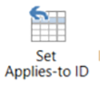
Figure 5 – Select ‘Set Applies-to ID’
6. Review entries – After selecting all lines that are being applied, notice that the ‘Amount to Apply’ should equal to the amount you are Applying.

Figure 6 – The ‘Amount to Apply’ should equal the amount you are applying
7. Post – Select the Post Application in the Tool Bar above.

Figure 7 – Select ‘Post Application’ in the Tool Bar
8. Edit – Post Application – NAV will prompt you with a ‘Document No.’ and ‘Posting Date’. The Document No. is the Purchase Invoice you are appling the entry to and the Posting Date of the entry.
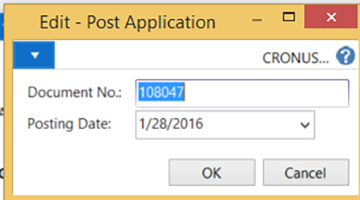
Figure 8 – Complete or accept the fields in Edit – Post Application
9. After you select OK it will pop up a window to show ‘The application was successfully posted’.
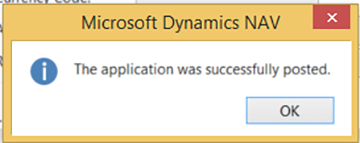
Figure 9 – Success window after completing the task
10. View Applied Entries – Select the Vendor Ledger Entries and then select the ‘Applied Entries’ in the Tool Bar above for review.
NOTE: Notice that the Credit Memo is no longer in the list.
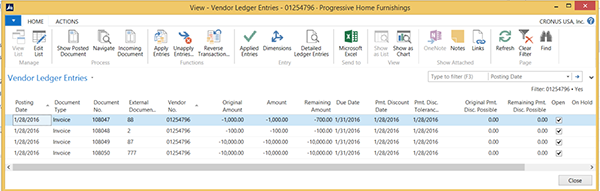
Figure 10 – View of the Vendor Ledger Entries window
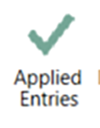
Figure 11 – Select ‘Applied Entries’ in the Tool Bar

Figure 12 – Review the Applied Vendor Entries
Read more “How To” blogs from ArcherPoint for practical advice on using Microsoft Dynamics NAV.
Trending Posts
- Login Error: Communication protocol mismatch between client and server
- How to Make Measures Total Correctly in Power BI Tables
- The Microsoft Technology Stack – What Is It & Why Should You Care?
- MRP vs. MPS: Choosing the Right Planning Approach for Your Manufacturing Business
- Guide to How Manufacturers Can Implement Quality Control Systems Using Business Central
Stay Informed
Choose Your Preferences
"*required" indicates required fields