Dynamics NAV Role Tailored Client - Master Template for Report Layouts

When you are designing a Custom Report Layout, the Visual Studio/Report Builder opens up with a Blank page.
During implementation of a new project, customers are often looking for custom layouts which have similar structures. This master Layout can be used to set all the common properties and objects that the developer needs to develop reports for a project.
For example, I am building a report, and the layout requires the following:
- A page header with four text boxes which can grow and be set to False
- A page footer
- A table in the body with, for example, 5 columns
In NAV, when you create and open a layout, you find some functions by default, including BlankZero, BlankPos, etc. However, if you attempt to create an SSRS Report directly by opening the Report Builder, these functions are not available.
In NAV 2016, using the default installation path, the Master Template in the NAV RTC report is located at: C:Program Files (x86)Microsoft Dynamics NAV80RoleTailored ClientReportLayout
Figure 1 – Microsoft Standard Report Layout Location
You will need to simply overwrite the template according to your requirements.
NOTE: For this demonstration, I am using Report Builder. The steps remain same if you are using Visual Studio.
Create the customized layout
Open the NAV Client and create a new report.
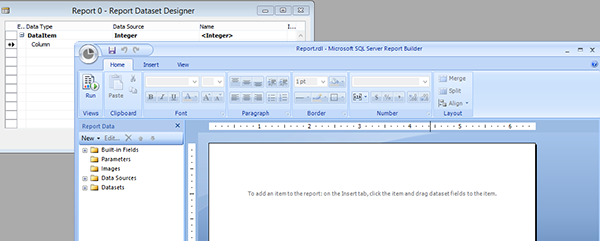
Navigate to Tools > Layout to open the default layout, as shown below.
Figure 2 – RDLC layout.
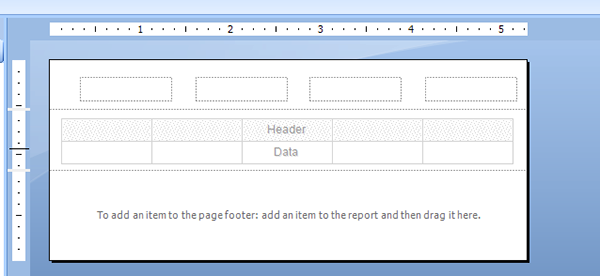
Now, add all the elements discussed above and set all the properties listed above. The layout appears as shown below.
Figure 3 – Master layout components.
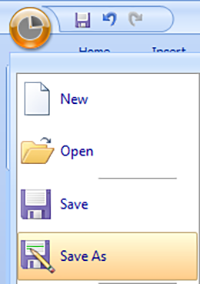
Save the customized layout
This step is important to do when you create a new report layout.
Figure 4 – Save Menu.
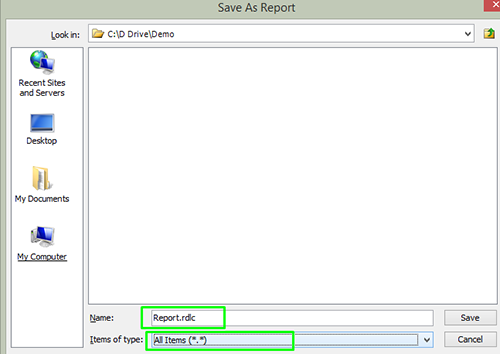
Save the Layout with Name Report.rdlc (By default, the system will suggest a .rdl extension; change the Item to All and save it with exact name as highlighted).
Figure 5 – Save Window.
Close the Report Builder/Visual Studio after saving the file and Close NAV.
Replace the customized layout
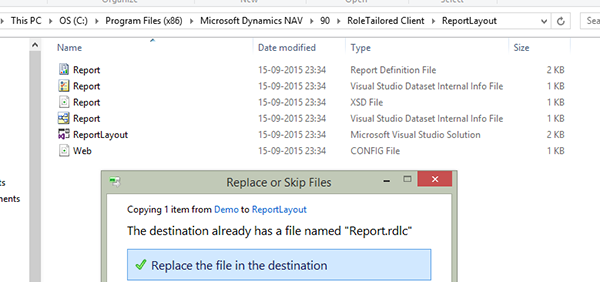
Copy the file from the path you have saved and replace the file in the ReportLayout folder of the respective RTC. I am using NAV 2016, so I will replace the file at C:Program Files (x86)Microsoft Dynamics NAV90RoleTailored ClientReportLayout:
Figure 6 – Replacing the standard layout with a custom layout.
Our customized layout is now ready to be used.
Now, when you start creating a new report, as you navigate to the layout, you will see the custom layout you created instead of blank page.
If you have any questions about this process or other technical questions about Dynamics NAV, please contact ArcherPoint.
Read more “How To” blogs from ArcherPoint for practical advice on using Microsoft Dynamics NAV.


