Hints on Navigating on an Item Ledger Entry in Microsoft Dynamics NAV

We frequently use the Dynamics NAV Navigate tool and Microsoft Excel to verify Item Ledger Entry postings to the General Ledger.
When Navigating on an Item Ledger Entry that involves both a purchase receipt and a purchase invoice, you must do two Navigations to see all of the General Ledger postings.
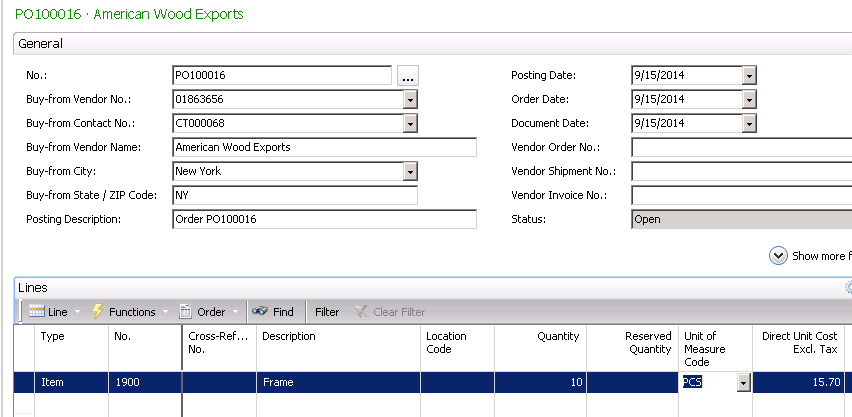
We start our scenario by creating a Purchase Order for a Bike Frame.
Figure 1 – Create a Purchase Order
We then receive and invoice the Purchase Order in separate transactions that create a single Item Ledger entry of REC0014.
Figure 2 – Receive and invoice the Purchase Order in separate transactions, creating a single Item Ledger Entry
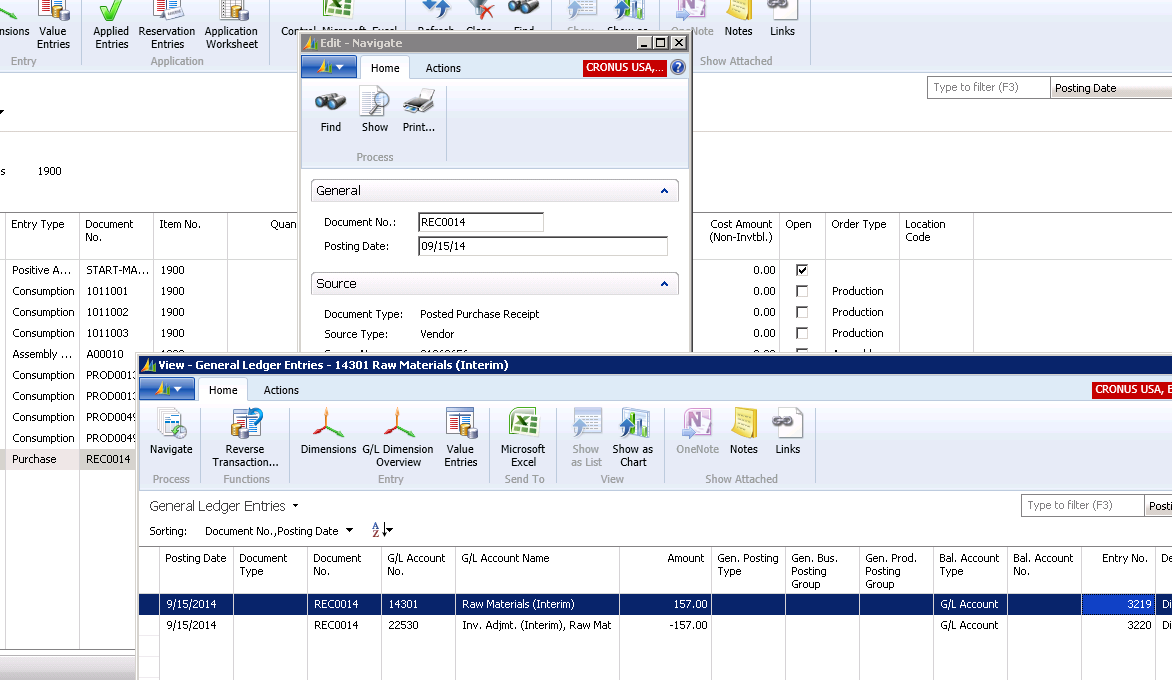
Now, if we Navigate on the Item Ledger Entry Document and show the General Ledger Entries, we only see the Receiving side of the postings.
Figure 3 – Navigate on the Item Ledger Entry Document and show the General Ledger Entries to see the Receiving side of the postings
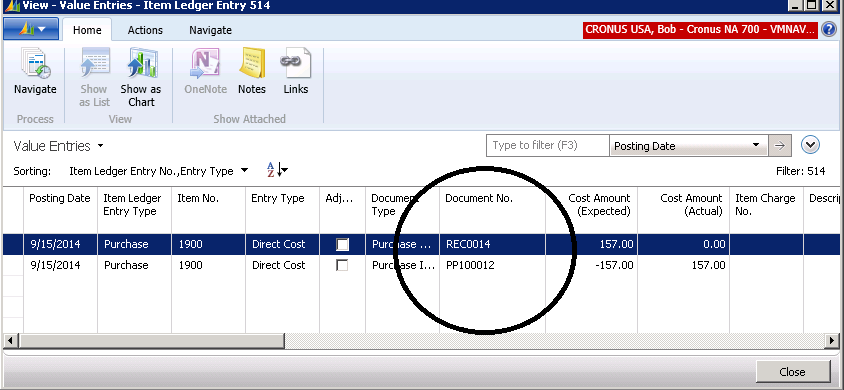
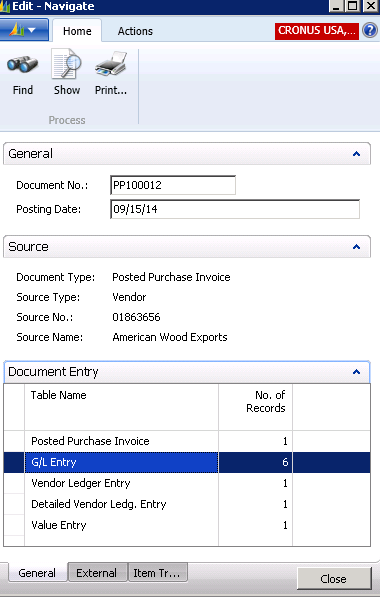
To see all of the General Ledger Entries, we need to drill down to the Value entries for the Item Ledger Entry. we now see that there are two Document Numbers that we need to Navigate to.
Figure 4 – To see all of the G/L Entries, drill down to the Value Entries for the Item Ledger Entry to find Document Numbers
Figure 5 – Navigate to the Document Numbers
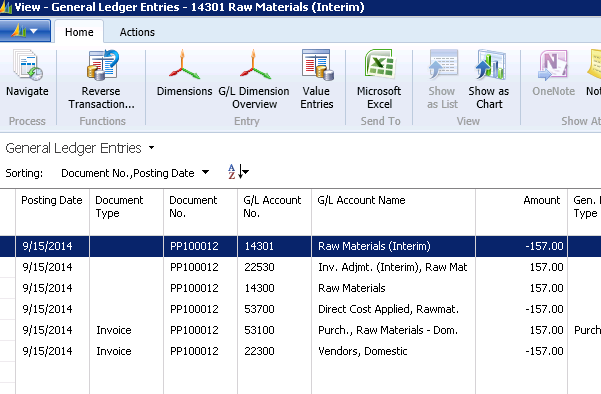
Figure 6 – View the G/L Entries
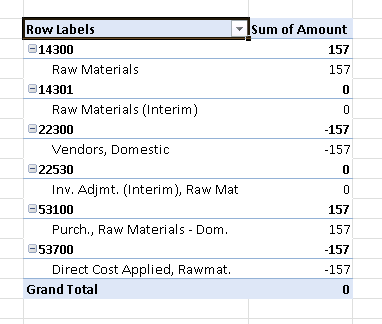
Now, when we take all of the General Ledger Entries to Excel and create a Pivot Table, we can see that the Postings to the General Ledger are correct.
Figure 7 – Take the G/L Entries to Excel and create a Pivot Table to see that the postings are correct
For more information on this or any other Dynamics NAV topic, please contact ArcherPoint.
For more step-by-step instructions on how to perform specific tasks in Microsoft Dynamics NAV, see our collection of How-To blogs.
Trending Posts
Stay Informed
Choose Your Preferences
"*required" indicates required fields

