
How to Handle Containers in Microsoft Dynamics NAV

Processing containers using standard Microsoft Dynamics NAV can be a bit cumbersome. However, there are a few tools in NAV that actually makes this easier than most people know. This blog will help you create a process that removes many of the issues that make container management so time consuming.
First, let’s review some of the requirements that make container management challenging and time consuming:
- Container shipments imply ocean shipments, which usually create an accounting requirement to show inventory in transit. This means the inventory must be received to show ownership and placed in transit to a local receiving location.
- To show something in transit, the most logical solution is to create a transfer order to show both ownership and inventory in transit.
- Container shipments many times could include many line items that have been accumulated, but are not yet in transit.
- Container shipments may contain items that were purchased on multiple purchase orders.
To summarize the above requirements, container shipments at best mean that a PO receipt, transfer order, and transfer receipt are required to properly account for the container while it is in transit. The time required to manually add each line item to a large, multi-order container shipment can be time consuming.
The process outlined below is a simple trick that nearly eliminates the duplicate effort required to create a transfer order to create and ship a container.
The tools we will user are basic standard NAV warehouse tools. We will use Bin Mandatory and the Receive function. The Receive function is not required, but for multiple order containers it is easiest if we use the Warehouse Receive function.
Follow the steps below to process your next container shipment.
- Create an offshore location to receive product from your vendor at this overseas location.
- Turn on the following features in the warehouse setup:
- Bin Mandatory = Yes (this will allow us to receive product in a container into a specific bin)
- Require Receive = Yes (This will allow us to use the warehouse receive function). NOTE: We will not set up a default receiving bin as we will want to put all items in a container into a unique bin for that container.
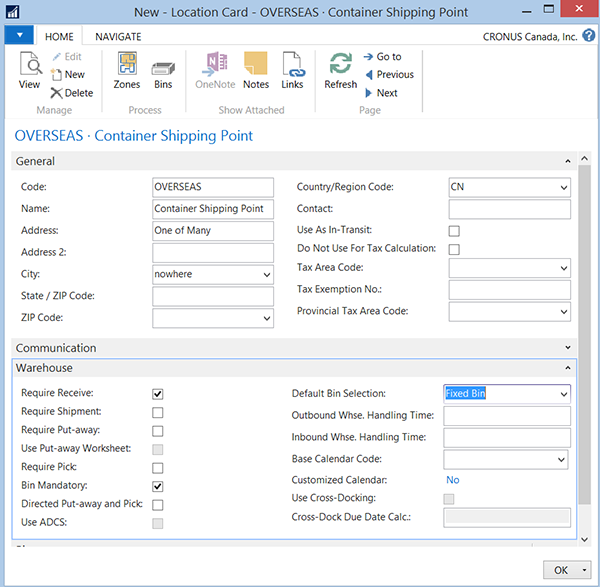
Figure 1. Location Card – OVERSEAS – Bin Selection.
- Create a new Bin Code when the vendor notifies you that a container has been or will be loaded. NOTE: I like to create a Bin Code that is equal to the container number so that the bin and container number match.
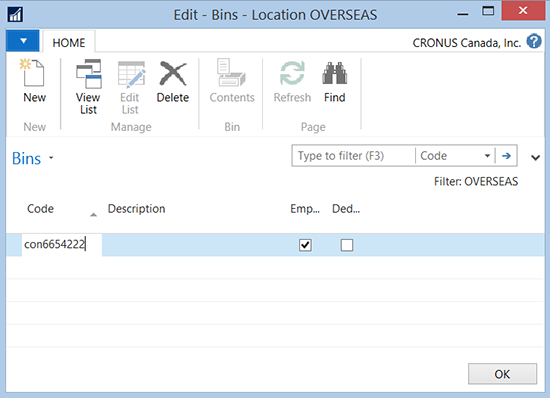
Figure 2. Creating a new bin code.
- Create a Warehouse receipt when the vendor advises you of what product has been received or loaded into the container.

Figure 3. Warehouse receipt.
- Set the Bin Code = Container Bin Code that was just created.
- Use either the Get Source Documents or the “Use Filters to get Source Documents” to bring the product to be received into the warehouse receipt.
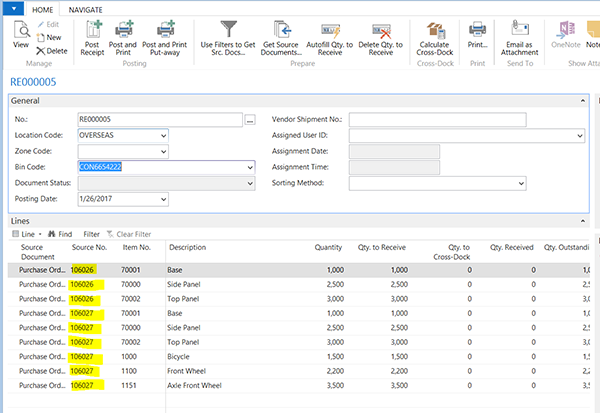
Figure 4. Bring product into the warehouse receipt.
- Delete any lines that are on the order but will not be included in the container.
- Enter the container quantity in the “Quantity to Handle” field of the warehouse receipt.
NOTE: We now have a warehouse receipt that has only the items in the container and the correct quantity.
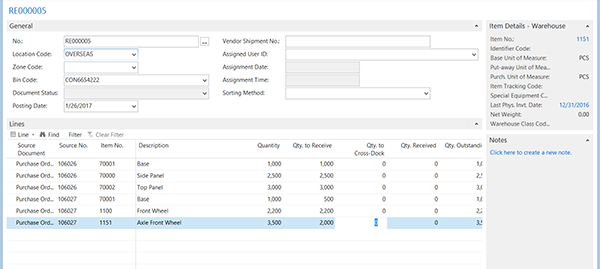
Figure 5. Enter the quantity of the items in the container.
- Post the receipt as vendor ships the goods (or as they deliver to the port if the ownership takes place as the products are received at the dock).
- When the container ships, all items and quantity from the container should have been received into the container bin.
NOTE: The receipt should now be deleted so that the balance of the quantities not received are available for a future container receipt.
- Now create the transfer to reflect the container is on the water and in transit.
- The “From Location” should be the overseas receiving location.
- The “To Location” should be the local receiving location.
- These two locations should be mapped so that an “In Transit Location” automatically populates.
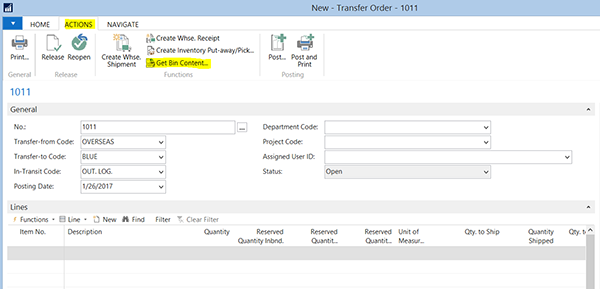
Figure 6. Transfer Order showing Get Bin Content Function.
- Use the Line Function “Get Bin” function to pull all lines from the container specific bin into the transfer order.

Figure 7. Get Bin Function Option Box – populate Bin Code
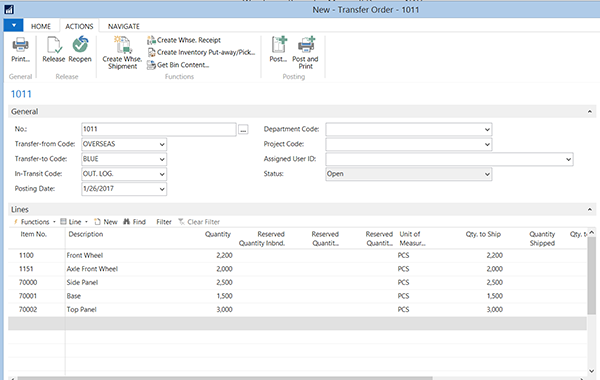
Figure 8. Resulting Transfer Order Lines.
- Post the Transfer Order Shipment.
We now have a transfer order specific to that container in transit and ready to be received. All inventory that is in the container was populated, shipped and received in three simple clicks:
- Get Bin Contents
- Posts Shipment
- Post Receipt
As I initially mentioned, with little effort, the challenges with container management can be greatly simplified using this little known trick. The accounting control can be maintained with little effort to show the inventory in transit. The fact that the container has multiple products from multiple purchase orders is simplified by using the Warehouse Receipt functionality. Using this makes it simple to get the product in one bin, which makes it easy to create the transfer order.
I hope you find using this simple trick a great time saver when processing your next container shipment.
If you have any questions on this function or other NAV questions, contact ArcherPoint.
For more step-by-step instructions on how to perform specific tasks in Microsoft Dynamics NAV, see our collection of How-To blogs.
Trending Posts
- Login Error: Communication protocol mismatch between client and server
- How to Make Measures Total Correctly in Power BI Tables
- The Microsoft Technology Stack – What Is It & Why Should You Care?
- MRP vs. MPS: Choosing the Right Planning Approach for Your Manufacturing Business
- Guide to How Manufacturers Can Implement Quality Control Systems Using Business Central
Stay Informed
Subscribe to Communications
"*required" indicates required fields