
How to Create a Journal Entry in Excel and Upload it to Dynamics 365 Business Central

A client recently asked me for instructions on how to create journal entries in Excel and then be able to “Copy and Paste” or “Upload” the entry from Excel to Business Central (If I had a dollar for every time I’ve heard “QuickBooks can do it…”). I had been addressing this before by showing a Configuration Package, but I wanted another option.
I reached out to my colleagues, who offered some good alternatives, including using the “Edit in Excel” feature, but that requires an Azure subscription and some complicated setup, even for the on-premises version of Business Central.
In the end, I got some great feedback that enabled me to prepare the “cheat sheet” below on how. I have asked a client to test it, and they are delighted. Please feel free to put this in your toolkit for clients on Business Central SaaS; I assume it will work with on-premises installations of Business Central, but that has not been confirmed.
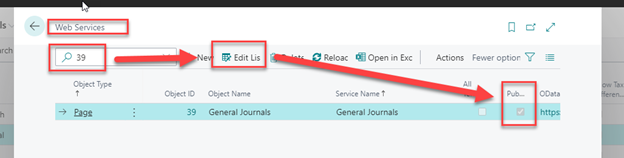
1. Publish page 39 in Web services.
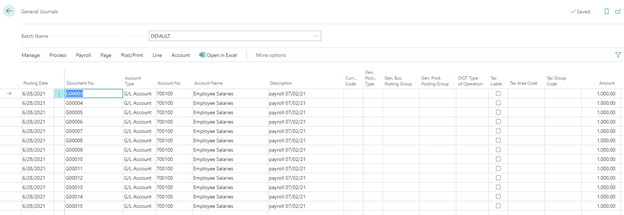
2. Open General Journal and enter one line.

3. Click the Page button and select Edit in Excel.
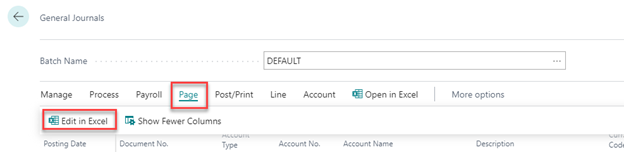
This will open Excel with all the fields on the page.
4. Click the Enable Editing button.

5. Populate all of the required fields. Note: Line Number is to the far right. This MUST BE unique on each line.
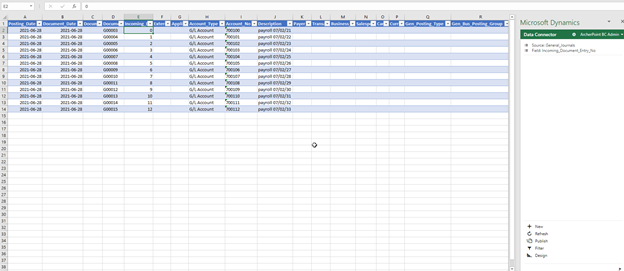
Figure 5 – Populate field in Excel
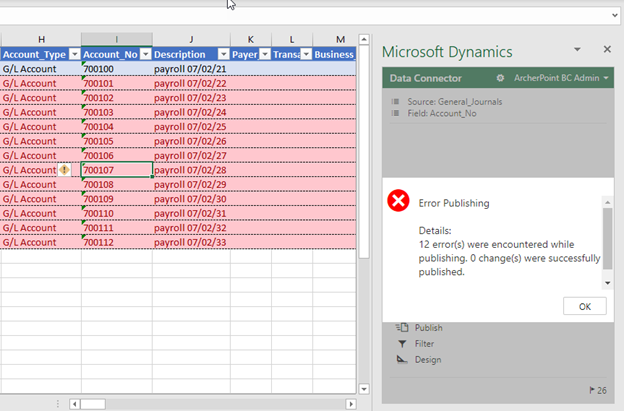
6. You might need to log into the Office 365 account that matches your BC Used ID. Click the Publish button.
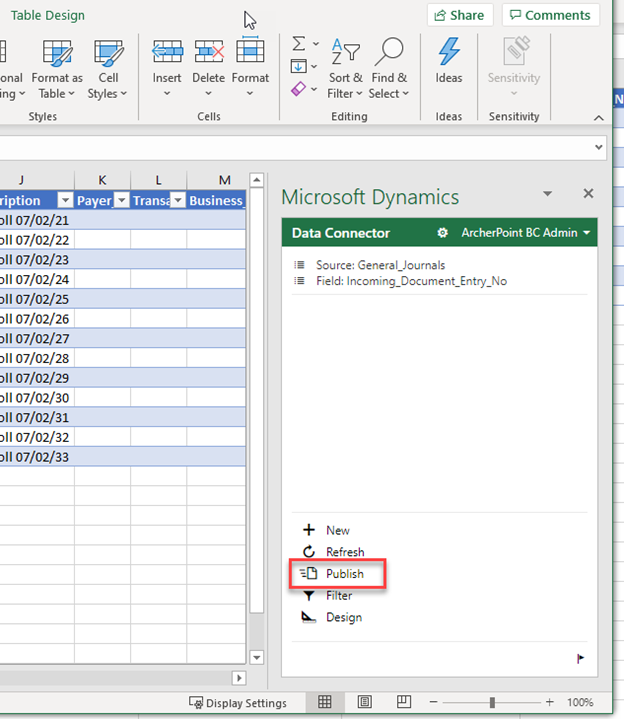
7. If there are issues with publishing the data, correct the issues and republish.
8. Refresh (F5) the Journal Entry page. Review the Journal entry and run test report. Correct errors and post.
To find out more about working with journals or other areas of Excel and Business Central, contact ArcherPoint.
Read more How-To blogs from ArcherPoint for practical advice on using Microsoft Dynamics 365 Business Central or NAV.
Trending Posts
- Login Error: Communication protocol mismatch between client and server
- How to Make Measures Total Correctly in Power BI Tables
- The Microsoft Technology Stack – What Is It & Why Should You Care?
- MRP vs. MPS: Choosing the Right Planning Approach for Your Manufacturing Business
- Guide to How Manufacturers Can Implement Quality Control Systems Using Business Central
Stay Informed
Subscribe to Communications
"*required" indicates required fields