
How To Import Account Schedules in Microsoft Dynamics Business Central or NAV

This blog explains how to import account schedules into a database in Microsoft Dynamics 365 Business Central or Dynamics NAV. Important steps include:
- Export Customer Data
- Export Default Cronus data
- Export Default Cronus Package
- Import Cronus package into Customer database
- Import Cronus data
Let’s get started with a backup. Normally, you do a backup of the database, but in the SaaS world, backups are automatically stored. However, you still need to make a backup of the account schedule data in the customer database.
Import Account Schedules Step 1: Export Customer Data
The first step in the process to import account schedules is to export the default Cronus data.
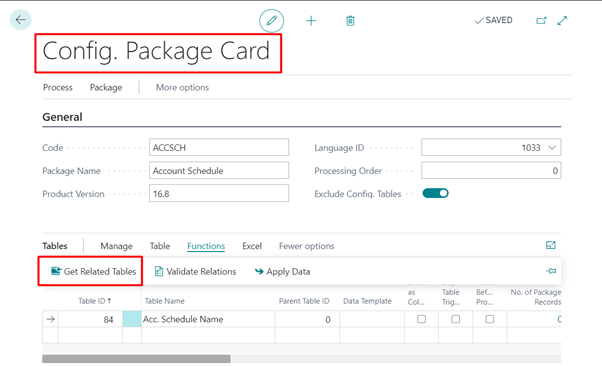
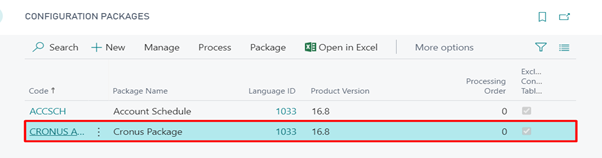
- Create a new configuration package; then update the required details like code, package name, product version, and language ID. The Exclude Configuration Tables field is used to get related tables, so that should be enabled.
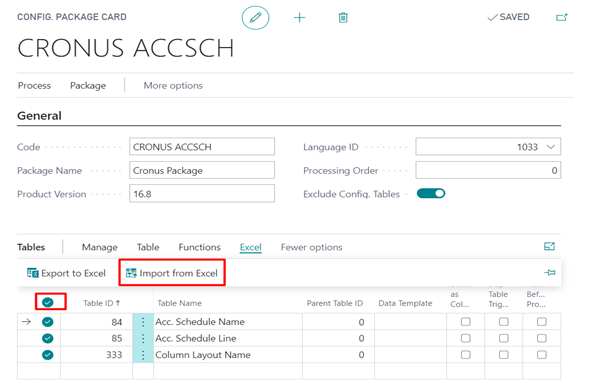
- Start adding the tables beginning with ID 84, getting related tables using Get Related Tables under the Functions tab.
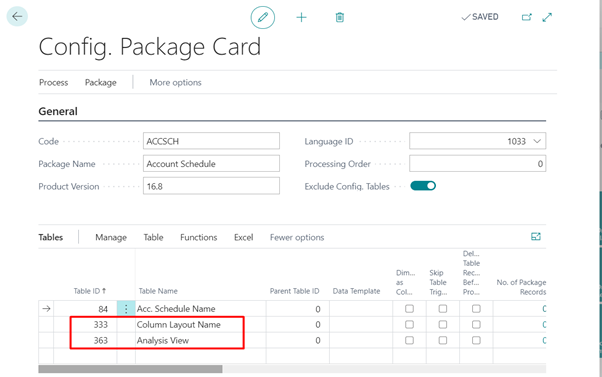
- Simultaneously add table 85 with its related tables. Once you add the tables, you will receive a notification, “Some fields have 3 or more related tables. Do you want to check them?” Click Yes.
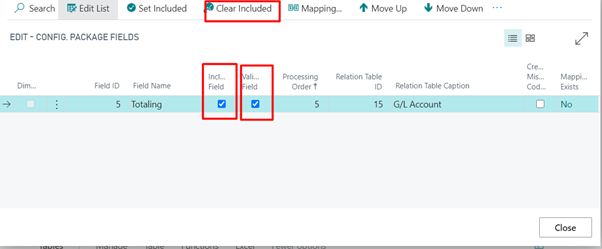
- In the EDIT – CONFIG. PACKAGE FIELDS page, uncheck the Included Field and Validated Field boxes and select the Clear Included option.
- Now you have four tables. You do not need the Analysis View table, so delete it and do an export to Excel. Select all the tables.
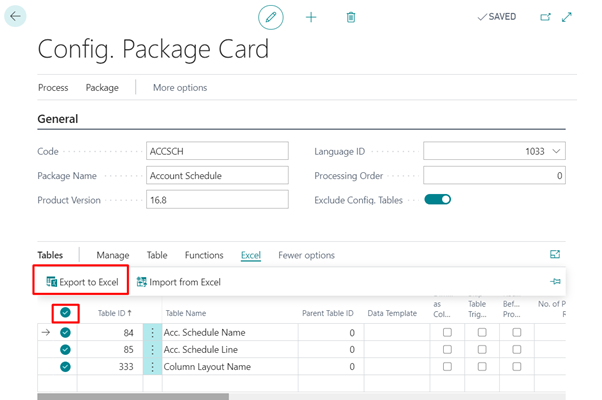
- When you get the notification, “3 tables have been selected. Do you want to continue?” click Yes. An Excel file is created containing the customer account schedule data values.

Step 2: Export Default Cronus Data
The next step in the process to import account schedules is to export the default Cronus data.
- Follow the same instructions with the Cronus database to get the default account schedule data package. Create a new configuration package, add required details, get the related tables, and export to Excel.
- After you export, if you need to cross check the data in this Excel file you created, you can compare it with account schedule values (both are Cronus data).
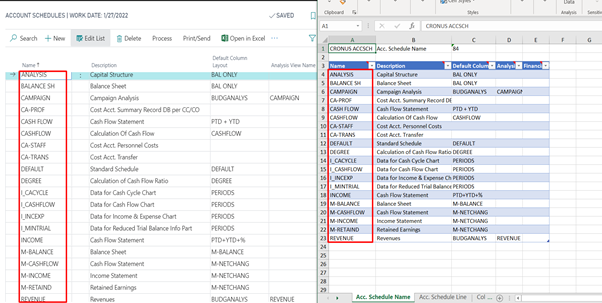
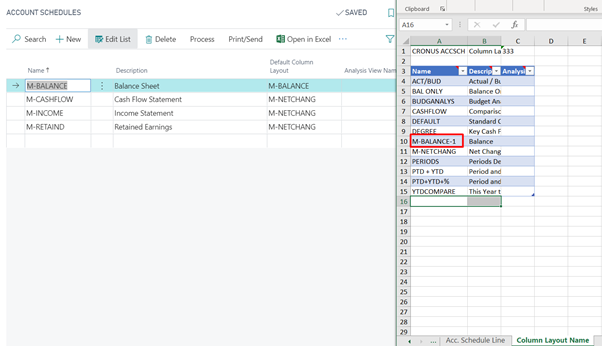
- One more check point: Cross check the Cronus account schedules with the customer account schedule data. Any account schedules names that are the same need to be changed in Cronus.
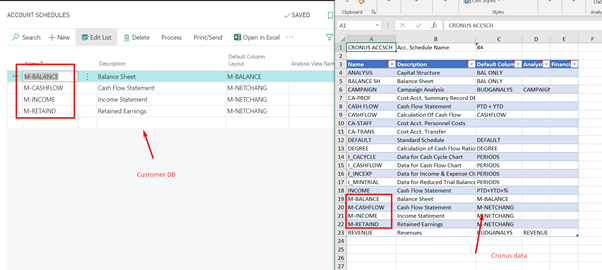
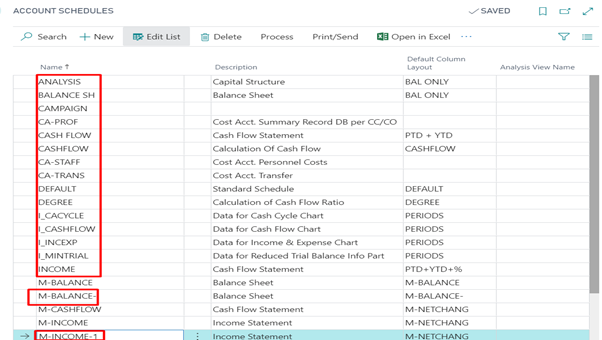
In this example, some values are similar so the values in Cronus need to be changed. Following are the names that were changed in account schedule name table:
M-BALANCE :M-BALANCE-1,
M-CASHFLOW:M-CASHFLOW-1,
M-INCOME:M-INCOME-1,
M-RETAIND:M-RETAINED-1
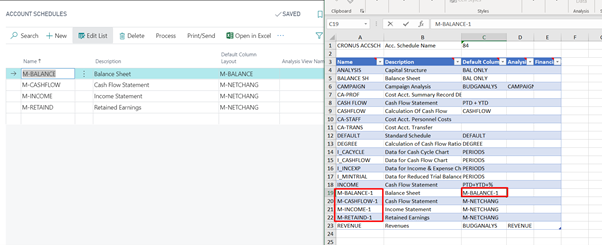
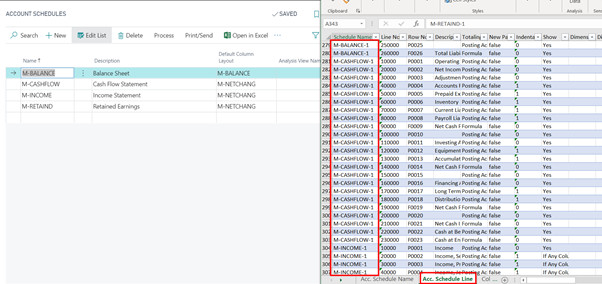
- In the Account Schedule Line table, the following four values also need to be changed:
M-BALANCE :M-BALANCE-1,
M-CASHFLOW:M-CASHFLOW-1,
M-INCOME:M-INCOME-1,
M-RETAIND:M-RETAINED-1
- Simultaneously change the values in column layout name table.
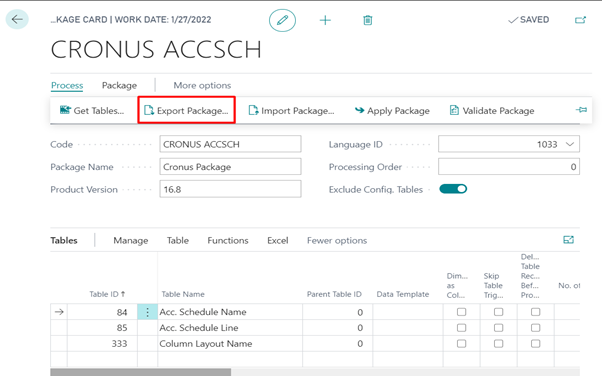
Step 3: Export the Default Cronus Package
- Once the data steps are completed, the next step in the process to import account schedules is to export the Cronus default package using the Export Package function on the Package card.
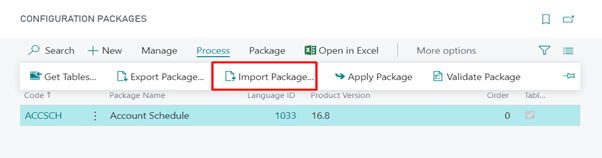
Step 4: Import the Cronus Package Into the Customer Database
- Use Import Package to import the Cronus Package into the customer database.
Import Account Schedules, Step 5: Import Cronus Data
The final step in the process to import account schedules is to import the Cronus data.
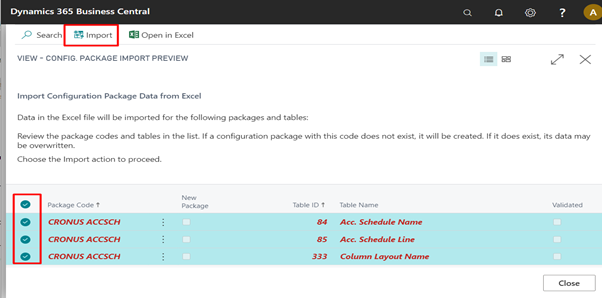
- To import the Excel file you took from Cronus, select all the tables to get all the data. Then select Import from Excel.
- Once you choose the Excel file, it should ask for importing options. Select all, then select Import.
- You will receive three notifications related to three tables—Account Schedule Name, Account Schedule Line, and Column Layout Name. Click Yes for all notifications.
- This is the most important step. Select all the tables, then select Apply Data under the Functions tab. Click yes on the notification you receive.
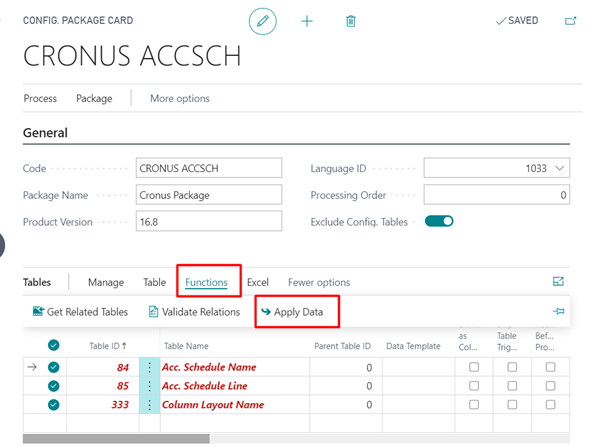
- A final note will display with record changes, like how many records are inserted, how many records are modified, and errors found. Click OK.

- Finally, all the default account schedules are successfully imported into the customer database.
If you have any questions about Dynamics NAV or Business Central for any version, contact ArcherPoint.
Read more “How To” blogs from ArcherPoint for practical advice on using Microsoft Dynamics Business Central or NAV.
If you are interested in NAV/Business Central development, check out our collection of Development Blogs.
Trending Posts
- Login Error: Communication protocol mismatch between client and server
- How to Make Measures Total Correctly in Power BI Tables
- The Microsoft Technology Stack – What Is It & Why Should You Care?
- MRP vs. MPS: Choosing the Right Planning Approach for Your Manufacturing Business
- Guide to How Manufacturers Can Implement Quality Control Systems Using Business Central
Stay Informed
Subscribe to Communications
"*required" indicates required fields