Microsoft Dynamics NAV 2013: Creating Page Breaks in RTC Reports

In this blog post, I will explain how to dynamically control the page break for a group.
In other words, how to create a conditional page break in a Microsoft Dynamics NAV 2013 RTC report.
For this example, I will use the standard report 5057 (Salesperson – To-do’s).
This report is already grouped by salesperson, but now we will add the option to add a page break by salesperson (New Page Per Salesperson).
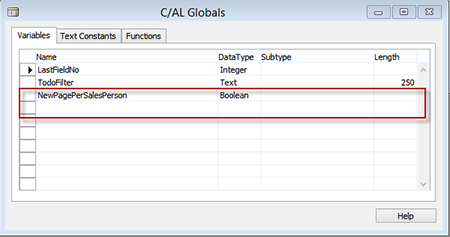
- In design mode, open Report 5057 and declare a new global variable, NewPagePerSalesPerson (Boolean), which we will use in the request page:
Figure 1 – Declare global variable, NewPagePerSalesPerson, for Report 5057
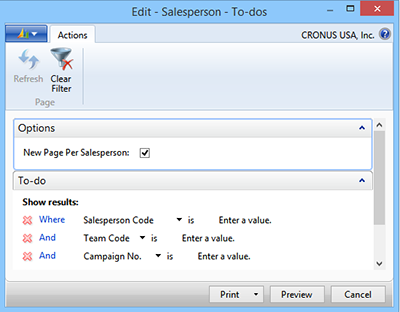
- Now we will add the option on the request page of the report for the user to choose Page Break. Choose View -> Request Page and add the variable as show in the figure below:
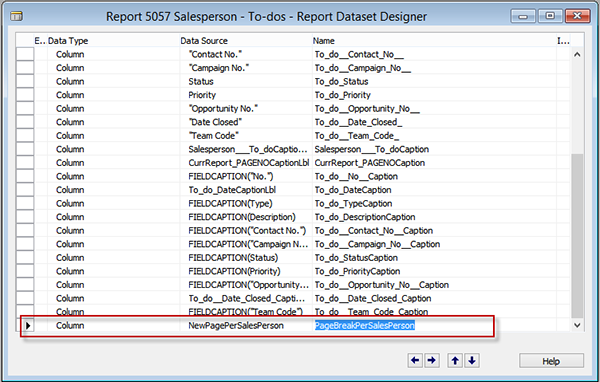
Figure 3 – Add the variable to the report dataset
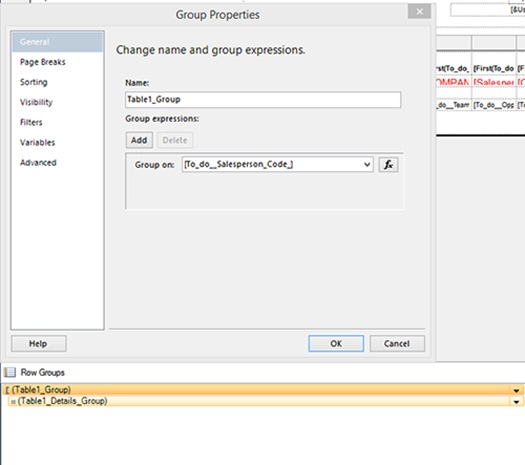
- Now open the report in layout mode by choosing View -> Layout. Notice the report already has a group which is grouped on Salesperson field:
Figure 4 – Open the report in layout mode; notice the Group Properties
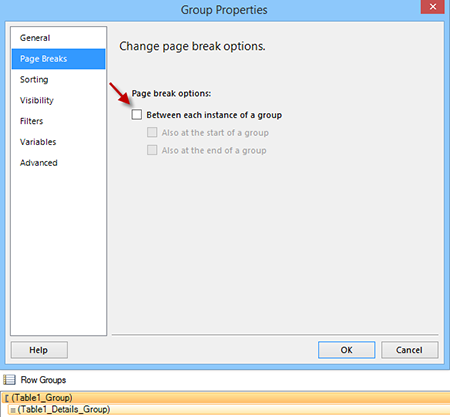
Currently this group is not enabled for page breaks, but if you enable Page Break, it will use New Page Per Salesperson every time you run the report. However, we want to control that based on the value in the options window.
Figure 5 – View of Page Break Options
- To enable Page Break based on the value in the options windows of the report, add a new outmost group for the current group by right clicking on the Table1_Group and Choose Add Group -> Parent Group.
Figure 6 – Add a new outmost group for the current group
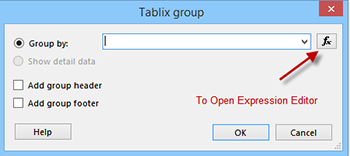
In the Group Window, open the expression editor by clicking Fx and leave other properties to their defaults.
Figure 7 – Open the expression editor by clicking on the Fx box in the Group Window
Add the following expression:
=IIF(Fields!PageBreakPerSalesPerson.Value,Fields!To_do__Salesperson_Code_.Value,Nothing)
Figure 8 – Add the expression given above using the Expression Editor
Click OK.
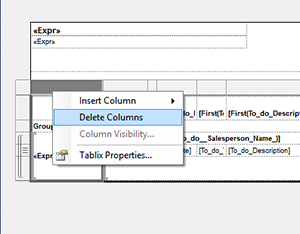
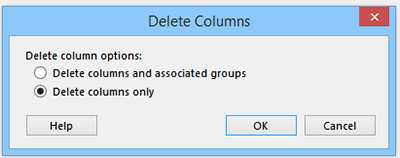
- A new column is added to the table. Select the column and delete the column, and from the confirmation dialog, choose Delete Columns only.
Figure 9 – Delete the extra column added…
Figure 10 – …and choose “Delete columns only” in the confirmation dialog box
- From the newly added group, right click and select Group properties:
Figure 11 – Select Group Properties from the newly added group
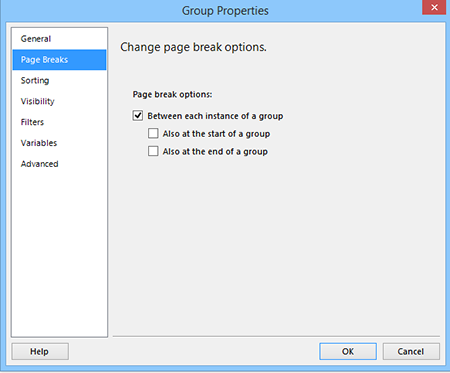
In the Page Break Options, select Between each instance of a group.
Figure 12 – In the Page Break Options, select Between each instance of a group
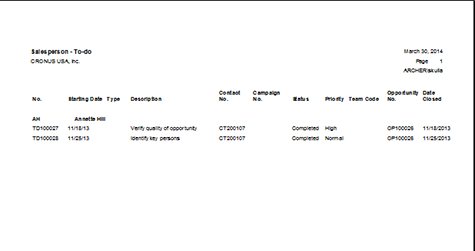
Now, if you run the report with option selected New Page Per Salesperson it will create a page break for every salesperson.
Figure 13 – Running the report with the New Page Per Salesperson option selected will create a page break for every salesperson
Figure 14 – Final report with page breaks after each salesperson
There are some other standard reports like 108-Customer – Order Detail, which has similar logic but instead of using an expression on a group it will use a variable value which is calculated in the report.
For more information on topics related to Microsoft Dynamics NAV development, read the ArcherPoint Developer Blog, written specifically for Dynamics NAV developers, or contact ArcherPoint directly.
Trending Posts
Stay Informed
Choose Your Preferences
"*required" indicates required fields

