
Managing Permissions and Security Groups in Dynamics 365 Business Central – Part II: Security Groups
In the first part of this series, Managing Permissions and Security Groups in Dynamics 365 Business Central – Part I, we discussed how to define your own permission sets in Business Central. Our focus in this series concerns granting users permission to view, edit, and delete Table Data, since this is a critical area where careless errors and fraud can occur.
In this installment, we discuss setting up security groups, assigning permission sets to those groups, and assigning users to the appropriate security group.
To learn how to view and manage user permissions with permission sets and security groups, see Part III: Managing User Permissions in Business Central.
Using a matrix to define permissions, security groups, and users
To determine the security settings necessary, administrators must first identify the different tasks each role is expected to perform. Start with nothing and add only the minimum permissions needed for each task. If a task can be completed using indirect access (like a system-initiated posting), that would be preferable to giving a user full edit permissions.
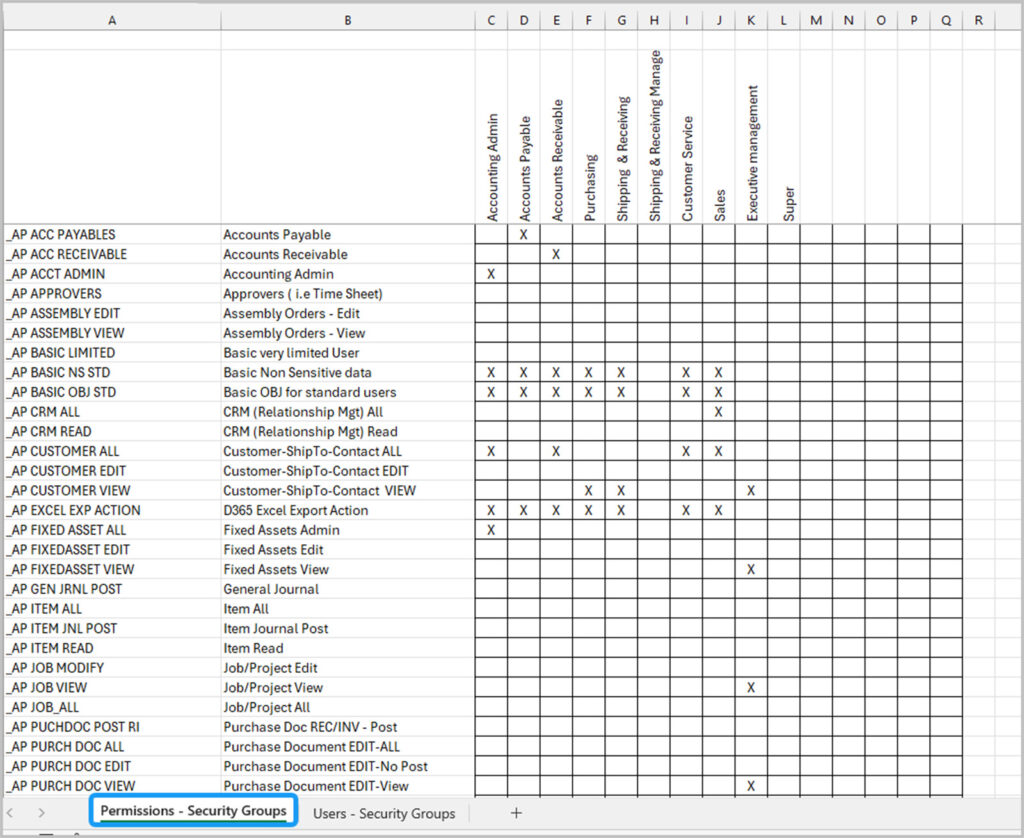
Once you’ve created lean permission sets, the next step is to map them to security groups, which are collections of user roles with similar responsibilities. You can use a simple matrix in Excel where:
- Rows represent permission sets
- Columns represent security groups
- Use checkmarks (or “X” s) to indicate which permission sets belong to which security group
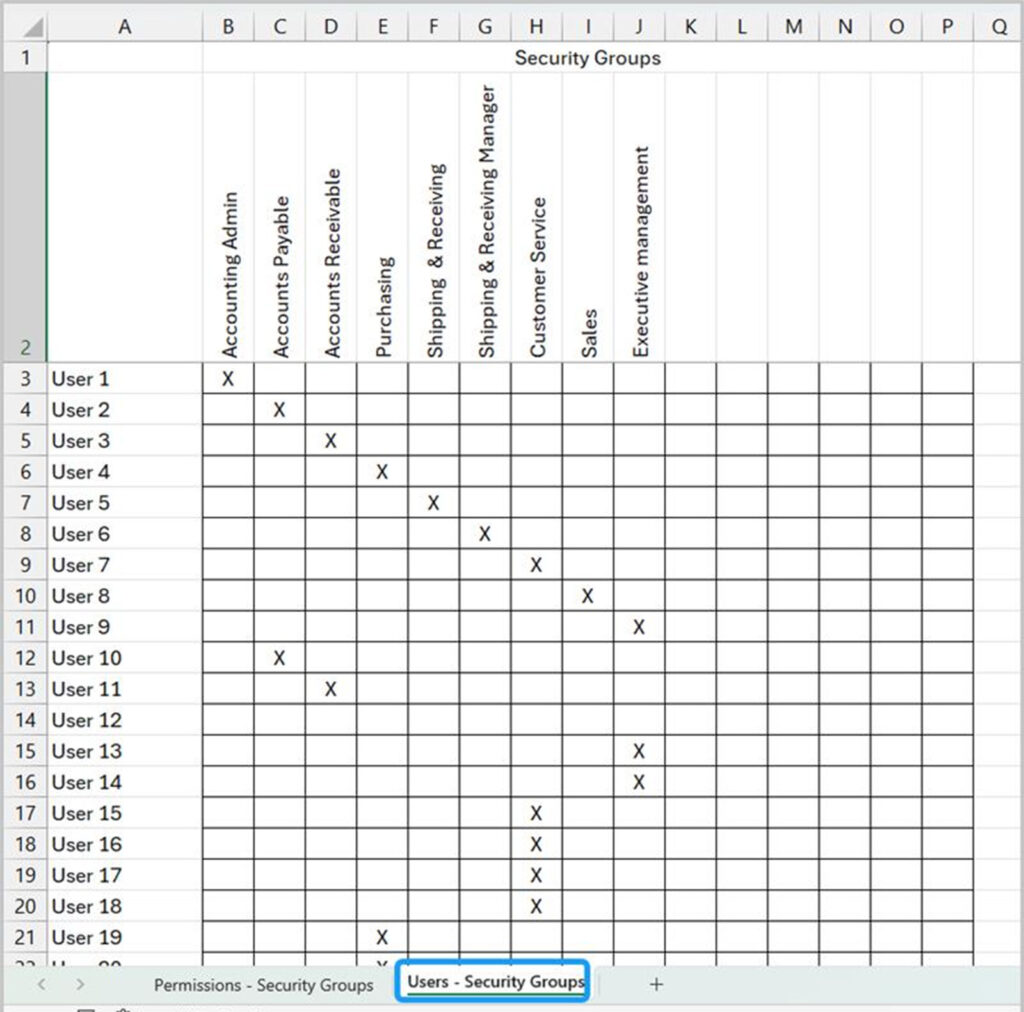
On a second matrix, list your users and assign them to the appropriate security groups. This structured approach makes it easy to manage access by role, not individual, and simplifies testing and audits down the road.
Note that a user can be assigned to more than one Security Group. Ask yourself what permissions are needed for each role.
For example, this method ensures that everyone in Purchasing can be assigned Purchasing permissions.
The goal is to protect data and processes – setups, master data, payment terms, G/L modifications, etc. Users will have what they need to perform their roles, but the company data will be protected if that user’s account is compromised. This also helps to enforce the Segregation of Duties requirements and other security precautions.
An advantage to starting small and adding permissions as you go is that, as users work within their assigned security groups, they will encounter errors if they try to perform a task for which they do not have permission. When this happens, they should notify the administrator, who can determine if that user or role needs permission to perform that task. If so, the proper permissions can be added to the role. Otherwise, the user should be prevented from performing that task.
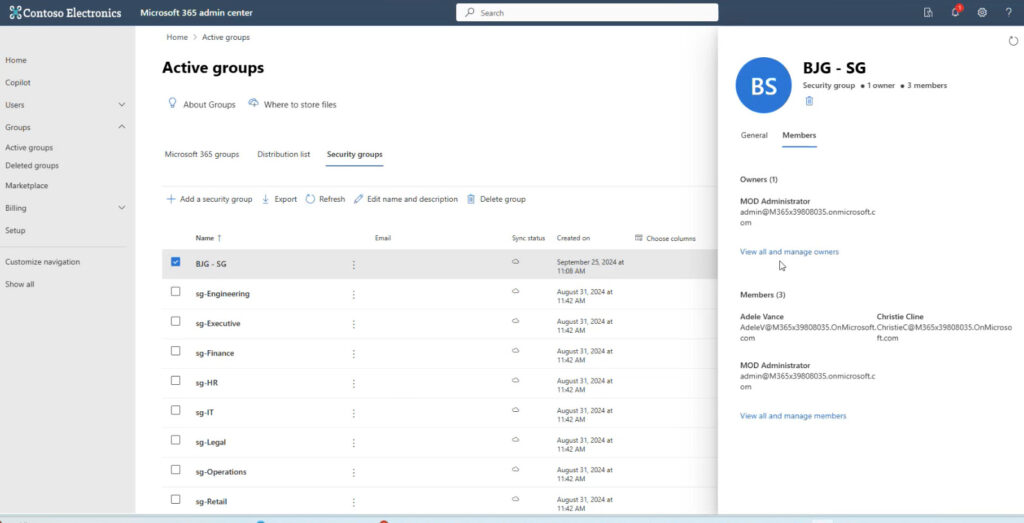
Microsoft 365 Admin Center
The Microsoft 365 Admin Center is where you add users, security groups, and users to security groups and then connect these to Business Central. For our purposes here, we will focus on using the Admin Center for security groups.
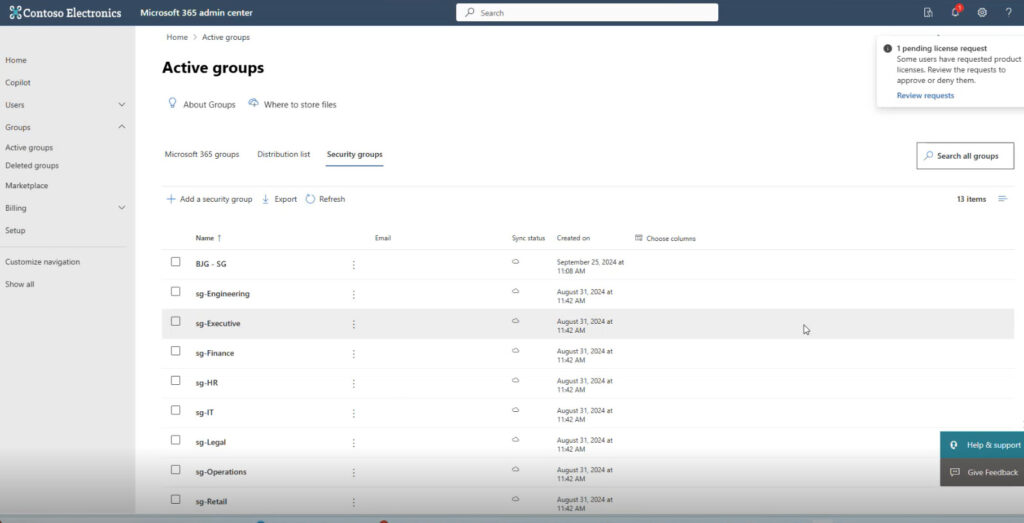
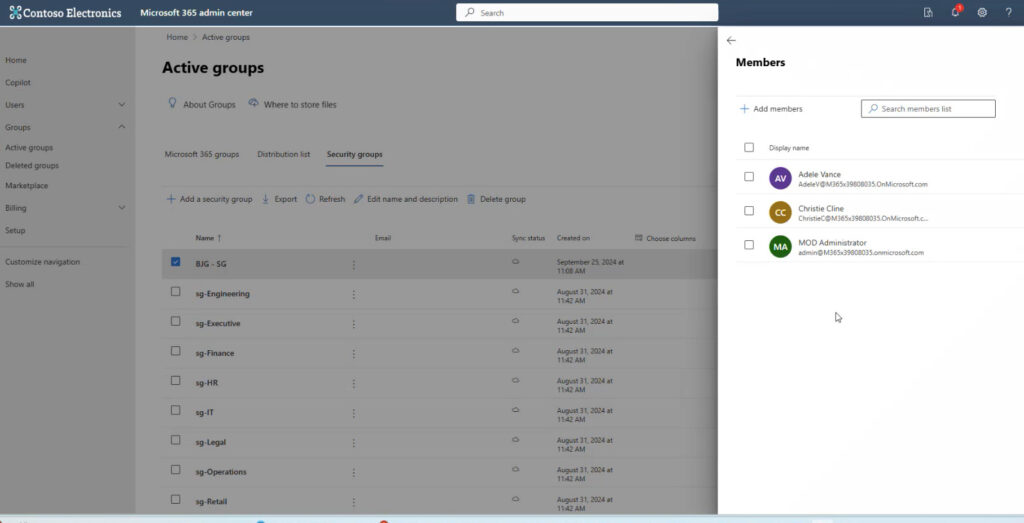
From the Admin Center, you can also view and manage the owners and members of a group.
You can also add a new member to a group.
Connecting a security group to Business Central
To connect a security group from the Admin Center to Business Central, start by selecting New from the Security Groups page.

Adding a new security group (aka Microsoft Entra security group) will bring up a list of available security groups from the Microsoft 365 Admin Center. Select the security group you want and click “Create”. You will bring each security group one at a time.
NOTE: Some security groups listed in Azure might not pertain to Business Central. Bring in only the security groups you need.

After adding the new security group in Business Central, assign the appropriate permission sets to each group.
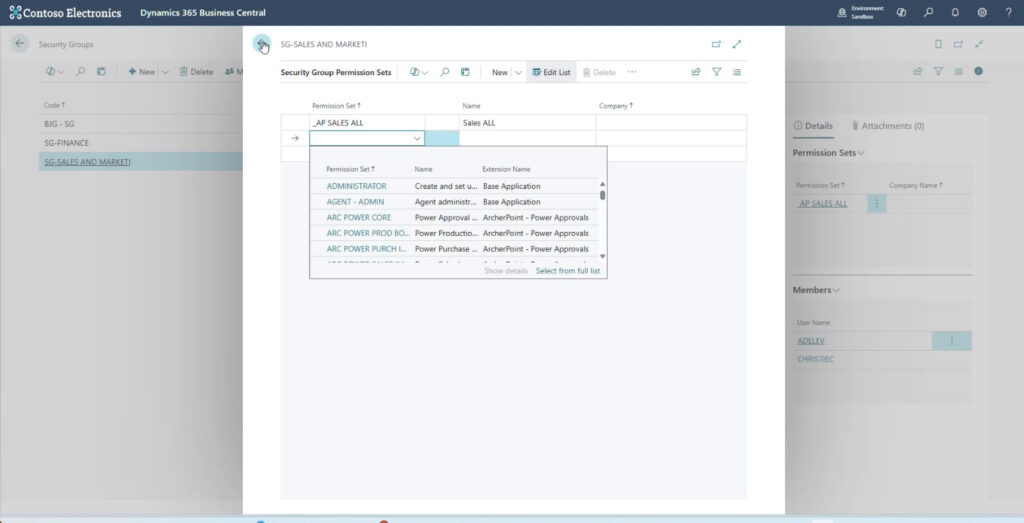
Plus, you can view the permissions assigned to that group.

At this point, you can see the permission sets and the members assigned to the selected security group.
Security Groups are your best friend
Security groups are synced from the Microsoft 365 Admin Center and connect permissions and users. You define the group (e.g., Purchasing, Receivables, Executives), assign the relevant permission sets, and then add users to the group. When a user joins or leaves a department, you only need to change their group membership—no more digging through individual permission sets.
This also makes troubleshooting much easier. If a user gets an error message, you evaluate the security group and permission set—not just for that single user’s configuration. If that user group requires additional permissions, administrators can make that determination at that time.
Stay on top of your data security
Whether you’re preparing for an implementation, optimizing after go-live, or tackling role-based access for the first time, our experts will help bring clarity, structure, and peace of mind.
Contact ArcherPoint by Cherry-Bekaert today to schedule a consultation and get started.
Trending Posts
Stay Informed
Choose Your Preferences
"*required" indicates required fields