Quick Start Guide for Setting up Microsoft Dynamics NAV Subcontracting

One of our Blog readers asked us to do a Blog on the Dynamics NAV Subcontracting Process. There is good documentation available for this process in the Dynamics NAV Manufacturing Training Manual that you can get through Partner Source or Customer Source, so we will write an abbreviated version here.
The scenario:
Your company sends out parts to a subcontractor to perform an operation that your company cannot do in house. You will pay the Subcontract Vendor for its services through the normal Accounts Payable Process.
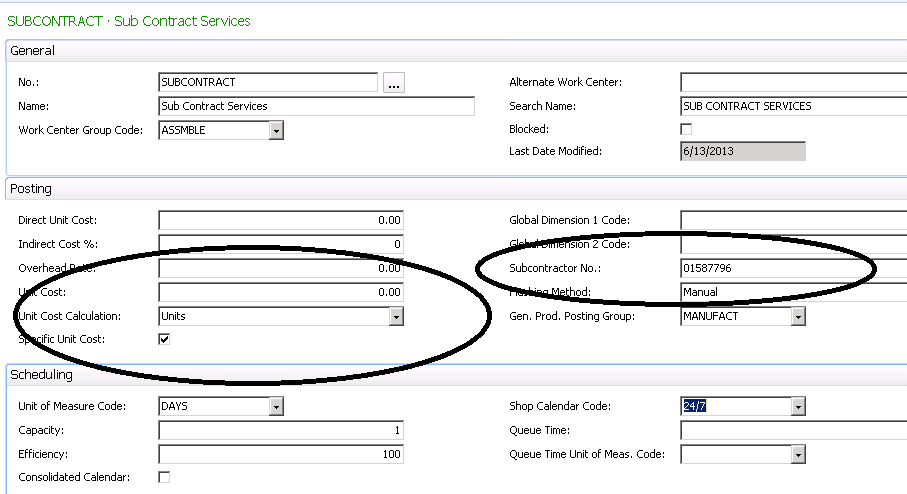
The first step is to setup a Dynamics NAV Work Center for the Subcontract Vendor. When you populate the Subcontractor No. with a Vendor Number, the system knows that this Work Center is not a typical inside process, but will be handled outside of the company. Also notice that we set Unit Cost Calculation to “Units” and selected Specific Unit Cost. This means that we will need to put the expected cost for this operation in the Routing Line itself.
Figure 1 – Subcontract Vendor setup
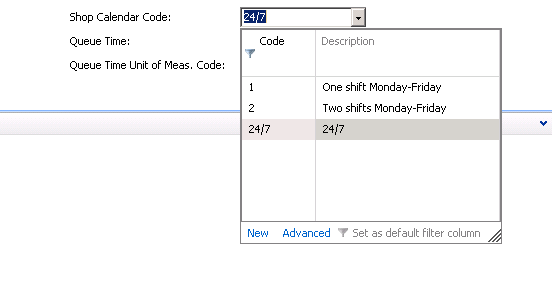
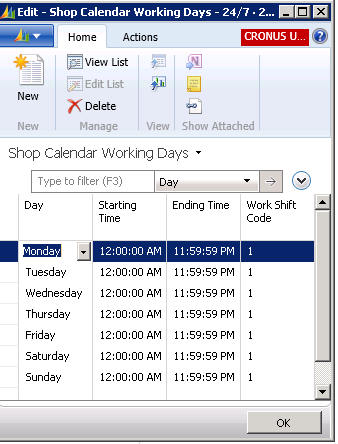
We then set up a 24/7 Shop Calendar to use for this Work Center.
Figure 2 – Work Center Shop Calendar is set to 24/7
Figure 3 – Shop Calendar Working Days for 24/7
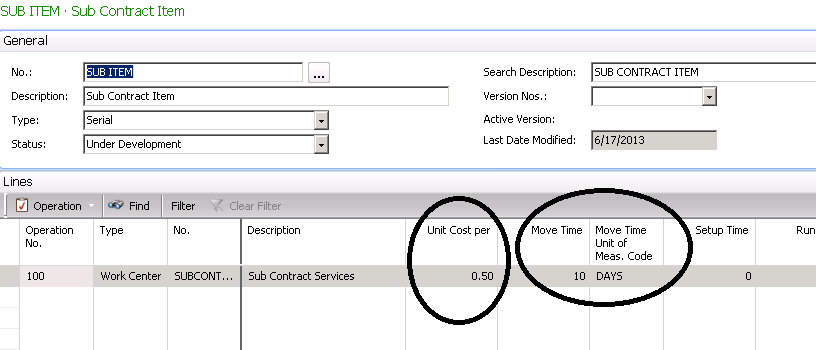
Next, set up a Routing that uses the Subcontract Work Center. Notice that we entered the Unit Cost per for what we expect to pay the Subcontract Vendor and the Lead Time entered as Move Time.
Figure 4 – Sub Contract Item set up
The next step is to associate the Routing to an Item.
Figure 5 – Associate the Routing to an Item
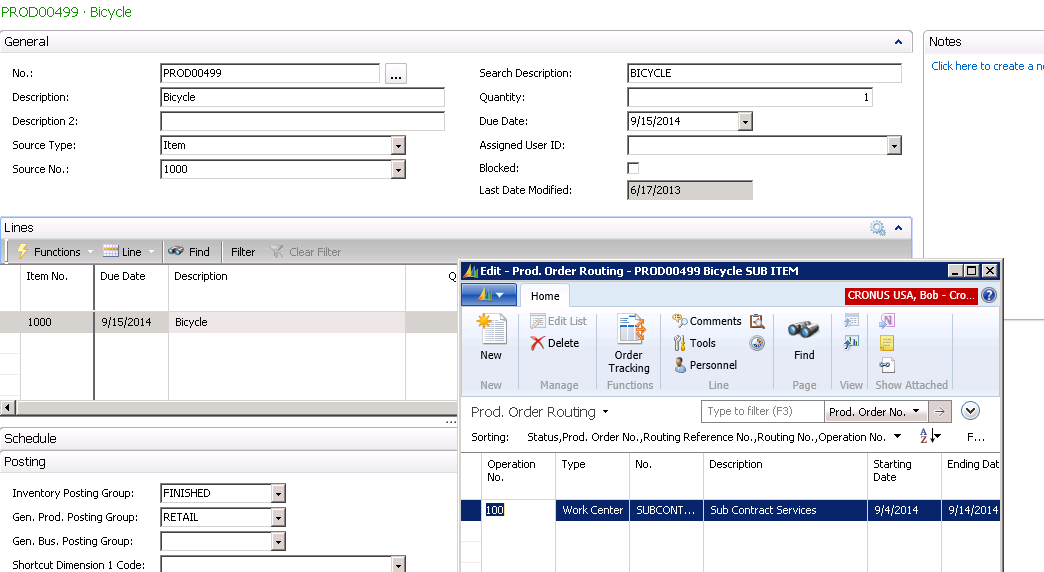
Now to get the process started, you create a Released Production Order for the item. Looking at the Routing Lines for this Production Order, we see that the Routing is the one we created for the Sub Contract Operation.
Figure 6 – Released Production Order Routing
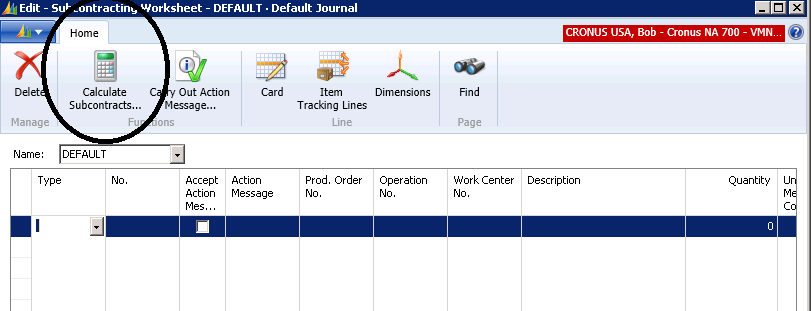
The next step is to go to the Subcontracting Worksheet and Calculate Subcontracts.
Figure 7 – Choose Calculate Subcontracts from the Subcontracting Worksheet
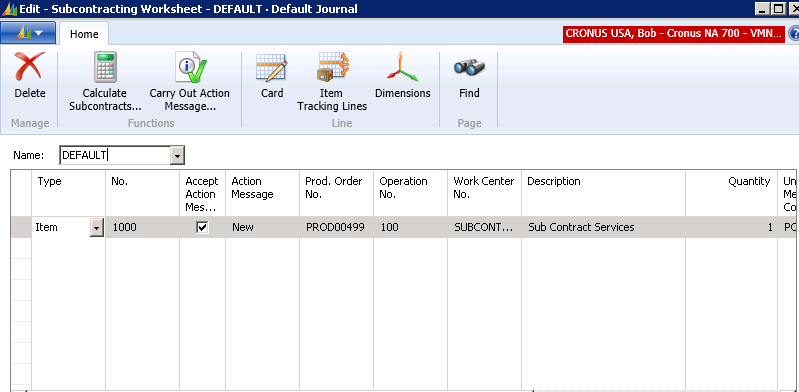
The results of Calculating Subcontracts are that the system will populate the Work Sheet with the Production Orders that need a Subcontract Purchase Order Created.
Figure 8 – The Subcontracting Worksheet is populated
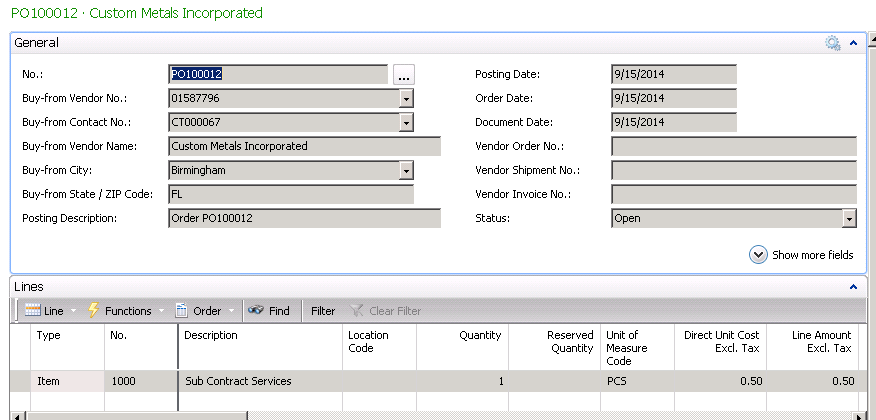
You then “Carry out the Action Messages” to create a Purchase Order for the Subcontract Operation.
Figure 9 – Select Carry out the Action Messages to create a Purchase Order for the Subcontract Operation
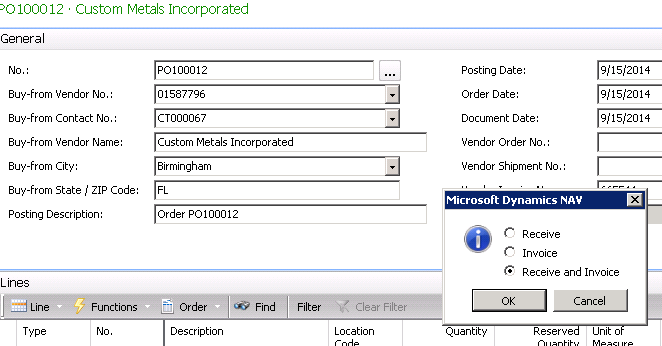
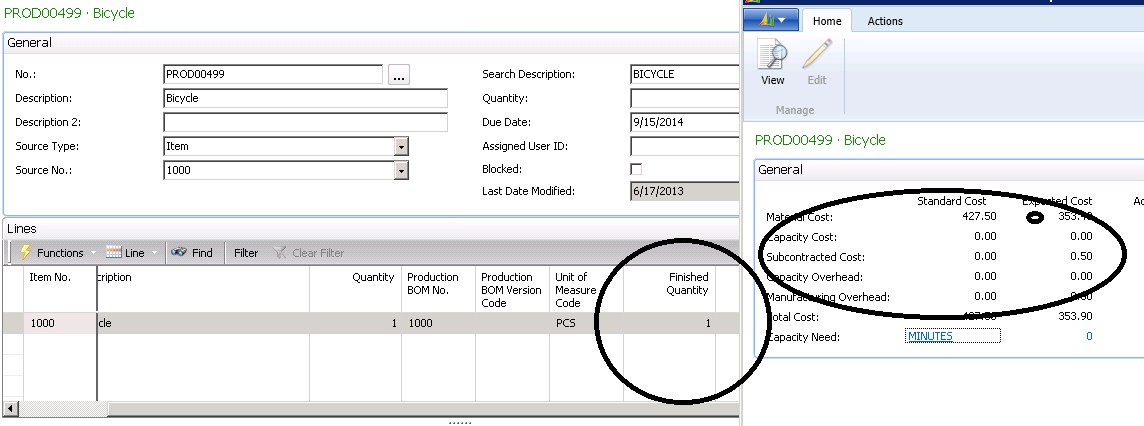
When you select Receive and Invoice for this Purchase Order, it will put the finished item into inventory and put the cost of the operation into the General Ledger WIP Account.
Figure 10 – Select Receive and Invoice for this Purchase Order
Figure 11 – Finished item is put into inventory and the cost of the operation is put into the General Ledger WIP Account
If you would like more information on this subject or another Dynamics NAV subject, please contact ArcherPoint.
Read more “How To” blogs for practical advice on using Microsoft Dynamics NAV.
Trending Posts
Stay Informed
Choose Your Preferences
"*required" indicates required fields

