How to Initialize Production WIP for a New Business Central Implementation

A common issue when getting a client ready to go live in Business Central is Production Work in Progress (WIP). Normally, we ask the client to complete all in-process Production Orders because it can be difficult to account for open transactions. The process below describes a proven method for setting initial WIP balances on Released Production Orders.
Assumptions in this example
- WMS is not used.
- All Labor and Material WIP goes into a single G/L Account.
- The initial WIP G/L balance is loaded with other G/L balances. The transactions in this example will net to zero.
- All journal entries are made manually, although a Configuration Package could be used for large quantities of records.
Step 1 – Determine which Production Orders are incomplete
For all open orders in the legacy system, accumulate the WIP amount for each order. Depending on your circumstance, this can be either:
- Total WIP Amount (Labor and Material)
- Material WIP and Direct/Indirect Labor WIP
In our example, we will assume that the Total WIP Amount is set
Step 2 – Create a dedicated WIP Item
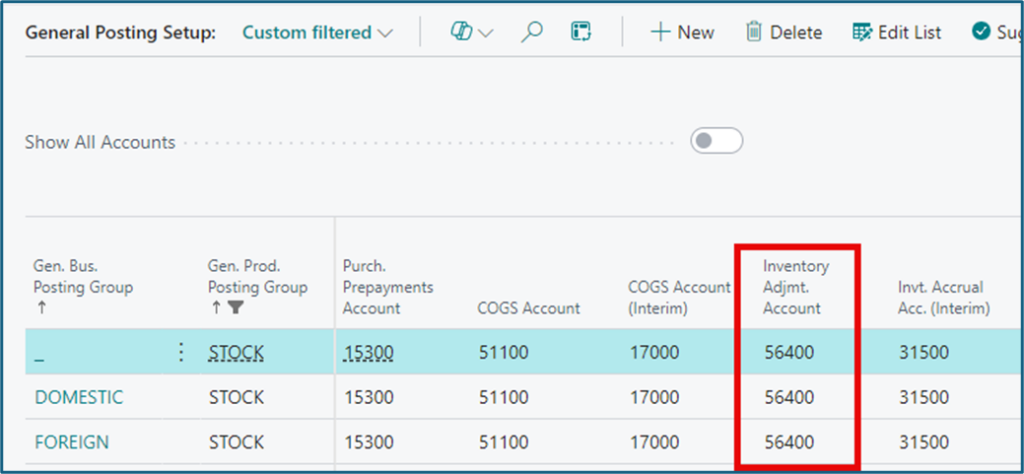
Create a new Inventory Posting Group called WIPLOAD. On the configuration, set the WIP Account equal to the G/L Account from the “Inventory Adjmt. Account” in the General Posting Setup.

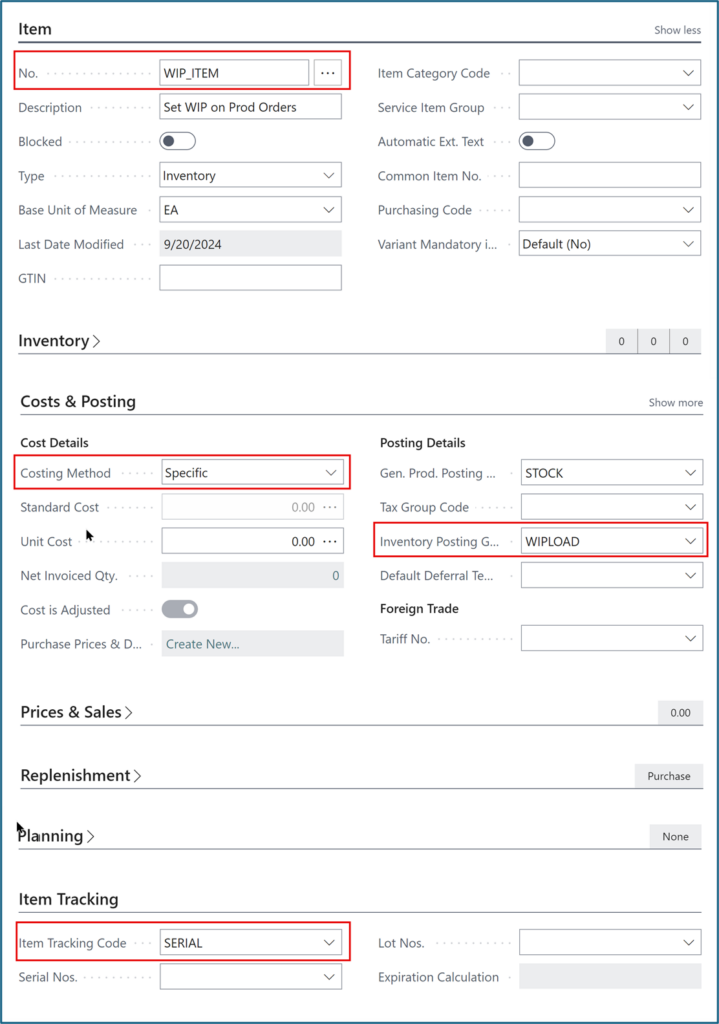
Create a new item as you normally would, WIP_ITEM (in our example), but with the following settings:
- Inventory Posting Group = WIPLOAD
- Gen. Prod. Posting Group = Inventory Account
- Item Tracking Code = Serialized option (this is required by the Costing Method)
- Costing Method = Specific
The Specific Costing Method allows a unique cost to be associated to each serialized layer of inventory.
Step 3 – Create Released Production Orders
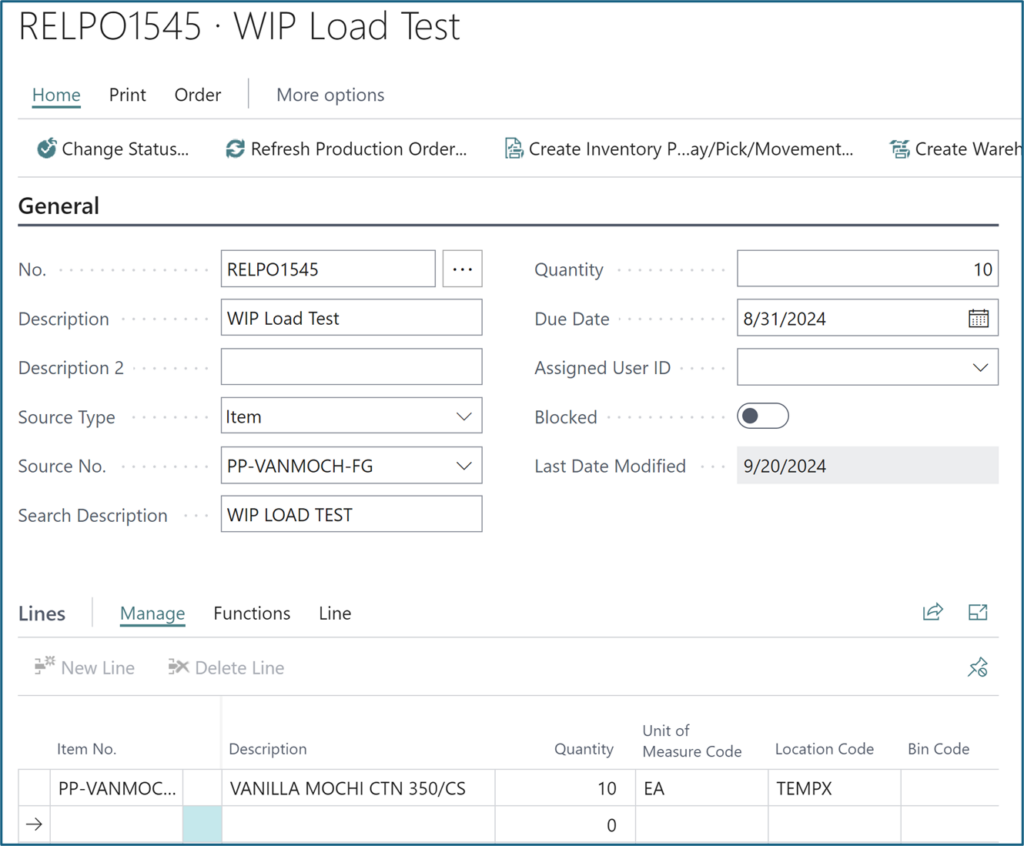
For each WIP case, create a Released Production Order and refresh the order to populate component and routing tables as you normally would. You may want to remove or adjust the Prod. Order Component quantities to avoid consuming components that were issued in the legacy system.
Step 4 – Load WIP Inventory
For each WIP Production Order, use the Item Journal to create one journal line for each WIP order as follows:
- Posting Date = Closing Date from Legacy System
- Document No. = WIP INV LOAD
- Item No. = WIP_ITEM
- Location Code = Production Location
- Unit Cost = WIP Amount for the Production Order
- Item Tracking = Set the Serial No. equal to the Released Production Order “No.”

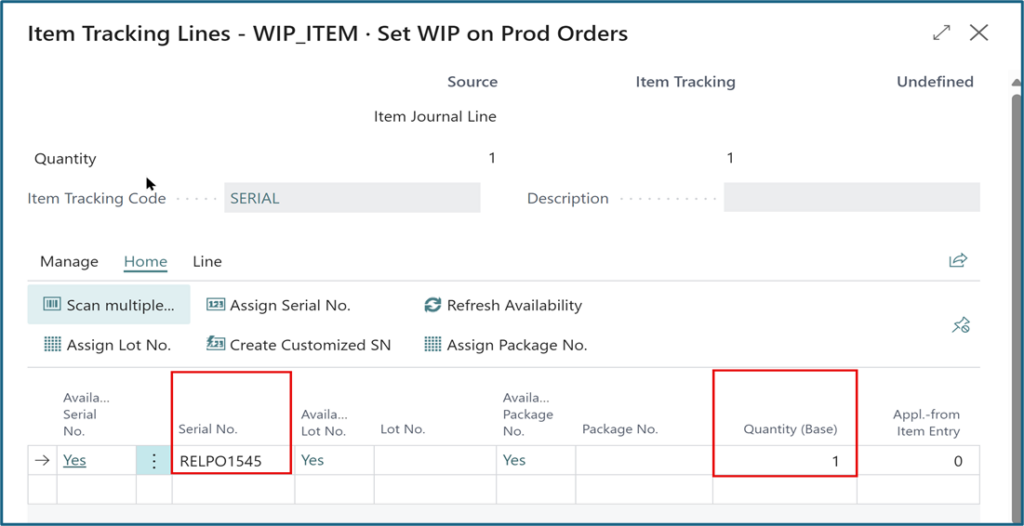
Post the Item Journal. Each item will result in these G/L transactions:
- Dr Inventory
- Cr WIP
Step 5 – Consume the WIP Inventory into the Production Order
From the Consumption Journal, each serialized WIP_ITEM needs to be issued to each WIP Production Order:
- Posting Date = Closing Date from Legacy System
- Order No. = Released Production Order “No.”
- Order Line No. = Will automatically populate
- Item No. = WIP_ITEM
- Quantity = 1
- Unit of Measure Code
- Unit Amount = WIP Amount
- Location Code

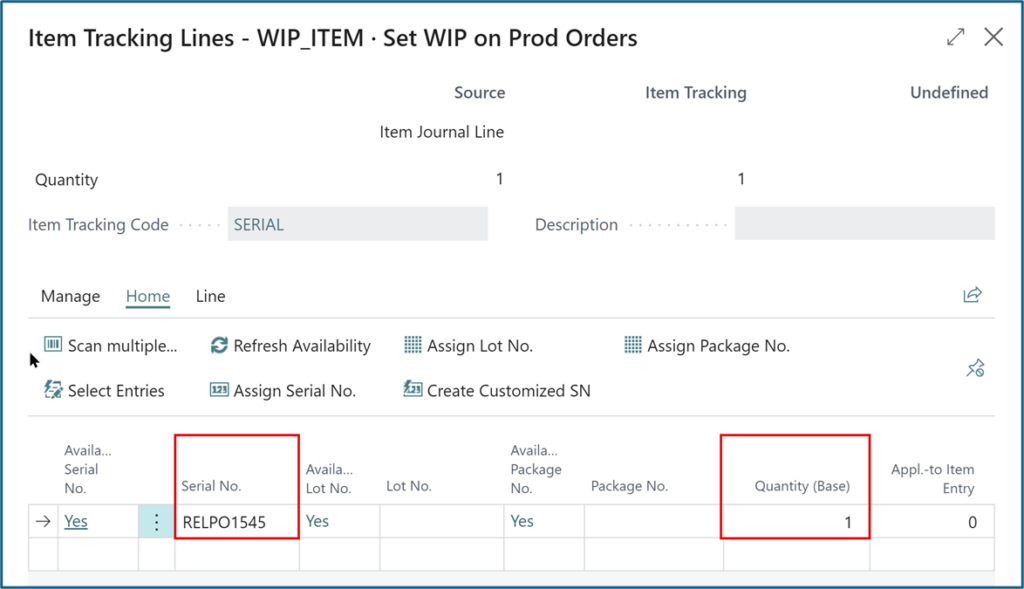
Post the Consumption Journal. Each item will result in these G/L transactions:
- Dr WIP
- Cr Inventory
Step 6 – Verify the WIP Balance of the Released Production Orders
Below are the G/L Entries for creating the WIP inventory and its consumption. The G/L Account balances net to zero.

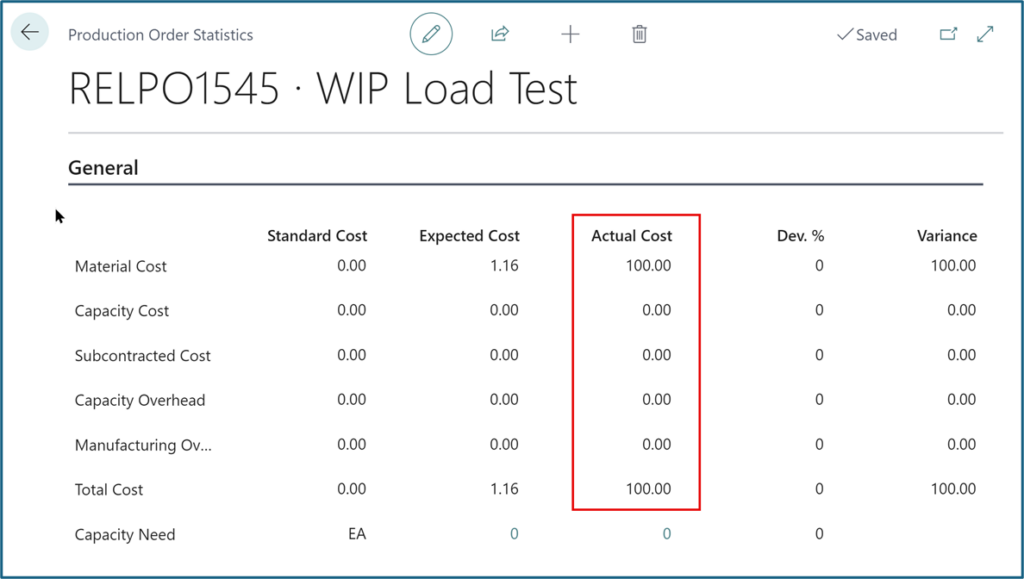
Looking at the Statistics on the Released Production Order, the cost is set at $100.
Finally, running the Inventory Valuation WIP shows that the WIP value is set for the Production Order.

Ask ArcherPoint
If you have questions about using Business Central for manufacturing, contact the experts at ArcherPoint.
Read more “How To” blogs from ArcherPoint for practical advice on using Microsoft Dynamics 365 Business Central and Dynamics NAV.
If you are interested in NAV or Business Central development, check out our collection of NAV and Business Central Development Blogs.
Trending Posts
Stay Informed
Choose Your Preferences
"*required" indicates required fields
