
NAV 2013 R2: How to Back up a Live Database and Refresh a Test Database

If you have a test database, at some point in time you will be asked to refresh this with the current live data, especially when testing. I am often asked how to copy the live database into the test database so accurate testing of a development request can be done.
In this blog, you will learn how to make a backup of the live database and restore this data to an existing test database.
The following steps take you through the Backup and Restore process step by step.
Stopping the Test Database Service
1. Go to your Service Tier computer.
2. Open the “Microsoft Dynamics NAV 2013 R2 Administration” tool.

Figure 1. View from Start button on tool bar
3. You should see a screen similar to the following:

Figure 2. Microsoft Dynamics NAV 2013 R2 Administration
4. Click the + next to the Microsoft Dynamics NAV (local).
5. You should now see the option to stop the service in the left hand panel.

Figure 3. Microsoft Dynamics NAV 2013 R2 Administrations Action Bar
6. Stop the service
Creating a SQL Backup
NOTE: If you already have a backup, skip these steps.
1. Go to the NAV2013 SQL Server.
2. Open SQL Server Management Studio.
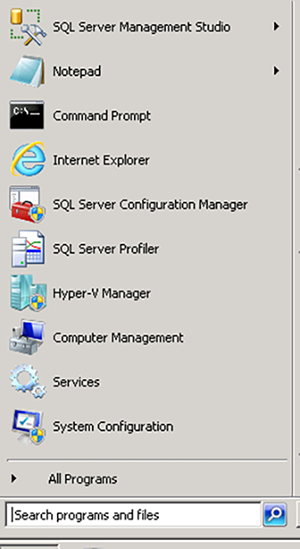
Figure 4. View from Start button on tool bar
3. You should see a screen similar to the following:
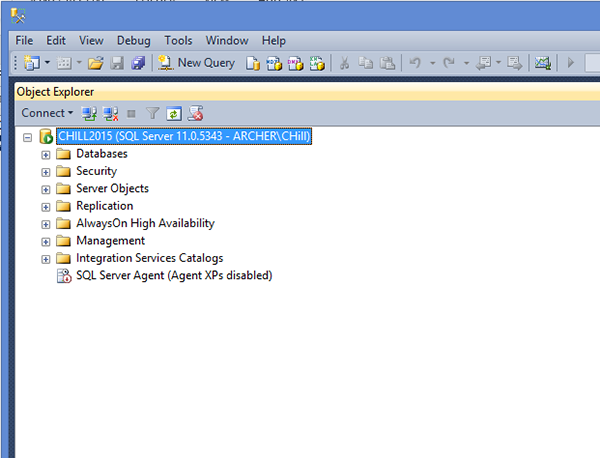
Figure 5. SQL Menu
4. Click the + next to the Databases.
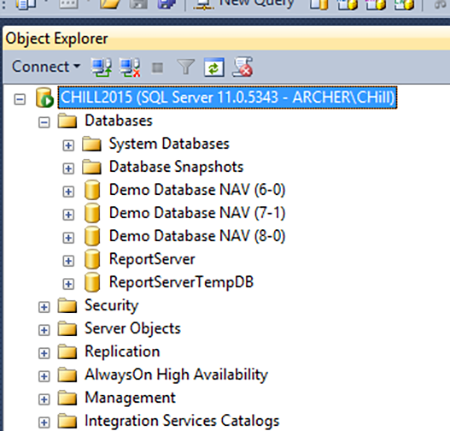
Figure 6. SQL Menu
5. You now see a list of all available databases.
6. Right-click the database if you want to make a backup.
7. Select Tasks and Backup.
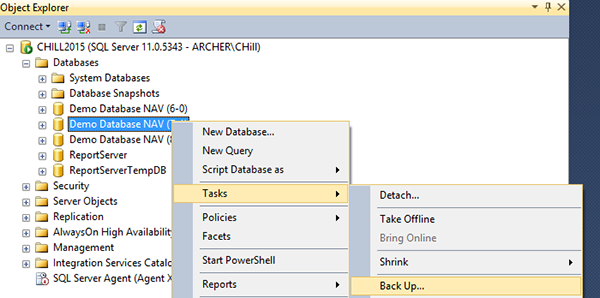
Figure 7. SQL Database List
8. You will see a screen similar to the following:
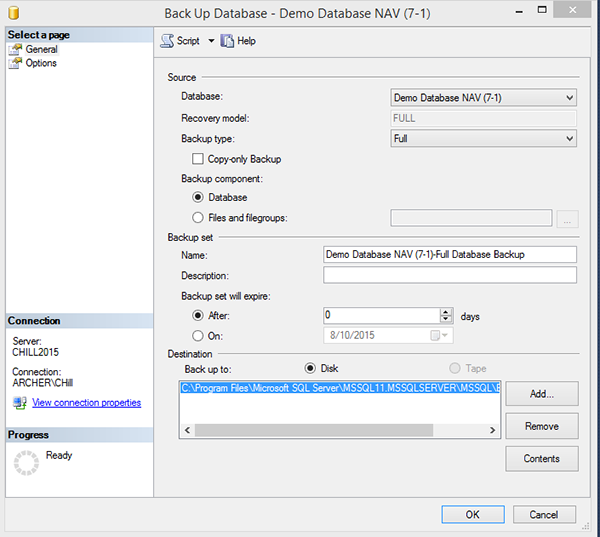
Figure 8. SQL Backup Tool
9. Make sure you select the options you see in Figure 8: Backup type = full, Destination = Disk
10. Click Add.
11. Select the location to which you want to save your backup. Remember, you need to have enough space to complete this task.
NOTE: If you are backing up your live database, this will cause table locking errors until the backup is completed.
12. Click the options tab and verify that the following settings are selected:
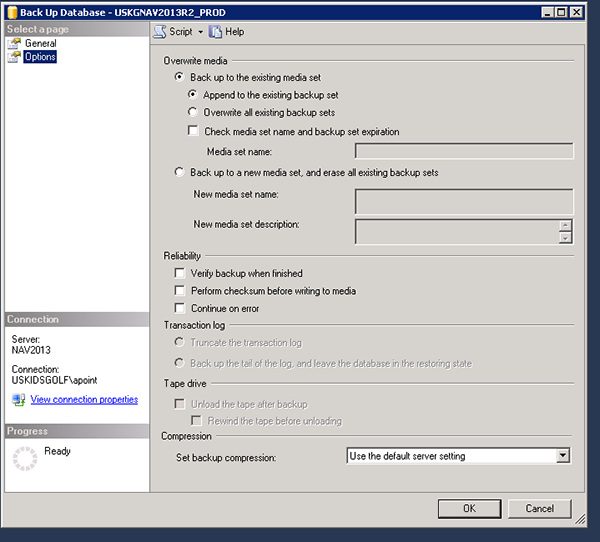
Figure 9. SQL Backup Tool
Restoring the Backup
1. Go to the NAV2013 Server.
2. Open SQL Server Management Studio.
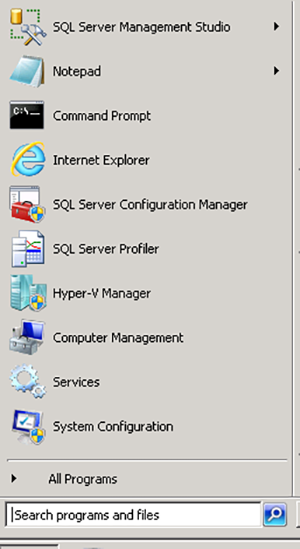
Figure 10. View from Start button on tool bar
3. You should see a screen similar to the following:

Figure 11. SQL Menu
4. Click the + next to the Databases.
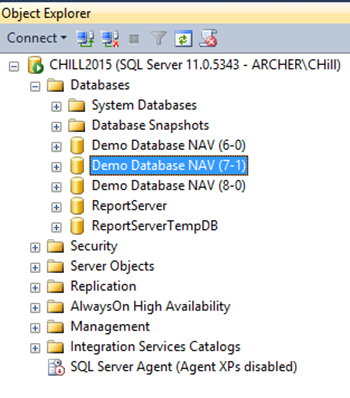
Figure 12. SQL Menu
5. You now see a list of all available databases.
6. Right-click the database you want to restore.
7. Select Tasks and Restore and Files and File groups.
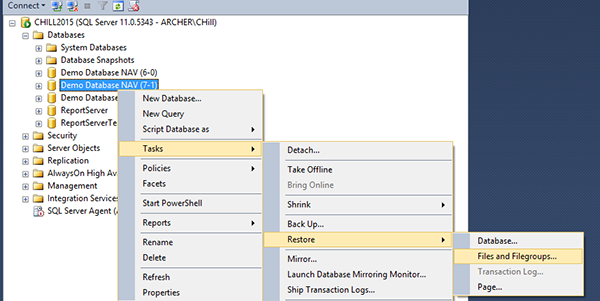
Figure 13. SQL Menu
8. You should see a screen similar to the following:
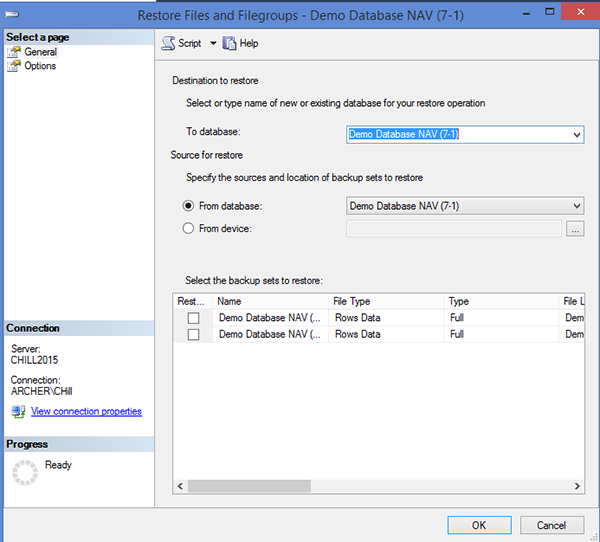
Figure 14. SQL Restore Tool
9. Verify that the To Database is the Test Database.
10. Select the From Device Radio Button.
11. Hit the Ellipsis.
12. Select the location of the backup file you want to restore.

Figure 15. File Location tool
13. Click OK
14. You should now see a screen similar to the following:

Figure 16. SQL Restore Tool
15. Check the box in the Select the backup sets to restore.
16. Click the Options tab.
17. Verify that the Restore Database Files are named the same as your test Database and test log names; if needed, correct he names.
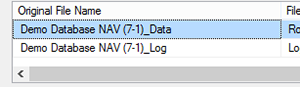
Figure 17. SQL Restore Tool File Names
18. Click the Overwrite the existing database (WITH REPLACE).
19. Click OK, and the backup will restore over your existing test Database with the new data.
Starting the Test Database Service
1. Go to your test computer.
2. Open the “Microsoft Dynamics NAV 2013 R2 Administration” tool.

Figure 18. View from Start button on tool bar
3. You should see a screen similar to the following:
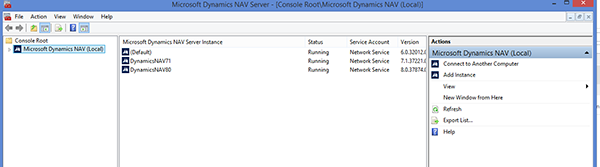
Figure 19. Microsoft Dynamics NAV 2013 R2 Administration
4. Click the + next to the Microsoft Dynamics NAV (local).
5. You should now see the option to Start the service in the left hand panel.
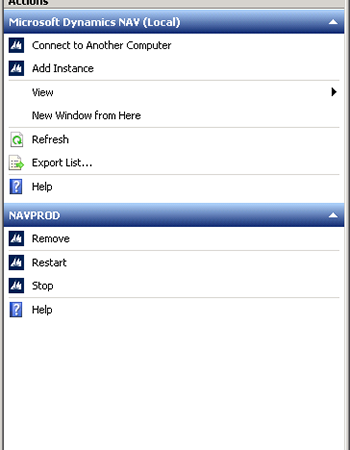
Figure 20. Microsoft Dynamics NAV 2013 R2 Administration’s Action Bar
6. Start the service.
7. You should now be able to run your test Database.
If you have any questions about this process or other technical questions about Dynamics NAV, please contact ArcherPoint.
Read more “How To” blogs from ArcherPoint for practical advice on using Microsoft Dynamics NAV.
Trending Posts
- Login Error: Communication protocol mismatch between client and server
- How to Make Measures Total Correctly in Power BI Tables
- The Microsoft Technology Stack – What Is It & Why Should You Care?
- MRP vs. MPS: Choosing the Right Planning Approach for Your Manufacturing Business
- Guide to How Manufacturers Can Implement Quality Control Systems Using Business Central
Stay Informed
Subscribe to Communications
"*required" indicates required fields